![]()
DIGITAL EDITING
Editing and post-production work is often a polarizing part of digital photography. Everyone has an opinion: Some say that any departure from a completely faithful and untouched reproduction of the original subject is fraudulent; others say the sky is the limit, and you can do whatever you like to any image. As usual, the truth lies somewhere in the middle.
For one, there is no such thing as a completely faithful reproduction—the process of capturing photons, converting them into digital information, and displaying that information in a two-dimensional format requires various levels of creative interpretation at several steps along the way. And on the other hand, the more digital enhancement that goes into an image—particularly as you begin introducing special effects and adding elements that weren’t in the original scene at all, such as with composites—the closer you get to crossing a line between a photograph and a work of digital art.
This section will cover the space in between these extreme interpretations Starting with an overview of the image-editing programs available to today’s photographer, we will spend two chapters thoroughly covering your various options for image optimization—and that word is used quite intentionally. Even in more creative and subjective techniques like black-and-white conversion, the methods covered concern themselves primarily with making the most out of the latent potential within each image. The final chapter, on the other hand, covers the more open-ended topics of digital editing, in which you’ll be combining separate images into one composite, removing unwanted objects from the image, stitching together panoramas, and other techniques that delve deeper into the creative tools available in pixel-level editors.
Hide your work
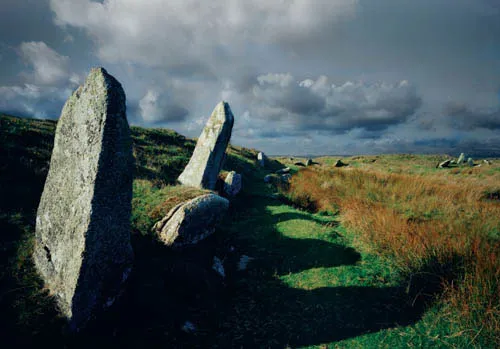
This relatively straightforward landscape has, in fact, had the sky desaturated, the greens and yellows saturated individually, and the contrast reduced by a curves adjustment. And yet, the resulting image is more faithful to the original scene.
Some of these techniques will resonate with your personal photographic style and workflow, others will likely not. However, for all the techniques discussed herein, whether or not you use them in your own photography is not nearly as important as the fact that you will be able to if needed or desired—that you recognize and are familiar with the various tools and options available, so that you can make the right decisions for each image that crosses your desktop. That is also the idea behind the Challenges scattered throughout the book: They are not meant to necessarily convince you that, say, Curves is the best tool for adjusting your shadows and highlights, or that HDR is the only technique for dealing with high-contrast situations. Rather, they are meant to get you familiar with possible courses of action, and prepare you for the wide range of photographic possibilities that you will encounter.
Clean representation
Even completely “faithful” photographs like those used in art catalogs often require some degree of optimization in post-production.
The Digital Workflow
Before we begin to look in detail at the tools and practices of digital photo editing, it’s worth spending just a brief moment or two discussing the concept of the digital photography workflow, as this will help you see where image editing fits within the broad scheme of creating a digital image.
In the context of digital photography, “workflow” describes the entire process of producing a digital image—from capture and importing, organizing and reviewing, through Raw processing and post-production, to distribution and backup. If you’re unfamiliar with any of these terms: Capture essentially means the action of taking the photograph; importing is simply transferring the image files to the computer; organizing and reviewing involve creating appropriate folders, ranking, and making a selection of your images; Raw processing and post-production (often grouped together) are concerned with optimizing the image so that it looks as good as it possibly can; distribution is primarily about preparing the image for either print or viewing on-screen; and finally, backup refers to the process of safely archiving and storing your images. Although there’s no single specific workflow for all photographs, there are definite considerations that must be taken before an image is ready for display.
Out of the workflow just described, the two areas that are of specific relevance to photo editing are Raw processing and post-production. For the purposes of this book we’ll use the term Raw processing to describe all aspects of optimizing the Raw image file once it has been downloaded to the computer; post-production, on the other hand, we’ll use to describe any aspect of optimization once the Raw file has been saved as a TIFF or JPEG. As you’ll see later, this does have a bearing on the type of software you’ll use for certain tasks.
The Raw Format
To understand Raw processing, you first need to be familiar with the Raw format. “Raw” is the generic term for the unprocessed fi...