eBook - ePub
Beyond Photoshop
Advanced techniques integrating Photoshop with Illustrator, Poser, Painter, Cinema 4D and ZBrush
- 376 pages
- English
- ePUB (mobile friendly)
- Available on iOS & Android
eBook - ePub
Beyond Photoshop
Advanced techniques integrating Photoshop with Illustrator, Poser, Painter, Cinema 4D and ZBrush
About this book
In his best-selling book Creative Photoshop, award-winning artist Derek Lea has already shown the digital art world how to create stunning, sophisticated works of art using Photoshop. Now, he goes one step further in this all-new book to demonstrate his unique methods for using Photoshop in conjunction with other software packages. Derek's first-class images will inspire you to think creatively about the ways in which you can use Photoshop alongside other popular programs such as Illustrator and Poser to take your own art to the next level. In addition to invaluable advice on how to create static works of art, Derek's also included plenty of material on creating motion-oriented art using Photoshop with programs like Flash and After Effects. Whether you are a digital artist, illustrator, cartoonist, graphic artist, designer, or serious hobbyist working for print or the web, this fantastic new book will open your eyes to a whole new world of digital art that's never before been uncovered. Challenge yourself and discover the more artistic aspects of these programs with one of the world's best teachers by your side. Be sure to visit www.beyondphotoshopthebook.com for more information including all of the sample images from the book to work with, a reader forum, and more.
Trusted by 375,005 students
Access to over 1.5 million titles for a fair monthly price.
Study more efficiently using our study tools.
Information
Topic
DesignSubtopic
Art General
Chapter 1
Sharp Edges and Painterly Blends
Combining Illustrator with Photoshop
Photoshop contains some excellent vector tools and features. But when it comes to creating artwork, experienced digital artists, illustrators, and designers rarely limit themselves to a single software application. It is no secret that when it comes to drawing with vectors, there is no better choice than Adobe Illustrator. Illustrator has been the industry-standard vector art tool for as long as I can remember. I personally have been using it as an integral part of my digital toolset since 1991.
The features and functions within Illustrator are unparalleled indeed, but what do you do when you want all the superb vector creation possibilities offered within Illustrator, yet you also want the superb paint tool features in Photoshop? The answer is simple: You combine the two applications. And believe it or not, when it comes to creating a stunning Art Noveau masterpiece like the one you see here, you simply need to copy and paste. To put it simply: Photoshop and Illustrator play very well together.
In this chapter, we’ll explore the advantages of bringing existing vector art from Illustrator into Photoshop and using it as vector building blocks to create the piece you see here. More specifically, we’ll be pasting vector art into Photoshop, creating shape layers and paths as the Illustrator data makes its way into Photoshop. We’ll use paths to create selection borders, and we’ll duplicate and edit shape layers to suit a variety of purposes. Once the vectors are safely in place, we can employ Photoshop’s marvelous paint and composition tools, resulting in a nostalgic piece of art that is a combination of both sharp vectors and soft painted elements.
| Versions | Requirements and Recommendations |
| Photoshop CS4 | In addition to Photoshop, you’ll need a copy of Illustrator. If you don’t have a copy of Illustrator, you can download a trial version from www.adobe.com. |
| Illustrator CS4 |
What you’ll learn in this chapter
Creative Techniques and Working Methods
Constructing rather than outlining
The artwork in this illustration relies heavily on prominent outlines. Generally, when I witness inexperienced users of Illustrator attempting to create artwork in a similar style, they rely on stroke attributes to create the outline in the image. An unfortunate result of this method is that there is little or no expressive quality in the line-work. What makes line-work expressive in the context of an illustration is the variation in thickness and the way the ends of each line taper, are sharp, or are rounded. Granted, there are options within the Stroke palette that allow you to change the endpoints of the line; but again, like the uniform thickness of the stroke, those just aren’t expressive enough. The best way to achieve the desired expressive quality is to pay attention to the sketch.

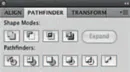
When we draw, something intuitive happens, and it becomes effortless or even a subconscious act to create expressive line-work. Within software it is a different story. We need to focus on preserving the innate, expressive quality of our drawing as we create the finished product. This goal cannot be achieved by using stroke attributes but by creating each element manually with the Pen tool. However, there is more to it than simple mastery over the Pen tool. There is a logical method of construction, which involves creating an exterior shape first. The next step is to subtract an interior. This will give you your expressive outline. After that, details are created as closed shapes, and the result is unified. The Pathfinder palette plays a central role in this systematic drawing process.
Deconstructing and inverting
When you paste your illustrated outlines into Photoshop, they will serve another purpose. By working with duplicates of the shapes, you will learn how to remove the outer regions, thus inverting the appearance of the fill. This might sound confusing, but it is a simple process that we’ll go through repeatedly. It allows you to use your illustrations not only as outlines but also for creating instant solid color fills on separate layers.

Tools, Features, and Functions
 | Template layersThese Illustrator layers will allow you to fade the opacity of your sketch so that you can trace over it without visual distraction. Also, and perhaps more important, the imagery on the Template layer will remain visible in both Preview and Outline modes. |
 | Outline StrokeThis nifty feature allows you to convert Illustrator’s stroke attribute to an actual, editable vector object. This is helpful when you’re pasting something into Photoshop. Not only do you preserve the stroke, but by converting it to an object, you can delete the exterior path on your resulting shape layer to invert the appearance as well. |
 |  |
| An intricate illustration like this one requires quite a bit of prior planning. There is no better start than putting pencil to paper and sketching out those ideas. Here the main content is more or less worked out. Her face is looking good, but everything else requires some more refining. | Because the face itself was working already, I simply refined the other elements in this drawing. Don’t fret because there is no face shown here; we’ll make a composite template soon by combing the two drawings in Photoshop. |

It is always a good idea to keep the components separate, even at the drawing stage. This allows you to digitally refine each component separately, affording you some flexibility when it comes time to assemble the finished composition.
PART ONE: Preparing sketches
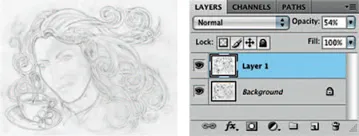
1 Open the sketch-1.webp file in Photoshop. Then open the sketch-2.webp file. Use the Move tool to drag the image from the sketch-2.webp file into the sketch1.webp file as a new layer. Reduce the opacity of the layer so that you see the underlying layer. Use the underlying layer as a guide to position the top layer as accurately as possible. The important thing to concentrate on at this point is lining up her facial features within the outline of her face.

All the files needed to follow along with this chapter and create the featured image are available for download on the accompanying Website, in the project files section. Visit www.beyondphotoshopthebook.com.
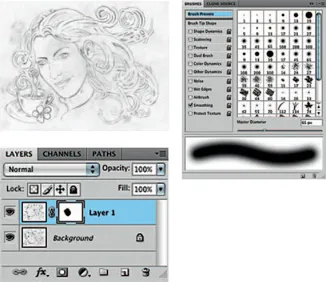
2 When you’re satisfied with the position of the top layer, click the Add Layer Mask button at the bottom of the Layers palette to mask the layer. Ensure that the new mask is targeted in the Layers palette and select the Brush tool. In the Brushes palette, select a soft, round preset and disable any shape dynamics that are active. Your foreground color should be set to black at this point; if it isn’t, press the X key to set it. Paint over her face area within the mask to reveal the underlying face. When you’re satisfied with the result, return the opacity of the layer to 100%.

3 Click the Create New Fill or Adjustment Layer button at the ...
Table of contents
- Cover
- Half Title
- Title Page
- Copyright Page
- Dedication
- Table of Contents
- Foreword
- Acknowledgments
- Introduction
- Chapter 1: Sharp Edges and Painterly Blends
- Chapter 2: 2D Textures and 3D Vectors
- Chapter 3: Live Trace and Pathfinder Effects
- Chapter 4: Hand-Painted Magic
- Chapter 5: Create an Old Master
- Chapter 6: The Best of Both Worlds
- Chapter 7: Sculpting Raw Materials
- Index
Frequently asked questions
Yes, you can cancel anytime from the Subscription tab in your account settings on the Perlego website. Your subscription will stay active until the end of your current billing period. Learn how to cancel your subscription
No, books cannot be downloaded as external files, such as PDFs, for use outside of Perlego. However, you can download books within the Perlego app for offline reading on mobile or tablet. Learn how to download books offline
Perlego offers two plans: Essential and Complete
- Essential is ideal for learners and professionals who enjoy exploring a wide range of subjects. Access the Essential Library with 800,000+ trusted titles and best-sellers across business, personal growth, and the humanities. Includes unlimited reading time and Standard Read Aloud voice.
- Complete: Perfect for advanced learners and researchers needing full, unrestricted access. Unlock 1.5M+ books across hundreds of subjects, including academic and specialized titles. The Complete Plan also includes advanced features like Premium Read Aloud and Research Assistant.
We are an online textbook subscription service, where you can get access to an entire online library for less than the price of a single book per month. With over 1.5 million books across 990+ topics, we’ve got you covered! Learn about our mission
Look out for the read-aloud symbol on your next book to see if you can listen to it. The read-aloud tool reads text aloud for you, highlighting the text as it is being read. You can pause it, speed it up and slow it down. Learn more about Read Aloud
Yes! You can use the Perlego app on both iOS and Android devices to read anytime, anywhere — even offline. Perfect for commutes or when you’re on the go.
Please note we cannot support devices running on iOS 13 and Android 7 or earlier. Learn more about using the app
Please note we cannot support devices running on iOS 13 and Android 7 or earlier. Learn more about using the app
Yes, you can access Beyond Photoshop by Derek Lea in PDF and/or ePUB format, as well as other popular books in Design & Art General. We have over 1.5 million books available in our catalogue for you to explore.