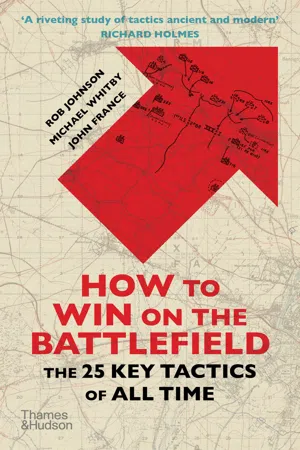
How can you off-balance your enemy? When is the best moment to deliver a counter-attack? What is the effect of shock action or defence in depth? Certain tactical concepts have stood the test of time. This ground-breaking book examines, in a series of case studies, 25 of the key tactics that have achieved victory through the ages. Drawing on examples of battles from around the globe, on land, at sea and in the air, and across history, the authors reveal the enduring value of each tactic in clear and compelling descriptions and analysis. General Robert E. Lee, although heavily outnumbered achieved a remarkable victory through an audacious flanking manoeuvre at Chancellorsville in 1863; the same bold move had been used over 600 years before by the king of France at Bouvines. For the Parthian general Surenas at Carrhae in 53 BC and again for Kitchener at Omdurman in 1989, an overwhelming concentration of firepower ensured a decisive outcome, while drawing the enemy led to victory both for Saladin at Hattin in 1187 and for the Russians against Napoleon in 1812. The book examines how Allied armies seized and retained the initiative through the airborne landings in Normandy in 1944, and how Soviet General Zhukov pierced enemy lines and penetrated in depth using Blitzkriegtactics in Mongolia in 1939. Evocative photographs, illustrations and paintings, and a series of specially commissioned battle plans complete this detailed study of the most successful tactics of all time. Written by leading experts, How to Win on the Battlefield will prove indispensable reading for historians, military enthusiasts and business leaders.
- English
- ePUB (mobile friendly)
- Available on iOS & Android
eBook - ePub
About this book
Trusted by 375,005 students
Access to over 1.5 million titles for a fair monthly price.
Study more efficiently using our study tools.
Information
Subtopic
Military & Maritime HistoryIndex
History1 |
| |
The Attack at the Centre of Gravity |
Clausewitz, the great strategic thinker, was always clear that the route to victory is through the offensive. Invariably, a force that finds itself on the defensive will eventually have to take the offensive and carry the fighting to the enemy. Even in a guerrilla warfare setting (see 24), strategists such as Mao Zedong and General Vo Nguyen Giap recognized that the final phase of any armed struggle would necessitate forming a conventional offensive force to take control of the country. Remaining on the defensive may, of course, be a means to inflict considerable losses on the enemy and allow a militarily weaker army to sustain itself against a stronger foe, but the offensive gives an army the initiative and allows a commander the chance to impose his will on the course of the campaign.
Field Marshal Bernard Montgomery advocated taking an offensive stance, even when forced on to the defensive.1 He also understood that an offensive against a strong position required careful planning, in particular to locate and then defeat the enemy at what Clausewitz called the ‘centre of gravity’ – the precise point and moment where a battle would be decided.2 For Clausewitz, the centre of gravity was usually in the strength of the enemy’s army, although it could also be a geographical location on the battlefield.
An excellent example of this concept can be found in the North African Campaign during the Second World War (1939–45). After British, Imperial and Commonwealth forces had ejected the Italian forces from much of Mussolini’s new ‘Roman Empire’ in East Africa and driven them back through Libya in 1940,3 the Germans augmented Mussolini’s wavering troops with an ‘Afrika Korps’. Twice (in spring 1941 and summer 1942) they pushed the British and their allies back towards Egypt. Each side discovered that it could exploit the expanse of desert to make wide flanking manoeuvres to the south, but also that the chief difficulty lay in supply. Although armoured and mechanized formations achieved successes, the further they drove from sources of fuel and ammunition, the harder it became to sustain an offensive. Clausewitz referred to a ‘culminating point’ in attack (see 13), a point beyond which the assailants are weakened or overstretched: the Desert War clearly demonstrates this factor.
El Alamein, 1942
In mid-1942, the German and Italian forces under Field Marshal Erwin Rommel had pressed the British and their allies back to the Egyptian border. The Allies were concerned that the Germans might make a bid to advance into the Middle East, perhaps in conjunction with Axis forces in Russia, to take possession of vital oil supplies. It was imperative that Rommel was halted. The Germans were at the limit of their supply line, which stretched back hundreds of miles to Benghazi and Tobruk, and in July 1942 this helped the British General Claude Auchinleck to hold the Egyptian border in the First Battle of Alamein. Montgomery was then appointed by the Prime Minister, Winston Churchill, to attack and defeat the Germans decisively. This would allow Britain to open a new front against Germany in the Mediterranean, thereby dividing Hitler’s forces. Montgomery first checked Rommel at the Battle of Alam Halfa (August 1942); it was now time to go on to the offensive.4
Montgomery planned his attack carefully, but knew that he would have to remain flexible once the action had begun. He concentrated first on the training, refitting and reinforcement of his army. New, more reliable tanks – the American Sherman – were delivered, and a vast number of guns deployed. Allied air forces gained air superiority, while the Royal Navy intercepted and destroyed an increasing volume of Rommel’s supply vessels. Montgomery knew that in this case the centre of gravity was the German Panzer Army itself, and he would have to make use of his superior numbers to break the Afrika Korps if he was to win.5
Rommel in turn realized that he would have to face this onslaught and had prepared his positions carefully. Critically short of petrol, he knew that he would only be able to make one decisive counter-move with his armoured formations. It was vital that he identified where the main attack would fall and he therefore had to slow the momentum of the attackers. To achieve this he depended on fixed positions: German and Italian infantry created minefields of great depth – as much as 5 miles (8 km) – covered by artillery and hedged with hundreds of miles of barbed wire. These ‘Devil’s Gardens’ would allow the Axis forces to inflict catastrophic casualties, but permit the counter-attacks Rommel envisaged at the Schwerpunkt (‘critical point’). To the south, his flank was fixed by the great Qattara Depression, which was impassable to Allied armour. The battle would be decided on a front just 37 miles (60 km) wide.
Montgomery’s plan was to make a strong feint against the southern flank with elaborate deception measures (including dummy vehicles, depots and a mock fuel pipeline), while making the main attack, known as Operation Lightfoot, against the northern portion of the Axis lines. The assault was to be preceded by the largest artillery bombardment by British forces since the First World War. This would cover the advance of four infantry divisions of XXX Corps as they picked their way through the minefields and broke into the German positions. Once secured, the next phase would involve an armoured thrust by X Corps into the heart of the German lines (the ‘dogfight’, as Montgomery styled it) and then a break out, striking deep behind their army.6
The Break-in: ‘Bite and Hold’
The Allied attack got under way as planned at 2140 hrs on 23 October 1942 with a hurricane of artillery fire against the Axis positions, all of which had been identified in advance. Pinned in their entrenchments, the Germans were initially unable to prevent the British, Australian, New Zealand and South African infantry inching their way through the minefields. However, there were a number of problems for the Allies. New mine detectors were found to be too sensitive to be useful, and the units equipped with them had to resort to the traditional method of probing the sand with a bayonet. As they neared the German positions they came under a greater volume of fire, and losses mounted steadily. Smoke and dust raised by the bombardment added to the confusion so that, despite the arc of tracers and pre-positioned lights, it became increasingly difficult to maintain direction towards the objectives. The 51st (Highland) Division troops found themselves ahead of their creeping curtain of artillery fire and suffered casualties as a result. On the left flank, the 1st South African Division was also badly cut up by German fire and had to repel a spirited counter-attack before doggedly fighting into the enemy trenches. In the centre, there was a bitter close-quarter battle for the Miteirya Ridge, but the Australians and New Zealanders took all their objectives.
Behind the infantry, who had been slowed almost to a standstill, the British armour was struggling to get through the smaller than expected gaps in the minefields. Darkness, dust and congestion delayed the advance. Nevertheless, by dawn on 24 October, part of one formation, the 10th Armoured Division, had reached the Miteirya Ridge. Major General Gatehouse, the divisional commander, found that his tanks were being destroyed rapidly by German artillery and requested that the attack be stopped; in a heated exchange, however, Montgomery ordered him on.7 The next day the armour did what it could, but was unable to break open the German defences or exploit the situation. The infantry too were exhausted and, despite the ‘leapfrogging’ of units (or ‘passage of lines’), they were unable to push any further.
Yet although the original idea of a breakthrough in one phase had not been achieved, the Allies managed to ‘bite and hold’ a significant section of the German positions. Montgomery knew he had to keep the Germans off-balance, and so now orchestrated his southern feint. The attacks went in, and, as predicted, Rommel, who had just returned from convalescent leave, was unsure where the main thrust was. He had to leave his main armoured formation, the 21st Panzer Division, and the Italian Ariete Division in the southern sector until the situation cleared.

The power of the offensive, as demonstrated at the Battle of El Alamein, 23 October to 5 November 1942.
Off-Balancing and the ‘Dogfight’
On 25 October, Montgomery pulled back his battered 10th Armoured and cancelled further infantry frontal attacks to facilitate an Australian thrust northwestwards against the German 164th Light Division on the coast. The change of direction made it possible to throw the Germans off-balance; the attack was covered by constant air and artillery bombardments, and there were limited infantry assaults on the main German positions in the centre. These smaller attacks were sharp and costly, but inflicted heavy losses on the Germans too – losses they could not easily replace. The Australians made a second thrust towards the coast during the night of 30 October, where they met stiffer resistance. However, they managed to sever the road and rail lines, threatening the German Light Division’s line of retreat. Rommel spotted the danger and personally supervised the counter-attack. Fighting was desperate, with both sides taking very high casualties. Concentrations of German armour and Allied gunfire raked the relatively small area around Ras el Shaqiq. By the end of this phase of the battle, the Germans had lost much of their reserve armour and the bloodied Australians were still in possession of their ground.
The Final Phase: Breakthrough and Breakout
Montgomery could now resume his attack against the German centre, and Operation Supercharge was launched in the area of Tell el Aqqaqir.8 The attack was preceded by another great artillery and air bombardment, and, again, the infantry were ordered to break into the German positions. Two British brigades made a textbook advance behind a curtain of gunfire on 2 November, with 800 guns concentrating their efforts on just 4,000 yd (3,700 m) of the German line. It was a success. Montgomery could order the long-awaited armoured thrust, but this time it was possible to deploy his formations in force.
The 9th Armoured Brigade was delayed in its pre-dawn attack, which meant that the tanks were silhouetted against the morning sky. Although they overran the German lines – and penetrated into the German artillery positions – they were clear targets for the accurate fire of 88 mm guns: 75 of the brigade’s 94 vehicles were rapidly knocked out. However, much of the 1st Armoured Division had been brought up and they were ready for the German counter-attacks of the 15th and 21st Panzer Divisions, the 90th Light Division and the Italian Littorio and Trento (mechanized) divisions. The armoured action lasted all day, with vehicles weaving between the burning wrecks. Allied losses were heavy, but the German casualties were heavier still. More importantly, the Axis losses were irreplaceable. Rommel was down to 35 tanks, and he had less capability to refit and repair his damaged vehicles. By contrast, the Allies could get theirs back into action.
Rommel decided to withdraw as much of what remained of his force as he could on 3 November, and he began thinning out his troops behind an infantry and supporting gun line. Armoured cars of the 9th Royal Lancers broke through the German lines and began driving at speed into depth. The Germans were cleared from the central part of the front, and both armoured and infantry formations began to surge through the gap. Some 35,000 Axis prisoners were taken. In the pursuit, a combination of bad weather, poor communications and hesitation served to frustrate the complete envelopment of the Germans, but Rommel was unable to mount such a strong defence in North Africa again.9 With Allied landings in Morocco and Algeria on 8 November, the Deutsche Afrika Korps was cut off.
Analysis
Several factors were critical to the outcome of this battle. Planning and preparation were thorough, from training to logistics. Recognizing and then concentrating greater numbers at the centre of gravity was crucial. As a rule, the ratio of attackers to defenders must be at least 3:1. Off-balancing attacks and multiple fronts allowed Montgomery to retain the initiative, while changes in the axes of attack drew in enemy reserves: the threat to cut off the German 164th Light Division forced the Germans to risk heavier losses to neutralize this thrust. The momentum of the attack was sustained, reaching a culminating point where the breakthrough and breakout could be achieved.10 At El Alamein, the centre of gravity was the German army itself, not a geographical feature. Montgomery’s offensive sought to reduce the capacity of the Afrika Korps to continue the campaign by inflicting heavy losses through concentrating maximum force, manpower, air power and firepower against it.
The centre of gravity is not the same in every campaign, or in every battle, and the good commander must be alert to such variations. Strict focus on the centre of gravity is also likely to be demanding: it entails the avoidance of distracting options, which may often appear easier, and the willingness to endure heavy losses. Determination, high morale and solid unit cohesion are essential. At El Alamein, the British, South African, New Zealand and Australian divisions of XXX Corps had a strong sense of esprit de corps and a willingness to engage in bitter fighting. Montgomery understood that, in the end, the key to this battle was the state of mind and morale of his personnel,11 and he took every opportunity he could to instil the offensive spirit:
Sometimes I spoke to large numbers from the bonnet of a jeep, sometimes I spoke to just a few men by the roadside or in a gun pit. I would address them less directly by means of written messages at important phases in the campaign or before a battle. These talks and messages fostered the will to win and helped weld the whole force into a fighting team which was certain of victory.12
2 | | | Counter-Attack |
The concept of the counter-attac...
Table of contents
- Cover
- Title Page
- About the Authors
- Other Titles of Interest
- Contents
- Introduction: The Aims and Principles of War
- 1. The Attack at the Centre of Gravity
- 2. Counter-Attack
- 3. Surprise Attack and Ambush
- 4. Envelopment and Double-Envelopment
- 5. Flanking
- 6. Dominating the Terrain and Using the Environment
- 7. Echelon Attack
- 8. Committing the Reserve
- 9. Blitzkrieg
- 10. Concentration of Firepower
- 11. Shock Action
- 12. Co-ordination of Fire and Movement
- 13. Concentration and Culmination of Force
- 14. Seizing and Retaining the Initiative
- 15. Off-Balancing and Pinning
- 16. Mass
- 17. Defence in Depth
- 18. Strategic Offence and Tactical Defence
- 19. Drawing the Enemy
- 20. Deception and Feints
- 21. Terror and Psychological Warfare
- 22. Attrition and Annihilation
- 23. Intelligence and Reconnaissance
- 24. Insurgency and Guerrilla Warfare
- 25. Counter-Insurgency
- Conclusion: How to Win on the Battlefield
- Notes
- Further Reading
- Index
- Copyright
Frequently asked questions
Yes, you can cancel anytime from the Subscription tab in your account settings on the Perlego website. Your subscription will stay active until the end of your current billing period. Learn how to cancel your subscription
No, books cannot be downloaded as external files, such as PDFs, for use outside of Perlego. However, you can download books within the Perlego app for offline reading on mobile or tablet. Learn how to download books offline
Perlego offers two plans: Essential and Complete
- Essential is ideal for learners and professionals who enjoy exploring a wide range of subjects. Access the Essential Library with 800,000+ trusted titles and best-sellers across business, personal growth, and the humanities. Includes unlimited reading time and Standard Read Aloud voice.
- Complete: Perfect for advanced learners and researchers needing full, unrestricted access. Unlock 1.5M+ books across hundreds of subjects, including academic and specialized titles. The Complete Plan also includes advanced features like Premium Read Aloud and Research Assistant.
We are an online textbook subscription service, where you can get access to an entire online library for less than the price of a single book per month. With over 1.5 million books across 990+ topics, we’ve got you covered! Learn about our mission
Look out for the read-aloud symbol on your next book to see if you can listen to it. The read-aloud tool reads text aloud for you, highlighting the text as it is being read. You can pause it, speed it up and slow it down. Learn more about Read Aloud
Yes! You can use the Perlego app on both iOS and Android devices to read anytime, anywhere — even offline. Perfect for commutes or when you’re on the go.
Please note we cannot support devices running on iOS 13 and Android 7 or earlier. Learn more about using the app
Please note we cannot support devices running on iOS 13 and Android 7 or earlier. Learn more about using the app
Yes, you can access How to Win on the Battlefield by Rob Johnson in PDF and/or ePUB format, as well as other popular books in History & Military & Maritime History. We have over 1.5 million books available in our catalogue for you to explore.