Beginning API Development with Node.js
Build highly scalable, developer-friendly APIs for the modern web with JavaScript and Node.js
- 100 pages
- English
- ePUB (mobile friendly)
- Available on iOS & Android
Beginning API Development with Node.js
Build highly scalable, developer-friendly APIs for the modern web with JavaScript and Node.js
About this book
Learn everything you need to get up and running with cutting-edge API development using JavaScript and Node.js; ideal for data-intensive real-time applications that run across multiple platforms.
Key Features
- Build web APIs from start to finish using JavaScript across the development stack
- Explore advanced concepts such as authentication with JWT, and running tests against your APIs
- Implement over 20 practical activities and exercises across 9 topics to reinforce your learning
Book Description
Using the same framework to build both server and client-side applications saves you time and money. This book teaches you how you can use JavaScript and Node.js to build highly scalable APIs that work well with lightweight cross-platform client applications. It begins with the basics of Node.js in the context of backend development, and quickly leads you through the creation of an example client that pairs up with a fully authenticated API implementation. By the end of the book, you'll have the skills and exposure required to get hands-on with your own API development project.
What you will learn
- Understand how Node.js works, its trends, and where it is being used now
- Learn about application modularization and built-in Node.js modules
- Use the npm third-party module registry to extend your application
- Gain an understanding of asynchronous programming with Node.js
- Develop scalable and high-performing APIs using hapi.js and Knex.js
- Write unit tests for your APIs to ensure reliability and maintainability
Who this book is for
This book is ideal for developers who already understand JavaScript and are looking for a quick no-frills introduction to API development with Node.js. Though prior experience with other server-side technologies such as Python, PHP, ASP.NET, Ruby will help, it's not essential to have a background in backend development before getting started.
Tools to learn more effectively

Saving Books

Keyword Search

Annotating Text

Listen to it instead
Information
Building the API - Part 1
- Implement a basic HTTP server using the Node.js built-in http module
- Implement a basic Hapi.js setup for an API
- Describe the basic HTTP verbs and how they differ from each other
- Implement various routes for the API, making use of the different HTTP verbs
- Implement logging the web application
- Validating API requests
Building a Basic HTTP Server
const http = require('http');
const server = http.createServer((request, response) =>
{
console.log('request starting...');
// respond
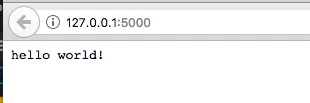
response.write('hello world!');
response.end();
});
server.listen(5000);
console.log('Server running at http://127.0.0.1:5000'); Use the simple-server.js file for your reference at Code/Lesson-2.
node simple-server.js
Setting up Hapi.js
Exercise 1: Building a Basic Hapi.js Server
- In your Lesson-2 folder, create a subfolder called hello-hapi.
Use the exercise-b1 folder for your reference at Code/Lesson-2.
- On the Terminal, change directory to the root of the hello-hapi folder.
- Initialize it as a basic Node.js project and run the following command:
npm init -y
- Create a file, server.js.
- Install Hapi.js by executing the following command:
npm install hapi --save
- In the file, write the following code:
const Hapi = require('hapi');
// create a server with a host and port
const server = new Hapi.Server();
server.connection
({
 host: 'localhost',
 port: 8000,
});
// Start the server
server.start((err) =>
{
 if (err) throw err;
 console.log(`Server running at: ${server.info.uri}`);
});
Use the server.js file for your reference at Code/Lesson-2/exercise-b1.
- We first start by requiring the Hapi.js framework that we just included.
Recall our subtopic, The Module System, in Chapter 1, Introduction to Node.js? We looked at third-party modules—this is one of them.
- We then create a server by initializing the Server class, hence a new Hapi.Server().
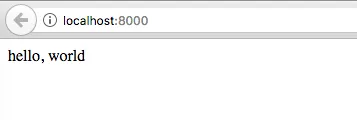
- We then bind that server on a specific host (localhost) and port (8000).
- After that, we create an example route, /. As you can see, for each route created, we have to specify three major things (as keys of an object passed to the server.route method):
- method: This is the HTTP method for that route. We're going to look more deeply at the types of HTTP verbs in a later section. For our example, we're using GET. Basically, as the name suggests, this gets stuff/resources from the server.
- path: This is the path on the server to the particular resource we are getting.
- handler: This is a closure (anonymous function) that does the actual getting.
We're going to look at another extra key, called config, in our main project.
- After this setup is done, we then start the server using the server.start method. This method accepts a closure (callback function) that is called once the server has started. In this function, we can check whether any errors occurred while starting the server.
- Run the server by going to the Terminal, and run the following command:
node server.js
- You should see this printed on the Terminal:
Server running at: http://localhost:8000
The reason we get this error is because we can on...
Table of contents
- Title Page
- Copyright and Credits
- Packt Upsell
- Contributors
- Preface
- Introduction to Node.js
- Building the API - Part 1
- Building the API - Part 2
- Other Books You May Enjoy
Frequently asked questions
- Essential is ideal for learners and professionals who enjoy exploring a wide range of subjects. Access the Essential Library with 800,000+ trusted titles and best-sellers across business, personal growth, and the humanities. Includes unlimited reading time and Standard Read Aloud voice.
- Complete: Perfect for advanced learners and researchers needing full, unrestricted access. Unlock 1.4M+ books across hundreds of subjects, including academic and specialized titles. The Complete Plan also includes advanced features like Premium Read Aloud and Research Assistant.
Please note we cannot support devices running on iOS 13 and Android 7 or earlier. Learn more about using the app