eBook - ePub
The Game Audio Tutorial
A Practical Guide to Creating and Implementing Sound and Music for Interactive Games
Richard Stevens
This is a test
Compartir libro
- 427 páginas
- English
- ePUB (apto para móviles)
- Disponible en iOS y Android
eBook - ePub
The Game Audio Tutorial
A Practical Guide to Creating and Implementing Sound and Music for Interactive Games
Richard Stevens
Detalles del libro
Vista previa del libro
Índice
Citas
Información del libro
Design and implement video game sound from beginning to end with this hands-on course in game audio. Music and sound effects speak to players on a deep level, and this book will show you how to design and implement powerful, interactive sound that measurably improves gameplay. If you are a sound designer or composer and want to do more than just create audio elements and hand them over to someone else for insertion into the game, this book is for you. You'll understand the game development process and implement vital audio experiences-not just create music loops or one-off sound effects.
The Game Audio Tutorial isn't just a book-you also get a powerful website (www.thegameaudiotutorial.com)
Preguntas frecuentes
¿Cómo cancelo mi suscripción?
¿Cómo descargo los libros?
Por el momento, todos nuestros libros ePub adaptables a dispositivos móviles se pueden descargar a través de la aplicación. La mayor parte de nuestros PDF también se puede descargar y ya estamos trabajando para que el resto también sea descargable. Obtén más información aquí.
¿En qué se diferencian los planes de precios?
Ambos planes te permiten acceder por completo a la biblioteca y a todas las funciones de Perlego. Las únicas diferencias son el precio y el período de suscripción: con el plan anual ahorrarás en torno a un 30 % en comparación con 12 meses de un plan mensual.
¿Qué es Perlego?
Somos un servicio de suscripción de libros de texto en línea que te permite acceder a toda una biblioteca en línea por menos de lo que cuesta un libro al mes. Con más de un millón de libros sobre más de 1000 categorías, ¡tenemos todo lo que necesitas! Obtén más información aquí.
¿Perlego ofrece la función de texto a voz?
Busca el símbolo de lectura en voz alta en tu próximo libro para ver si puedes escucharlo. La herramienta de lectura en voz alta lee el texto en voz alta por ti, resaltando el texto a medida que se lee. Puedes pausarla, acelerarla y ralentizarla. Obtén más información aquí.
¿Es The Game Audio Tutorial un PDF/ePUB en línea?
Sí, puedes acceder a The Game Audio Tutorial de Richard Stevens en formato PDF o ePUB, así como a otros libros populares de Computer Science y Programming Games. Tenemos más de un millón de libros disponibles en nuestro catálogo para que explores.
Información
1
Basic Training
In this chapter you’ll be introduced to the chosen platform for demonstrating the principles within the book, Epic Game’s Unreal Development Kit (UDK, available to all readers for free at www.udk.com). We will also begin to look at the importance of ambient sound in adding character and immersion to game environments.
Opening the Tutorial Level
The first step is to download and install UDK. While you’re waiting, go to the companion site www.thegameaudiotutorial.com and download the tutorial files. Once downloaded, unzip the package by right-clicking and selecting “Unzip to” (Choose a folder). See the README file in the zip package for full instructions on how to get everything up and running.
You will need to remember the UDK install folder. This is typically C:\UDK\UDK-(Date of current version).
As the precise location may change depending on which version you are using we will simply refer to C:\UDK\(***) in the text.
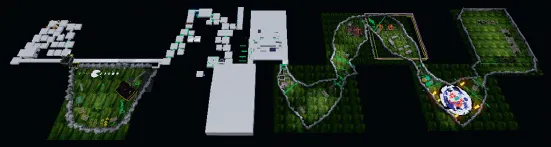
The Game Audio Tutorial Level.
Before you start the tutorial level, we recommend that you play some of the levels that come with the UDK. From the Start menu, select Unreal Development Kit/Game–Unreal Development Kit. If you’re not used to this first-person-shooter style environment, then use the mouse to look around and to shoot and use the WASD keys to move.
When you’re done, exit the game and then from your Programs menu choose Unreal Development Kit/Editor–Unreal Development Kit. When this has started up, choose Open from the File menu and open the level GAT_V01_000. To play the tutorial level now, click on the Start this level on PC icon from the top menu bar.

Start this level on PC.
Spend some time exploring the level, and when you’re ready to move on press the Esc key on your computer keyboard then choose Exit Game to return to the Editor window. Before we start looking at the level, you should save it under a different filename. That way if you start playing around with it (which we would encourage you to do), you can always go back to the original version. Do this now from the File/Save menu in the main window.
It’s a good idea to get into good habits straight away, so start by having useful information in the filename, like today’s date and the version number: MyGame_1901_01_01_V01.
Then after making any significant changes, you can save it again, this time calling it MyGame_1901_01_01_V02. You’ll notice that we’ve used underscores (_) instead of spaces. You should do this with all your files including sound or music files. The general rule is that games software doesn’t like spaces!
Explore the Level: Navigation
If you haven’t used a game editor before, then simply navigating your way around is probably going to be your steepest learning curve. Most editors use a combination of mouse buttons to enable you (sometimes referred to as “the camera”) to move around in the 3D space. Some (like UDK) also allow you to also use the WASD keys that are typical of first-person shooter navigation.
In the tutorial level, we’ve put in some basic navigation points. Try jumping between these points by pressing the keys 1, 2, 3, 4, 5, 6, and 7 on your keyboard. These correlate to the start room for each of the chapters of the book. (You can override these or create your own by pressing Ctrl + the number key to set them up.)
You can see within the tutorial level that we have numbered all the rooms. These correspond with the room numbers in the text below. To help you navigate your way around the level, we’ve also added colored doorframes. Green is a room that moves forward in the order of the book, Red goes back. For annex rooms that come off the main rooms Blue takes you forward, and Yellow takes you back. We hope you don’t get lost!
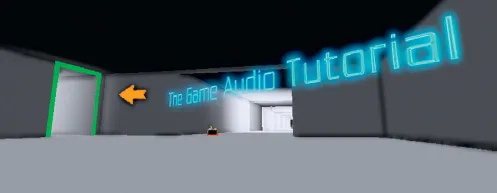
Go back to navigation point 1 by pressing “1” and you should find yourself in the first room.
Views
You’ll see that you have four different viewports of the map: Front, Side, Top, and Perspective. (If the editor has started with one full screen view then click on Maximize Viewport—the square icon on the Viewport toolbar—to change to the view below.)
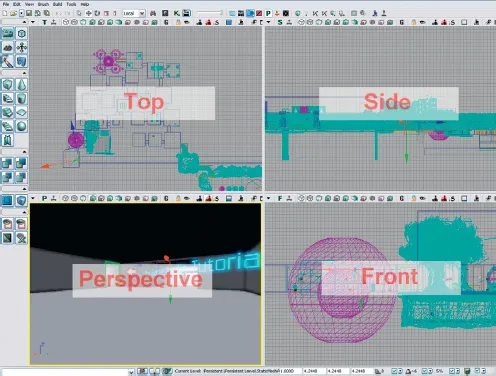
You can change these using the Viewport Options menu (the drop-down arrow on the left of each viewport) and choosing Viewport Type.

You can also cycle through the viewports by clicking on the button currently marked “P.”

Try changing the viewports for the bottom-left screen and then return to Perspective view “P.”
Navigation
Now try using your left mouse button, your right mouse button, your mouse wheel, and both mouse buttons together to start seeing how you can move around the level.
Left mouse button (LMB): Pan the camera left/right, Move forward/back
Right mouse button (RMB): Mouse look
LMB + RMB: Move left/right, Move up/down
Right mouse button (RMB): Mouse look
LMB + RMB: Move left/right, Move up/down
If you hold down your right mouse button, you can also “fly” through the level by using the keyboard keys W, A, S, D and using Q and E to move up or down. It’s often easiest to use a combination of “flying” in the Perspective viewport and clicking and dragging in the Top viewport to navigate your way around.
If at any time you want to just start playing the game from a particular spot, then right-click on the floor and select “Play from here.” (Press the Esc key to return to the editor.) Or you can play the whole level from the beginning in the Editor window by clicking on the aptly titled “Play this level in an editor window” button.

Building
As you work your way through the book we’d encourage you to learn by playing around with items in the tutorial level and exercise rooms. As you do so you’ll quickly become aware that when you make a significant change to a level you need to “Build” it again. You can do this from the Build menu or the shortcut icons on the top toolbar. See Appendix C: Building for some specific guidance on this.
Actors
100 Start Room
Go back to the first room (Press 1 on your keyboard) and turn around using the left mouse button until you are looking behind you. If you press the G key a few times, you should see the small switch icon disappear and reappear. The G key hides everything that’s not actually visible in the game itself. These objects are what control the events in the game; they are called Actors.
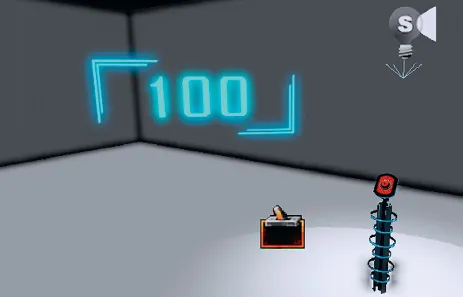
This particular Actor is called a [Trigger] and we will be see...