![]()
Part I
Light-Insensitive Methods
Chapter 1: Transfers, Lifts, and DIY Printmaking
Chapter 2: Hand Coloring
Chapter 3: Toning
![]()
1
Transfers, Lifts, and DIY Printmaking
Solvent Transfers
Inkjet Transfers
Muscle Rub Transfers, by Dorothy Imagire
Heat Transfers, by Kathy Halamka
Polymer Transfers, by Peter Madden
Impossible Project Image Lifts
Magazine and Copier Lifts
Lazertran™ Inkjet Lifts, by Dorothy Imagire
Paper Photo-Lithography, by Christine Tinsley
Gelatin Prints, by Peter Madden
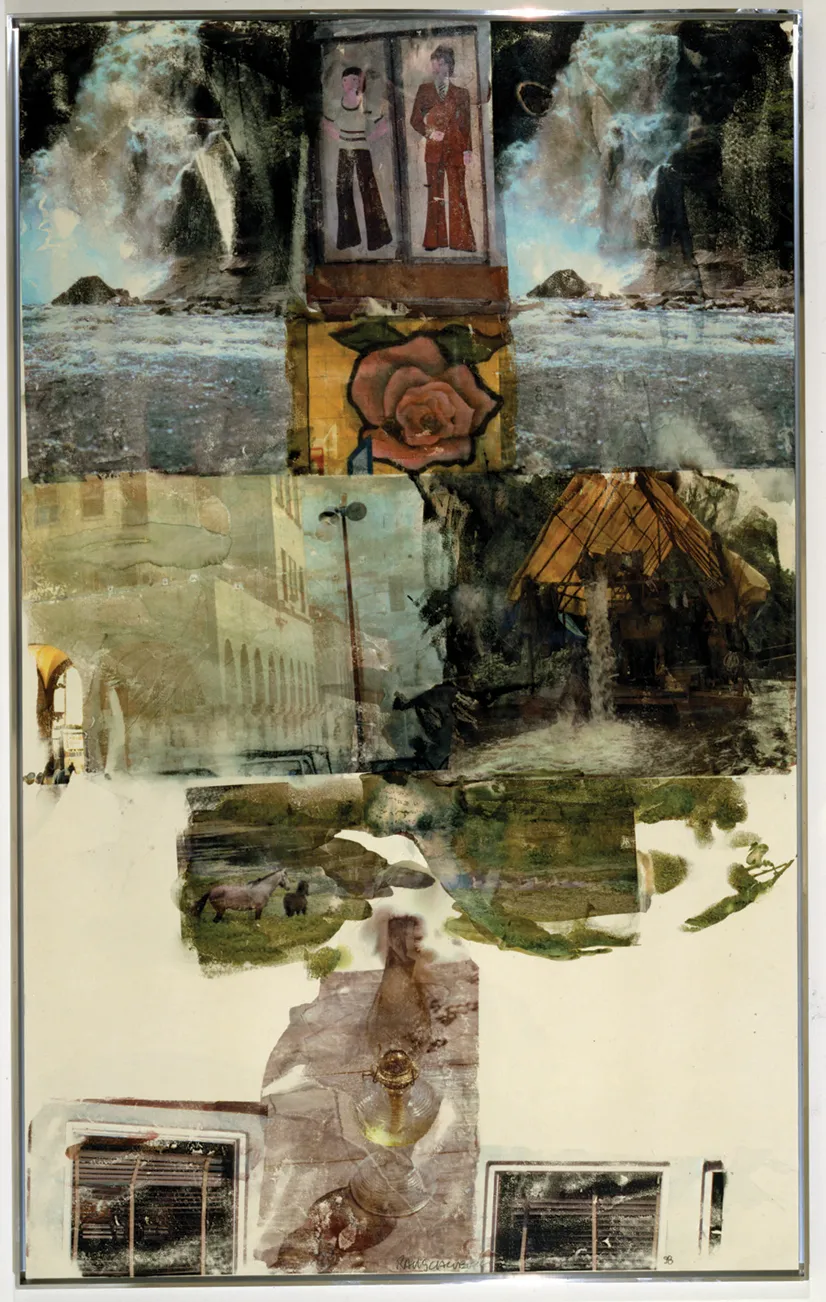
1.1 (opposite) Robert Rauschenberg, Mother-in-Law [Anagram (A Pun)], 97 ½ × 61 in. (247.7 × 154.9 cm), Inkjet pigment transfer on polylaminate, 1998. Private collection. ©Robert Rauschenberg Foundation.
The pursuit of new techniques has been a continuous theme of Rauschenberg’s work. During a trip to Cuba in spring 1952, the artist first experimented with transfer drawings, taking printed images, primarily from newspapers and magazines, placing them face down on sheets of paper, and then rubbing the backs of the images (exploiting the gradations of tone achieved by changes in pressure from an empty ballpoint pen) or other burnishing device to transfer the original to the paper.1 He also made life-size body cyanotypes (Chapter 7) on commercial, pre-coated blueprint paper in the early 1950s. By 1958, Rauschenberg employed a technical development in which he applied a chemical solvent, such as turpentine and, later, lighter fluid, to glossy magazine images, facilitating a clearer and more complete transfer. (Solvent transfers are the next item in this chapter, as well as the less toxic but closely related “muscle rub transfer” on page 12.) Subsequently, Rauschenberg sprayed a fine solvent mist on smooth and crumpled printed images, which he sent through a lithography press with natural fabrics underneath for his extraordinary Hoarfrost series. In 1991, he began using inkjet transfers (another method explained in this chapter on page 9) and eventually turned to biodegradable and soy-based dyes and water as the solvent, due to his concern for the environment.2
SOLVENT TRANSFERS
Please see “Muscle Rub Transfers,” below, on page 12, for another way to transfer ink off magazine pages, photo copies, and newspaper pages. Although these processes are not risk-free, muscle rub is less harmful than solvents to your health.
A fast and simple technique, transferring allows you to remove the image only from a magazine, newspaper, photocopy, or digital print, and relocate it on various surfaces such as paper, fabric, frosted acetate, wood, or lithographic stones or plates. A combination of solvent and pressure dislodges the ink from the page and allow the image, without the original paper, to adhere to the receiving surface. Reproductions of photographs or drawings in black-and-white or color can be transferred. You can write or draw onto a transferred image or onto the receiving surface before or after transferring; you can sew into them, mix media processes with transfers, or locate one image on top of another. Because most inks are oil-based and not soluble in water, transfers on cloth remain permanent when washed in mild soaps.
SAFETY
Be sure to work in a well-ventilated area, a place that has not just an open window, but 20 air changes per hour. The solvents used in this process, even in marker pens, are highly flammable and noxious to breathe, irritating the eyes and respiratory passages, and they have a narcotic effect on the nervous system.
They also dry the skin and can cause serious damage to the kidneys and liver. If you use citrus solvent, do not be fooled by the label “natural”; rather, avoid contact with eyes and prolonged or repeated contact with skin.
Read all warning labels and wear neoprene gloves when handling solvents. Wear an organic solvent vapor mask when working in close proximity with solvents.
Immediately replace the cap or covering on solvent containers after use, and discard paper or other materials in a manner that prevents further release of the solvents into the air you are breathing.
Do not store solvents in inappropriate containers after use (e.g., solvent eats through Styrofoam™); use metal or glass containers.
Isolate solvents from heat, sparks, electrical equipment, oxidants, and open flames.
Fumes tend to cling to the transfer after it is made, so air it out in a well-ventilated area away from your living space until the solvents have evaporated.
METHOD OVERVIEW
1. Printed page or office photo copy to be transferred is removed from its source and prepared.
2. Solvent is applied, usually to the back of the page, which seeps through to dislodge the image on the front.
3. Transfer of the image from the page is made by rubbing the back of the image, forcing the ink off the front of the page and onto the receiver.
MATERIALS
1. Image. A photocopy made with carbon-based “ink,” magazine page, or newspaper page will work well. Most magazines are printed on coated stock (clay-impregnated slick paper), which is very effective for transfers because the ink rests on the clay (kaolin), not on the paper. Make sure that the image to be transferred is not gravure-printed or varnished (as are magazine covers, generally). The newer the publication, the fresher the ink and the easier the transfer will be. The thinner the paper, such as newspaper, the less solvent and pressure needed for a transfer. Because you cannot transfer the same image material clearly more than once, copies of the same newspaper or magazine issue or photocopies of your own pictures offer an inexpensive source for multiple transfers. Expensive magazines tend to use finer reproduction methods, resulting in more detailed transfers. Even printed wallpapers can be used. I have started with a black-and-white photograph, which I put on a color copier and reproduced in any or all of the colors available on the copier, but you can also make copies and scans from flat art. The copier’s and digital printer’s color balance and zoom functions add to your aesthetic choices, and you will find that some copiers accommodate sheet sizes up to 11 × 14 in. (28 × 35.5 cm) or larger. Another way to create large images is to grid several small transfers into one larger image.
2. Metal spoon or etching or lithography press.
3. Solvent. Only silkscreen supply stores carry transparent base, and the only brand I know of still available is Naz-Dar Transparent Base number 5530 (http://www.nazdar.com/portals/0/tds/NAZDAR_5500_SV_Screen_Series.pdf). Use it on the back of the image. Pantone and Admarker, to name two companies, make blender pens for their permanent ink felt-tip markers. (A more detailed description of how to use these pens appears in the Tips section.) Oil of wintergreen or of lavender, eucalyptus oil, fabric spot remover (such as Carbona™), lighter fluid, lacquer thinner, acetone, Citra-Solv, and offset blanket wash can be applied, but these are more difficult to work with because they evaporate more quickly. I know that some artists prefer to put these solvents on the front of the picture, but I prefer the more time-consuming method of applying to the back because the stain of the solvent never gets on the receiver.
4. White scrap paper. The paper should be larger than the size of the transfer image. Inexpensive bond paper is excellent.
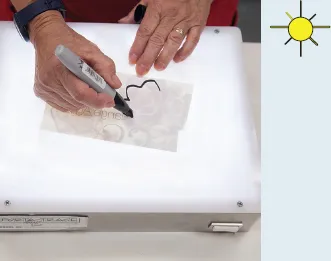
5. Black permanent marker. In my method, I draw the shape of the image onto a frame, which I cut out, as explained in the step-by-steps. I use a light table (see material #11, below).
6. Scissors or stencil knife.
7. Tissues or paper towels. This process can become messy from the ink removed from the non-image side of a magazine page and from stains developed as the solvent spreads.
8. Masking tape or drafting tape. Drafting tape is less sticky than masking tape and will not rip artwork when removed. To make masking tape less sticky, press the tape first onto your clothing a few times before using it.
9. Hard, smooth work surface. Imperfections in your table or desk will show in the transfer and can tear paper receivers when you apply pressure.
10. Plastic bags. For solvent trash, to prevent continued release of solvent vapors into the air you breathe, wrap up and dispose of used materials, preferably outside the rooms where you work and live.
11. Light table or window with daylight. To draw an outline of where to apply the transparent base on the back of the page, you need to hold the image up to a light and to be able to see through from the front to the back. Chapter 4, Creating the Photo-Printmaking Studio, contains directions on making an inexpensive light table.
12. Receiver. Almost any paper will be fine, and I have used transfers extensively in personal journals including smooth graph paper and drawing paper pages and ones that I have hand-bound to include Rives Heavyweight and Arches 88. Papers with bumpy surfaces like traditional cold press and watercolor paper prove difficult. Fabric, such as flat silk and cotton, can be stretched in an embroidery hoop or stapled to chip board or some other smooth surface. On the other hand, bumpy fabric, such as corduroy and many knits, work against your efforts. You can make transfers onto smooth wood. Choose a light color substrate so that the image can be seen.
13. Vapor mask and gloves. All solvents are dangerous, so a respirator and gloves should be worn, no exception, and especially if you are spraying the solvent. See #14, below.
14. Atomizer for spraying the solvents, particularly solvents that need to be applied to the image side of the paper. I would rather apply solvent to the back and wait until liquid solvent seeps through the paper because I have more control that way.
MAKING A SOLVENT TRANSFER
1.2 Preparing the Image
1. Prepare the image
Cut out the magazine picture or other image at least ¼ in. (6.5 mm) larger than the image all around. Working at your light table or against a day-lighted window with the image facing away from you, use a black ink marker on the back side of the image to draw the outline of the area you want transferred. Afterwards, place a piece of plain paper on the back side of the image and retrace the shape marked, using the light table or window to aid in the tracing. Leave lots of room around the shape. This method also allows you to get away from the rectangle,...