Chapter 1
An Introduction to 3D Modeling, Animation, and Rendering with a Focus on Autodesk Maya
With a survey of the Autodesk Maya interface.
In this chapter, we look at the overall workflow of using Autodesk Maya, and the various windows in the Maya interface, along with the purposes of the tools the interface presents to the user. We also consider the basics of working with the media and applications used in basic 3D projects. An overriding goal is to begin focusing on the aspects of the highly complex Maya interface that will enable a beginner to build complete 3D projects.
Three-Dimensional Workflow Overview
Autodesk Maya is arguably the most popular 3D modeling, animation, and rendering application. Its interface is extremely large and complex, but only a small subset of it is needed to create complete 3D single-frame renderings and videos. The central task of this book is to convey that critical core of Maya, that is, to take a deep vertical slice of Maya and present it to the reader. With this slice of Maya, complete projects can be built. This slice also serves as a knowledge platform to which beginners can incrementally add as they master more and more of Maya.
The basic unit of work in this book will be a “scene” file, which includes all the information needed to create a 3D rendering or a 3D video (although Maya itself does not render video). In this book, we will look at the entire 3D workflow, including the creation of vector-based “wireframe” models that make up a 3D scene, the application of materials to the surfaces of these models, the insertion of lights into a 3D scene, the animating of the 3D models in a scene, and the rendering of a scene.
Wireframe Models and Pixel-Based Rendering
When designing applications, we typically make a sharp distinction between the internal logic of the application, that is, what data it uses and what computations it performs on that data, and the interface of the application, that is, how the user accesses the data and the computational capabilities of the program. In 3D modeling and animation, this distinction is particularly critical to keep in mind: the internal data structures used to represent 3D models inside an application like Maya are very different from the way in which we display these 3D models. The models are stored and manipulated internally as 3D vector data structures, but they must be displayed, that is, rendered, on 2D pixel-based displays. This distinction gets to the heart of what 3D modeling and animation is all about: Autodesk Maya allows the user to create scenes with wireframe models in them, prepare them for rendering by adding materials and lights, and then render them as pixel-based images. Thus, the Maya interface supports the process of creating a scene with wireframe models in it and then translating this scene into an extremely different format, namely a series of digital images that can then be turned into videos by a video editor.
Wireframe Models
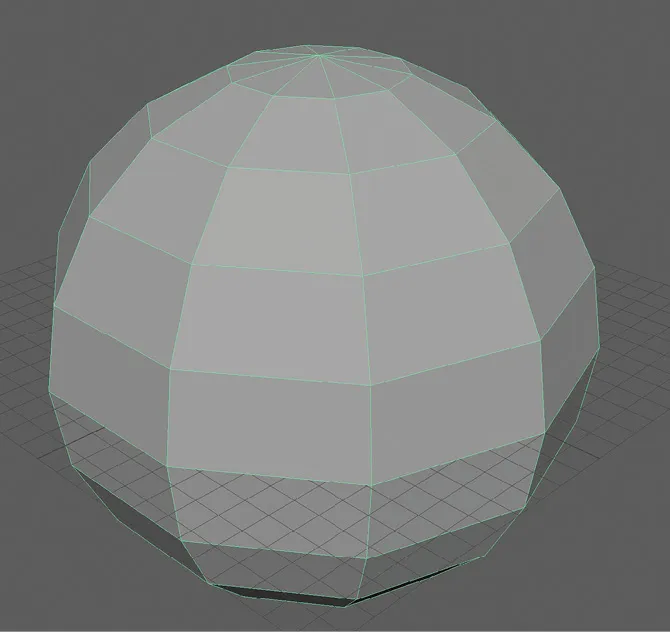
Consider Figure 1.1. This image, taken from the “Viewport” of the main Maya window, is of a polygon sphere. (We’ll worry about what this means soon.) The important point is that this is a 3D structure formed of lines. This is what we call 3D vector graphics. A line is, by mathematical definition, something that exists in 2-space, but a “mesh” (or wireframe) of lines in 3-space forms the “wireframe” of a 3D object. Yet, consider how we view this sphere on a computer screen; our 3D wireframe must be displayed as a 2D grid of pixels. This is true in the Viewport as well as when we “render” the sphere for final display, as in Figure 1.2. Again, this is what rendering is all about: taking a 3D vector geometry model and displaying it as a pixel-based image. Maya must give the user a quick-and-dirty pixel-based rendering in the Viewport so users can see what they are doing as they develop their scene.
Figure 1.1A polygon sphere.
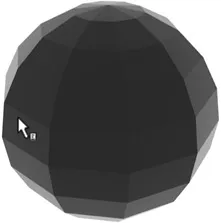
Figure 1.2A material on the sphere.
A Quick Overview of the Modeling and Animation Workflow
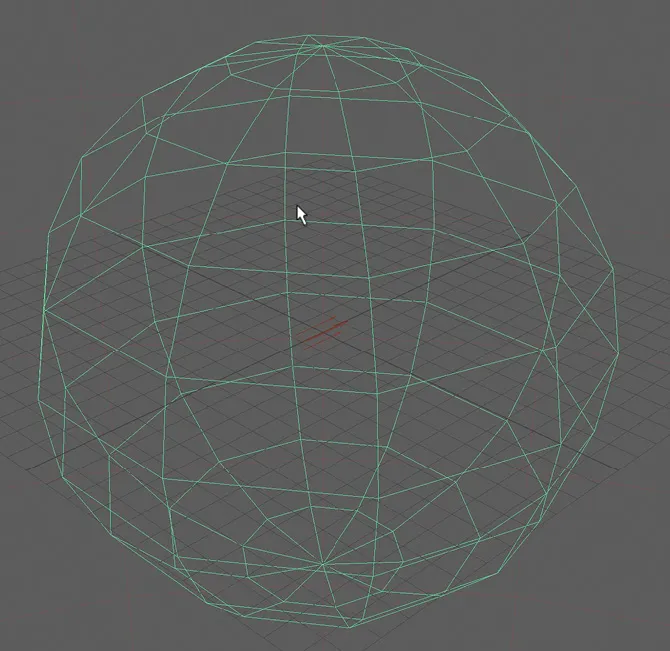
Here’s an overview of a typical 3D workflow within an application like Maya. First comes the modeling phase where the wireframe is created. In our case, the model consists of a wireframe sphere, as in Figure 1.3.
Figure 1.3The wireframe of the sphere.
Second, a “material” is placed on the outer surface of the wireframe. This is a good place to make a critical distinction. This book is about “surface” modeling, that is, the creation, animation, and rendering of 3D models that consist only of wireframes with what can be thought of as infinitely thin outer surfaces. In other words, there is nothing there except the surface; the model has no interior. This is not the kind of modeling we would use if we were designing, say, a nuclear bomb or a computer motherboard. We could design the outward appearance of our nuclear bomb or make a marketing model for our motherboard with Maya, but to actually design either of these, we need to know what is on the inside of our model. Surface modelers like Maya are generally used to create models used for entertainment or visualization (such as in architecture) purposes, not for engineering or product development. Let’s get back to our second stage; this is where we place an infinitely thin material on the outside of our wireframe. The material is a mathematical definition of the way light bounces off and/or refracts through the surface of the model. If we were to render what we see in Figure 1.3, the render would be blank because there is no material on the surface of the model. If we look at Figure 1.2, the wire mesh sphere has had a material placed on it. The material tells the renderer that light will both pass through it and bounce off of it; the material is thus glasslike. It has no color, so the render consists of shades of gray. There is something hidden here in our second phase: lights. The material on the sphere will not render if there isn’t light bouncing off the surface of the object. It is the combination of a material and lights that allows the surface of the object to be seen in the render.
The third phase consists of animating the sphere. We might have it bounce up and down. Or we might change the outer surface of the sphere over time, perhaps by having the surface of the sphere compress inward and then flex back outward. Or, we could do both: the ball could flatten on the bottom when it hits the ground and then go back into a spherical shape when it goes back upward.
Our fourth phase consists of rendering the ball as it bounces up and down. This consists of turning the animation of the ball into a series of pixel-based images that we can display as a video clip. This gets us to our second topic of this chapter: images and video.
This is a good time to introduce some critical pieces of terminology. An “object” is something that is stored inside the underlying Maya database. An object could be something that is directly rendered, like a sphere. It could also be something that affects the appearance of a rendered object; a material is an object. Objects have “attributes,” which are often other objects; a material can serve as an attribute of a sphere object. A “tool” is something that is used to craft Maya models; tools have “settings.” Three important tools are Translate, Rotate, and Scale, and basic settings of these three tools are the orientations of the three axes around which we translate, rotate, or scale objects like a sphere. (The word “translate” is more commonly use...