![]()
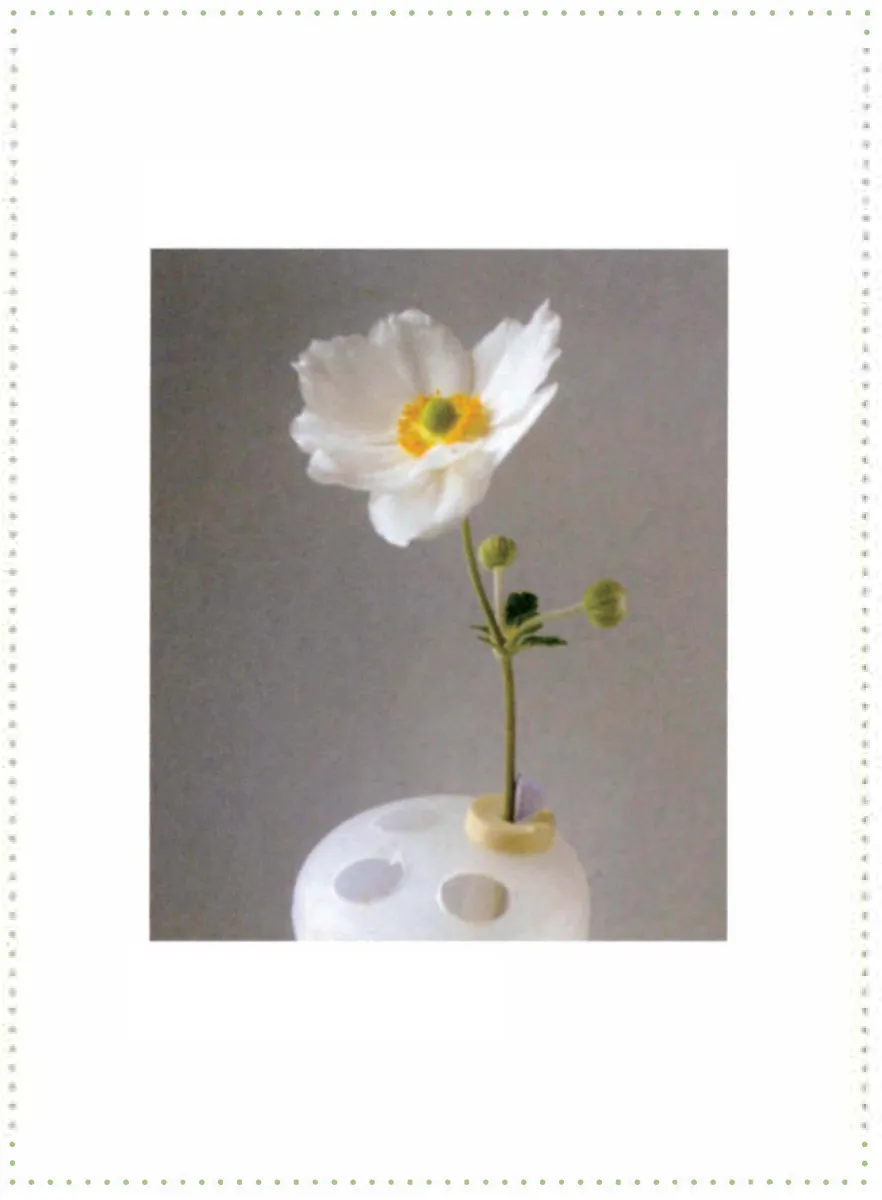
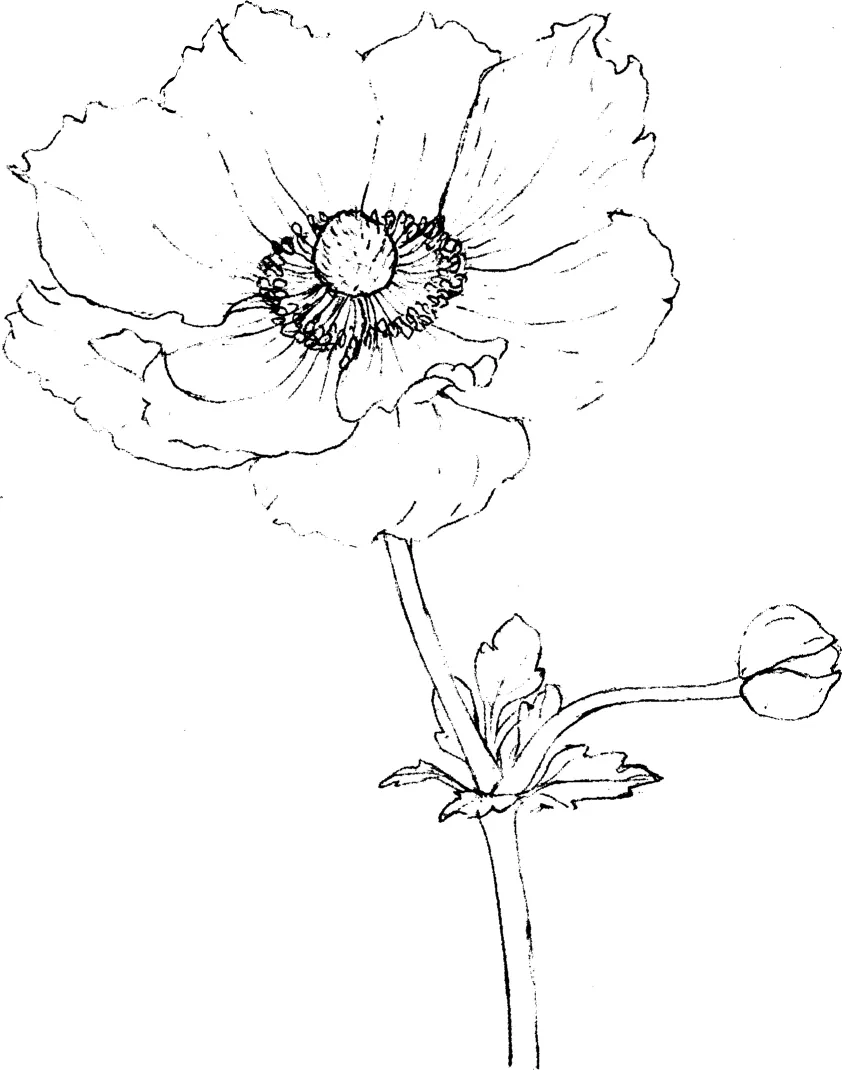
LESSON 1:
Accurate drawing
This will be the basis for all that you will be doing from now on. It may take you two or three hours to complete the drawing, but as you could be spending twenty hours on the painting, it is a wise investment in time.
Of all the things that can be blamed for a poor botanical illustration, a poor, weak or rushed drawing is the only one that can be clearly down to you, and no amount of technical tweaking at the final stages will make up for it. If something is wrong in the early stages, such as a leaf or a flower bending at an impossible angle or attached in an improbable way, correct it, and spend more time on the drawing next time. If the drawing is right, the painting will be so much easier. A well observed study showing an understanding of plant form, habit, shape and structure is the foundation for an accurate and detailed botanical illustration.
Prepare yourself as discussed above: sit comfortably with your sketchbook at a comfortable angle. Have your light source opposite your drawing hand, and try to maintain the same light for the duration of the illustration. Place your subject with care in the light and within arm's reach, and your equipment next to your working hand.
Have an HB pencil in one hand and a scrap of clean paper in the other, and begin. Shut one eye. The subject in front of you is three dimensional, and the paper you are working on is a two-dimensional flat surface. By shutting one eye, you limit your depth perception, enabling you to make a faithful rendition of your subject. Most right-handed people are right-eyed, while left-handed people tend to be left-eyed. To find your dominant eye, cover an object on the other side of the room with your thumb, both eyes open. Then, without moving your thumb, close one eye at a time. The object will appear to move more when seen through one eye than the other. The eye that records least movement is your dominant eye, so from now on the eye that you will be closing is the other one. In other words, pretend that you are looking through a telescope, as you will automatically use your dominant eye.
Now imagine a vertical plate of glass about a centimetre in front of your subject. This will mean that all the measurements you make can only be taken from a vertical and horizontal rotation on this plane. In other words, you are again limiting your depth perception, by not passing through your imagined plate of glass. All measurements will be taken from this plane. Any deviation from it will result in a disproportionate drawing. The aim is to produce an accurate, life-size drawing. All this is actually to make your life easier: if you reduce the size of your subject it becomes smaller and more fiddly; if you enlarge it, you are making more work for yourself; and by keeping to exact measurements you are less likely to make parts of your plant out of proportion, and more able to check and correct, if you do. Besides which, it is a requirement for publication in the Kew Magazine, and is an admirable target. Some people like to use a ruler or a pair of dividers to measure with, but I often note that they have a tendency to measure 'into' the subject, crossing into the plane of glass rather than rotating around it.
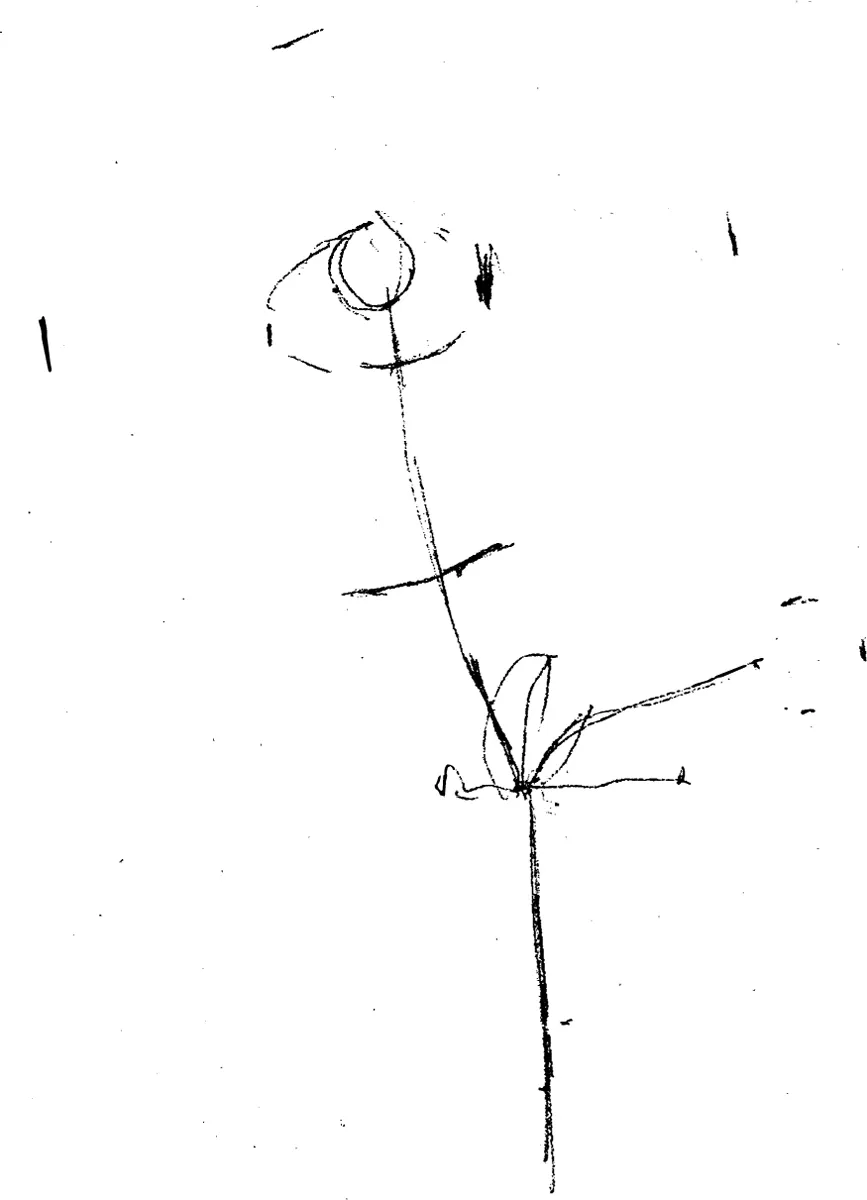
Offer your piece of paper up to your subject on the plane of the imaginary plate of glass, and take a measurement of the overall height of your subject. Do not draw the pot, the surface or anything other than the plant, as your work would then become a still life.
Using your piece of paper, record the height of the plant. Transfer this measurement to your cartridge paper, using an HB pencil, and maintaining the angle at which you took the measurement. Return to the plant and measure its overall width, checking that it fits within the cartridge paper.
Work around the plant, making a series of measurements that gradually become more detailed and informative. Begin to sketch in some lines and angles within this framework, gradually filling in detail, and adding more measurements all the time.
Always consider the central axis of your subject, be it the vein on a leaf, the centre of an apple, or through the middle of a twisting petal. Remember that you are recording a living thing, and bear in mind how it is constructed. Think of the flow of water moving along the stem, stalks, veins, etc., and allow your drawing to flow the same way, so that angles are soft and fluid. Continue taking measurements, cross-referencing them and re-checking the overall size, and remember the spaces that are created between different parts of your plant and their relationships to each other.
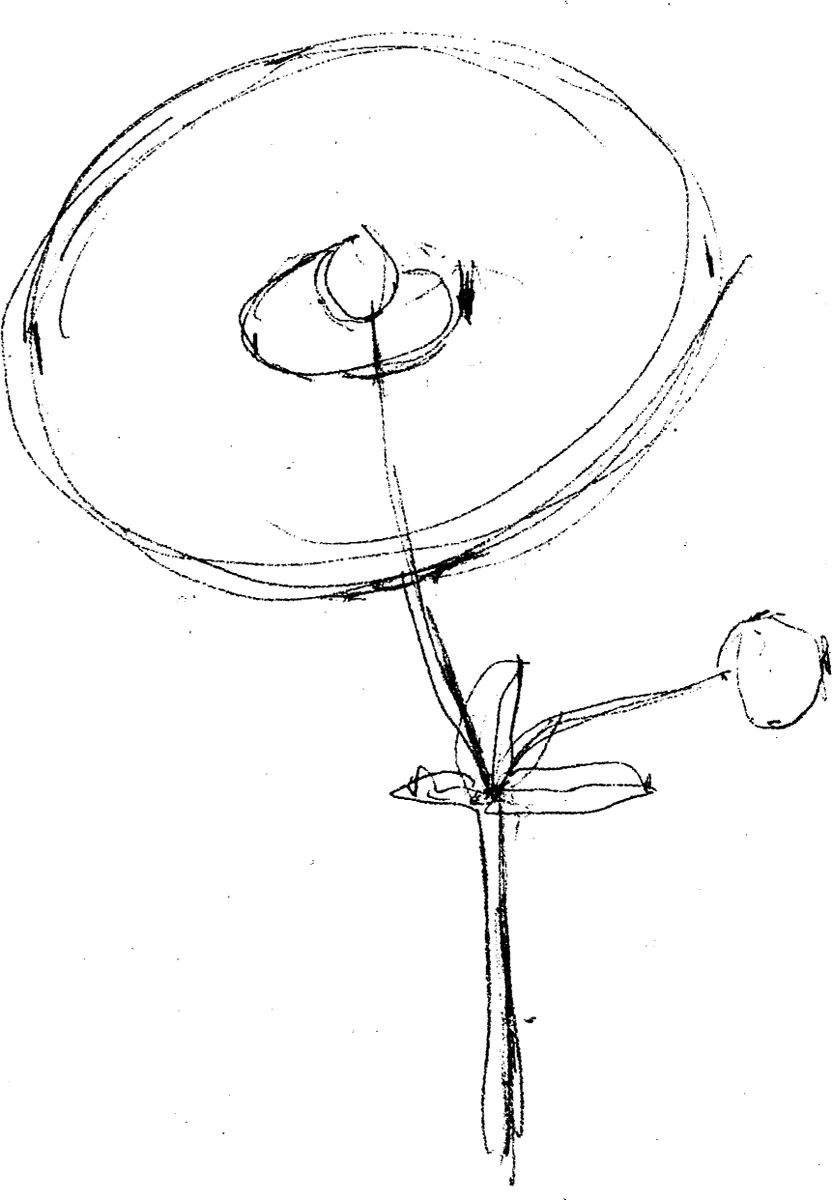
Sit back and view what you have done, checking that it resembles the basics of your subject. Using an HB pencil, make gentle marks that can be easily rubbed out if incorrect, and won't scratch your paper like a harder lead or leave lots of graphite, as a softer pencil would. Now is the time to correct basic mistakes: it is much easier at this stage, when you have only invested a few minutes in your drawing, than later, when you have painstakingly recorded every detail of serrations and veins. Work over the whole drawing, checking for shape, form, pattern and balance, and rubbing out your first, sketchy lines. Think about the form you are recording. If you cannot see how a petal is attached, move so that you can, and then return to your base. By making the lines flow, the structure will be correct, with petals firmly linked and the stem properly attached.
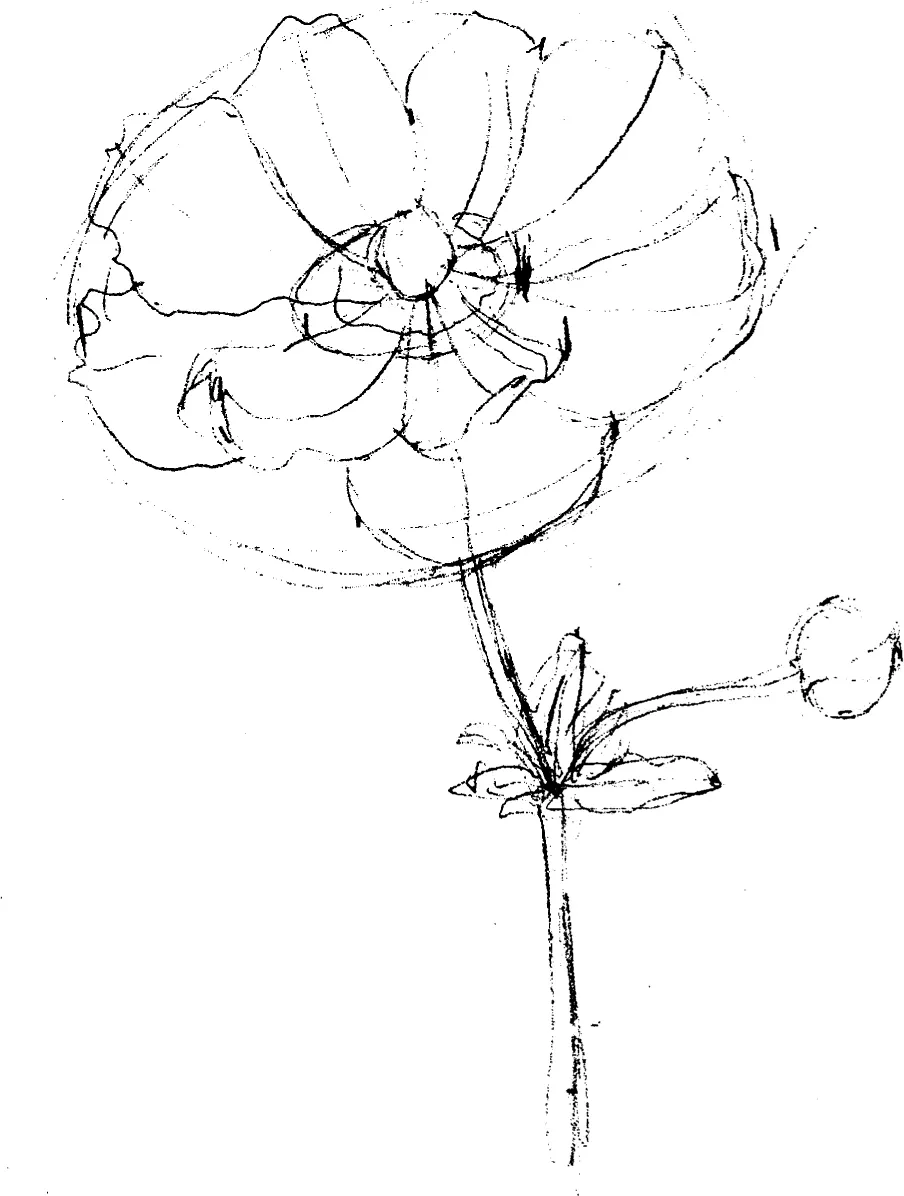
When you are satisfied with your drawing, swap the HB pencil for a fine, sharp 2H pencil. Work over the whole drawing, rubbing out a tiny bit at a time, re-measuring, checking and refining the lines to one 'perfect' line. Keep looking at your subject, observing and recording every detail. Consider where lines come from and go to, in order to create a perfect line drawing of the plant in front of you, with no discrepancy or ambiguity. Recording the intention of the line will greatly improve the quality of your drawing, with the smallest alteration of the movement of a line having great impact on the overall illustration. When working in paint, the accuracy of your drawing will be tested, and you will have enough to concentrate on without having to worry about the underlying drawing, or question its accuracy. Time spent tidying and refining the drawing will reward you tenfold while you are working in watercolour. Make sure your drawing reflects the nature of your subject, so that a daisy is fine and delicate, while a conker could be drawn with a more solid line. The drawing is now ready to be transferred to watercolour paper, inked in for a line drawing, or worked up as a tonal pencil study.
Critical assessment
• If the drawing does not look like the plant, blame the plant: it has probably moved. A living subject will be moving constantly, and a flower will rotate to follow the light source. Try to stay with your original measurements and observations.
• If the drawing is out of proportion, the measurements are probably more accurate in one dimension than the other. Usually, people find the horizontal measurement easier. Go back and re-check, starting with the more accurate measurement and rotating at the same distance.
• If the drawing is heavy and undefined, or smudgy and hard to read, use a harder, sharper pencil. Check the quality of your paper.
• If the stem appears to be detached from the flower head, ensure that your original lines bisect the flower following through from the stem, and that the width of the stem is sufficient. Always allow imagined lines to continue through flowers and leaves to ensure correct attachment.
• If the petals appear to be detached, work out from the centre of the flower to create a radiating system of petals.
![]()
LESSON 2:
A leaf
For this lesson, we will skip most of the drawing to concentrate on identifying and mixing colour, and laying washes to create an accurate watercolour illustration of a leaf.
Sel...