Part I
Knowing Your Camera Inside and Out
Very simply, this part gets you up and running.
Chapter 1 explains all the buttons, bells, and whistles on your Canon EOS 5D Mark III. You learn how to get at and manage the information the camera throws at you; how to work with lenses, batteries, and memory cards; how to adjust the viewfinder so that you can see better through it; and how to clean the camera’s sensor.
Chapter 2 walks you through how to set up the camera, including how to set the date and time, choose a shooting mode and drive mode, and set up image size, quality, and type.
It’s an action-packed way to start the book, I tell ya!
Chapter 1
Surveying the Territory
In This Chapter
Discovering all the buttons, controls, and displays that the 5D Mark III has to offer
Learning how to manage the wealth of information thrown at you
Reviewing how to attach and remove lenses
Zooming in and out, and manually focusing with the lens
Adjusting the viewfinder’s focus to make images sharp and clear
Working with batteries and memory cards
Cleaning the camera’s sensor
The Canon EOS 5D Mark III is a beautiful, powerful camera. Your assignment, should you choose to accept it, is to learn the 5D Mark III inside and out. Master it. Make it part of your arsenal. Whether you are a professional photographer or an enthusiast, the 5D Mark III should be an extension of you and your vision.
Show us the world you see.
The road ahead has some hard work, but it’s an enjoyable and worthwhile trip. This chapter starts you on that road by first showing you the externals of the 5D Mark III. I show you the buttons, dials, and displays and briefly cover their function (with plenty of references to more meaty sections in the book where they are more fully illustrated). You also learn how to insert batteries, attach lenses, work with memory cards, and get a sense of how the 5D Mark III works. All important stuff.
Time to get started!
It’s the Hard-Knocks Life (Not)
I named this section as I did because although you have quite a few controls and displays to learn about, it’s really not the hard knocks life. Please, make me learn about a $3,400 full-frame camera with incredibly high ISO speeds. (ISO speed is a measure of the camera sensor’s sensitivity to light; ISO is short for the International Organization for Standardization, the body, not surprisingly, responsible for standardizing these things.) Male me have to learn to shoot full HD movies with a camera that’s also a workhorse in the hands of actual filmmakers. Yeah, torture me with it, why don’t you!
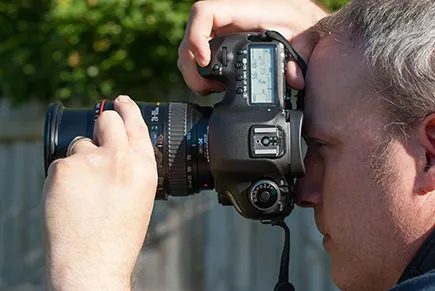
As Figure 1-1 shows, the 5D Mark III is a joy to behold. This section walks you through the controls, displays, and other doodads, with brief descriptions of what they are and how they work. Use this material as a learning tool or as a reference to keep handy.
Figure 1-1: She’s gorgeous, isn’t she?
Full frontal awesomeness
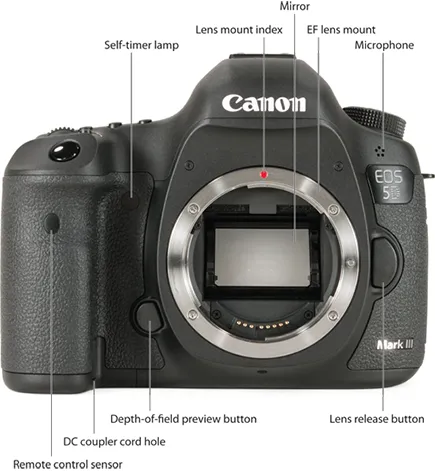
The front of the camera has a few important controls and other gizmos (see Figure 1-2, which was taken with the lens off to make the controls more visible). Practice identifying them so that you don’t have to turn the camera around to see them.
Self-timer lamp
The self-timer lamp works based on how you have set the self-timer:
10-second self-timer: Blinks twice a second (yes, I counted) for the first eight seconds and then remains steady for the remaining two.
2-second self-timer: Lights up but doesn’t blink. Goes off just as the photo is taken.
You can find more on drive modes, including the self-timer, in Chapter 2.
Figure 1-2: The business end of the 5D Mark III.
Remote control sensor
This sensor receives signals from the Canon family of remote controllers (Remote Controller RC-6, RC-5, or RC-1), which are all wireless. Don’t cover or block the sensor if you’re planning on using a wireless remote.
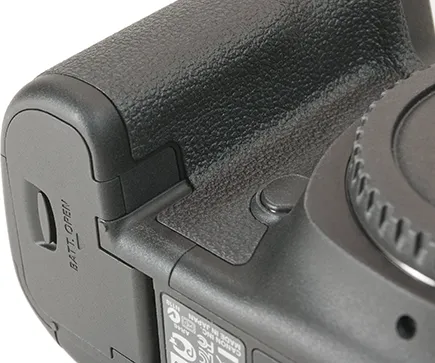
DC coupler cord hole
This little flap (see close-up in Figure 1-3) covers a connection for attaching an optional AC power adapter. When open, the AC adapter power cord snakes through this hole cover and down into the battery compartment, where it connects to a power coupler that replaces the battery in the compartment. Canon sells the AC Adapter Kit ACK-E6 for about $180 (you wanna play with the big boys, you gotta pay with the big boys). The alternating current (AC) that comes out of your wall is converted to direct current (DC) — the same type as the battery — so that it doesn’t blow your camera up. See the camera and adapter manuals for specifics.
Figure 1-3: The DC coupler cord hole routes a cable into the battery compartment.
Depth-of-field preview button
Use the preview button to check the depth of field before taking the photo. (See Chapter 7 for more on depth of field.) You won’t notice much of a difference between your normal view and the preview if the f-number is small (meaning a large aperture).
You ca...