Overview
In this chapter, we will be covering the fundamentals of Java. You will first learn to write and compile your first "Hello World!" program—traditionally the first step to practicing any new language. We will then discuss the differences between the command-line interface (CLI) and Graphical User Interface (GUI), and the relative benefits of both. By the end of this chapter, you will understand the basic concepts behind variables, know how to hold data within them, and, even, how to comment on your own code.
Introduction
When learning how to program in almost any programming language, the first example you will typically test is called "hello world." It is the simplest application possible; the aim is to write the expression "hello world" to whatever user interface the programming environment offers. Executing this program will introduce you to the basics of writing code using the IntelliJ editor, utilizing different types of data to be printed to the user interface and adding comments to your code.
When writing your first program, you will also discover how Java's syntax is constructed and how it relates to other languages such as C or C++. Understanding the syntax is key to starting to read code. You will learn how to distinguish where commands and functions begin and end, how parameters are passed over between blocks of code, and how to leave comments that will help you when revisiting your software in the future.
This chapter covers the basics of writing and testing programs as a first step toward building all the code that you will find in this book.
Writing, Compiling, and Executing Your Hello World Program
In the preface, you saw how to install the IntelliJ development environment. While it is possible to write Java code with literally any text editor, we believe it is good to see how to create applications using state-of-the-art tools such as the aforementioned software package.
However, prior to guiding you step by step through getting your first program to run, we should take a look at the code that will become your first executable running on Java. The following code listing shows the program. Read through it, and we will later revise what each one of the parts is doing:
public class Main {
public static void main (String[] args) {
System.out.println("Hello World!");
}
}
The first line is what we call a class definition. All programs in Java are called classes. A program might consist of several classes. Classes carry inside them everything they need to perform the task they were designed for. For a class to be executable in Java, it must contain a method called main. In this program, you can see how the Main class contains a method called main that will be printing the sentence "Hello World!" to the system's default output.
The code included in the class definition (public class Main) indicates that the class itself is public, which means that it will be accessible from other programs running on your computer. The same happens for the method definition (public static void main(String[] args)). There is, however, a series of other things that require our attention:
- static signifies that there is nothing in the system instantiating the main method. Because of the way the Java Virtual Machine works, the main method needs to be static, or it will not be possible to execute it.
- void indicates that the main method will not be returning anything to any code calling it. Methods could, in fact, send an answer to a piece of code executing it, as we will see later in the book.
- main is the name of the method. You cannot assign this a different name, since it is the method that makes the program executable and needs to be named this way.
- String[] args are the parameters of the main method. Parameters are passed as a list of strings. In other words, the program could take arguments from other parts within your computer and use them as data. In the particular case of the main method, these are strings that could be entered on the command-line interface (CLI) when calling the program.
Exercise 1: Creating Your Hello World Program in Java
IntelliJ provides you with a pre-made "hello world" template. Templates help you to get started faster with your code, as they provide the components you may need to speed up development. Templates can also be used for educational purposes; this is the case when it comes to testing "hello world."
For this first exercise, start with the editor. We will leave some options as they are by default. We will later see how to personalize some of the options to better suit our needs:
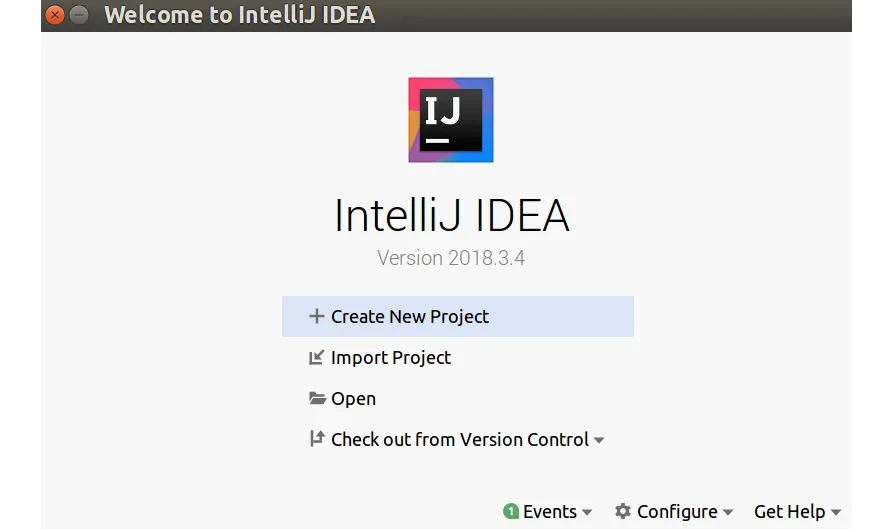
- Open IntelliJ and you will see a window giving you several options. Click on Create New Project. It should be the first option in the list:
Figure 1.1: Creating a new project on IntelliJ IDE
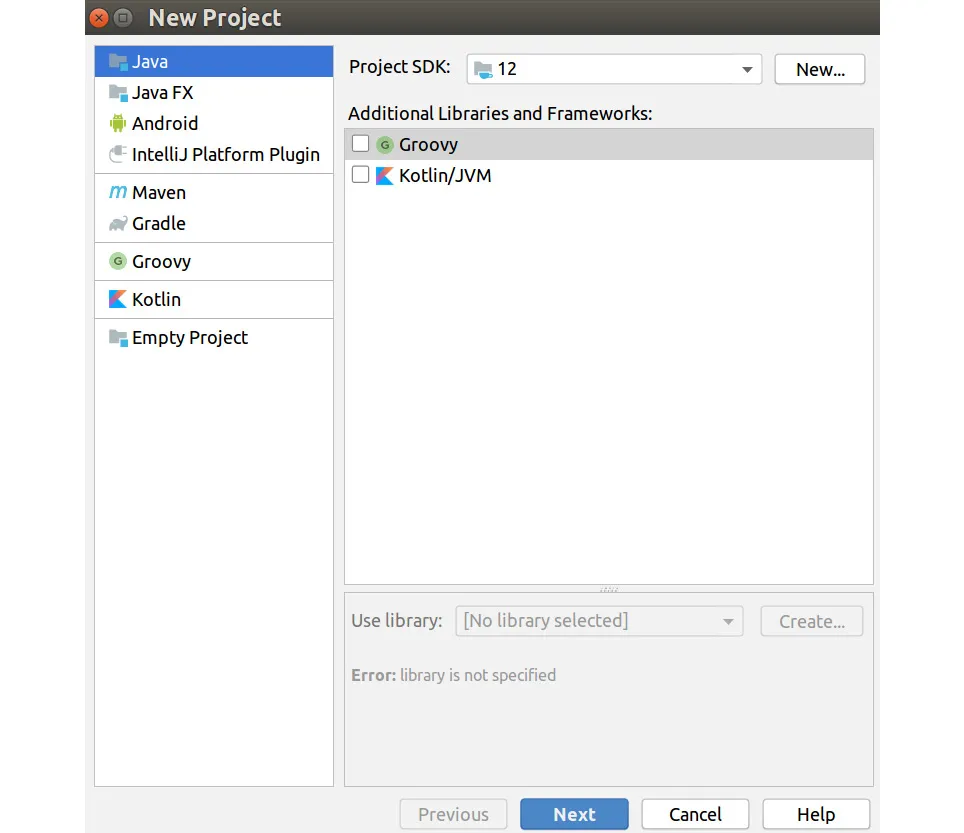
- A new interface should appear. The default options here are meant for creating a Java program, so you just need to click Next:
Figure 1.2: Creating a new Java project
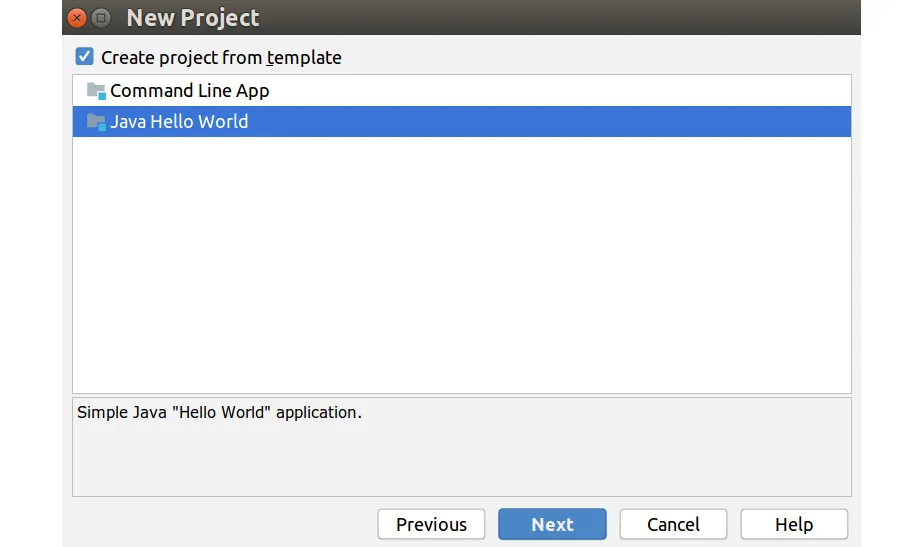
- Check the box to create the project from a template. Click on Java Hello World and then click Next:
Figure 1.3: Create a Java Hello World project from template
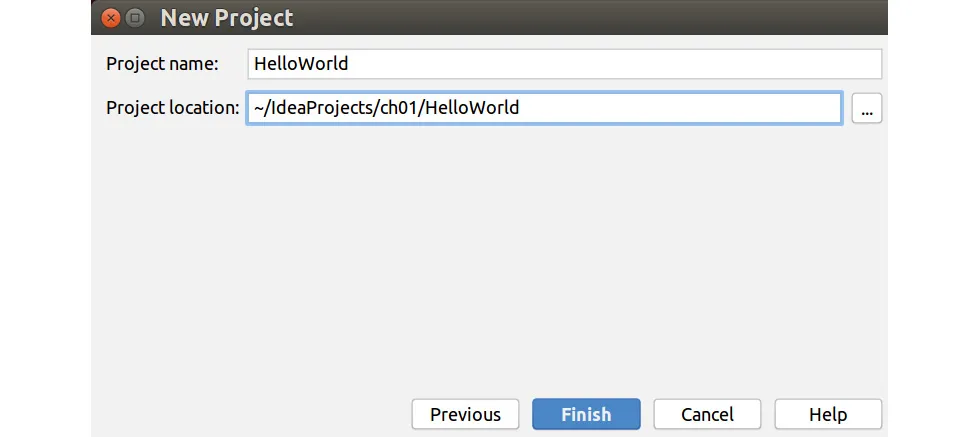
- Name the project chapter01. Then, click Finish:
Figure 1.4: Create a Hello World Project
- As we haven't chosen a folder to store the projects (intentionally), IntelliJ will offer you the possibility to create a default project folder inside your user space. Click OK:
Figure 1.5: Default project folder option on IntelliJ IDE
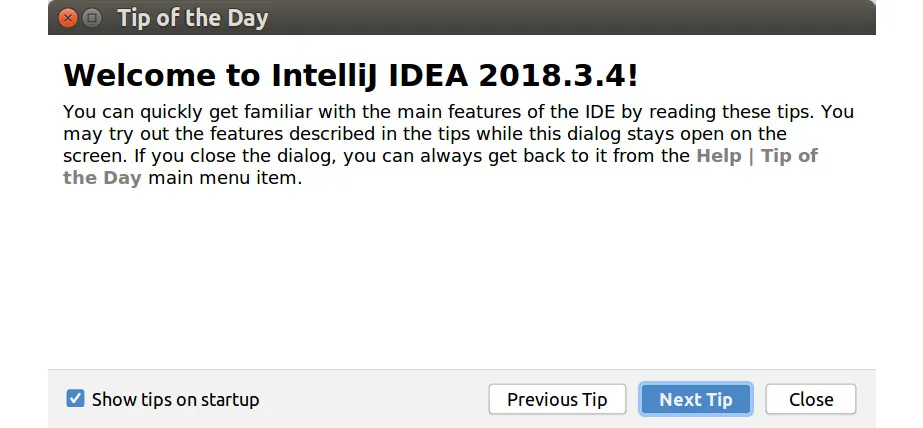
- You will see a popup with tips on how to use the software. If you have never used a development environment of this type before, then this is a good way to get information about how it functions every time IntelliJ boots up. Choose your preferences and then click Close:
Figure 1.6: Tip on how to use the IDE
- IntelliJ reminds you regarding the possibility of using a special tab dedicated to learning more about the environment in relation to programming. Click Got It.
- The editor presents a menu bar, a code navigation bar, a project navigation area, and the actual editor where you can see the code we explained earlier. Now it is time to test it. Click on the Run button (this is the triangle on the right-hand side of the code navigation bar).
Figure 1.7: Execute the program by clicking on the Run button
- When the program runs, a terminal window unfolds at the bottom of IntelliJ. Here, you can see how the software called your JVM, the program's outcome, and a line from the ...