- 160 pages
- English
- ePUB (mobile friendly)
- Available on iOS & Android
eBook - ePub
Trusted by 375,005 students
Access to over 1.5 million titles for a fair monthly price.
Study more efficiently using our study tools.
Information
Print ISBN
9781617691416
A
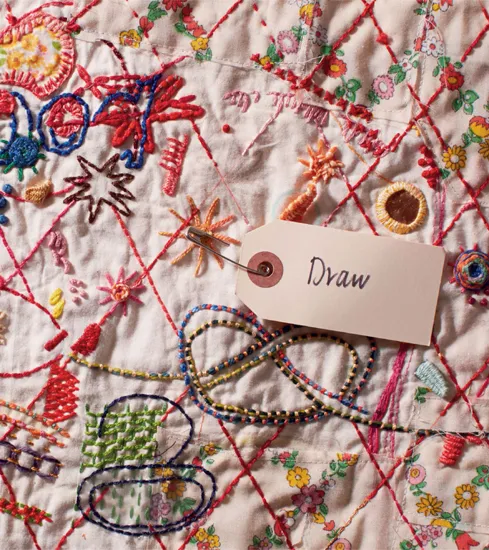
DRAW
Sometimes people ask me what I do for a living, and when I tell them that I am an artist, they ask what kind of art I make. In the past I got a lot of strange looks when I responded simply, “Embroidery.” Now, though, I’ve devised a more thorough reply: I tell them I use embroidery as a way of drawing on fabric, using hand-stitching and machine-stitching as drawing tools and as ways of adding layers of color and texture to my fabric.
Embroidery, like drawing, is a way of making a mark. Just as you use a pencil, you can use a needle and thread to make almost any kind of image appear on your fabric.
In this chapter, I introduce some of my favorite ways of making marks on fabric. Even if you don’t think of yourself as an artist, I hope these simple exercises will help you gain confidence so you can dive in and start creating original designs.
A
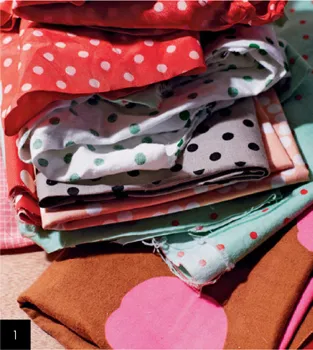
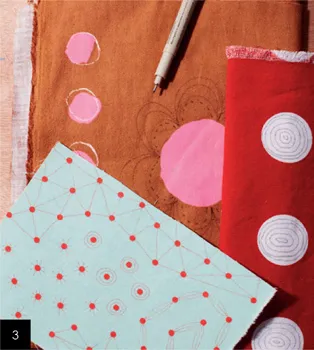
DOODLING INTO POLKA DOTS
Oftentimes, the hardest part about drawing is beginning. A blank piece of paper or fabric can feel intimidating. A lot of people get stuck in a place of hesitation, worrying that their first mark will mess everything up. There are lots of ways to fight this fear, but one way to surpass it is to avoid it altogether by starting with a fabric that is already printed with a design.
MATERIALS
Polka-dot fabric
Micron pen
Color photocopier (or scanner and color printer)
Freezer paper
Iron
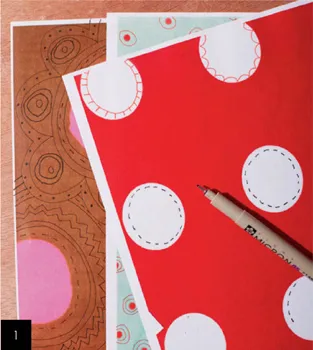
1 Make some color photocopies of your fabric and doodle on them in lots of different ways to figure out what you like. Even the simple act of connecting polka dots can add a huge amount of visual interest to an already lively print.
Here are some ideas to get you started:
• Circle the dots.
• Connect the dots.
• Turn each dot into the center of an asterisk.
• Connect the dots using elongated seed shapes.
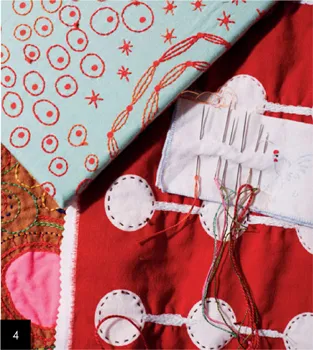
2 Iron your fabric flat from the wrong side, and cut a piece of freezer paper out to cover it. Iron the freezer paper to the wrong side of your fabric and let it cool. This will stiffen the fabric temporarily while you draw on it.
3 Now draw your design directly onto your fabric with the Micron pen.
4 When you’re finished drawing, remove the fabric from the freezer paper by peeling the two apart, and embroider over the markings using the stitches of your choice.
A
LINE DRAWING WITH A RULER
Some people think that using rulers and stencils when drawing is cheating. I beg to differ. These tools make it easy to draw straight lines and are excellent for creating plaids and other patterns. For this technique, I recommend using Micron pens. These fine-point permanent pens make a smooth mark that does not bleed and will not fade over time. The thin marks of the pen are a breeze to cover with hand- or machine-embroidery stitches. However, they are permanent. Use a disappearing ink pen if you prefer.
MATERIALS
Patterned fabric
Micron or thermo-reactive pen
Color photocopier (or scanner and color printer)
Freezer paper
Iron
1 Make some color photocopies of your fabric and use your ruler to doodle on them to figure out what you like. Try spacing your lines out at varying intervals or crisscrossing them to make your own plaids.
2 Prepare the fabric for drawing by ironing it flat and then ironing a piece of freezer paper onto the wrong side. This will keep your fabric from bunching up and wrinkling while you work.
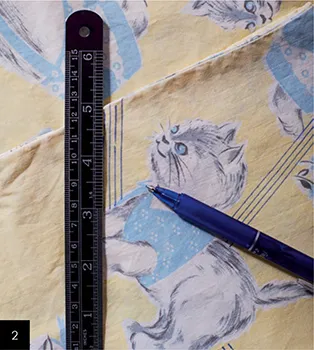
3 Start simply. Using the pen, draw parallel lines. You can use the ruler to make sure the lines are straight and are all the same distance apart, or you can dispense with the ruler and go for a freer, more organic arrangement. If your fabric has a repeating motif, as in the cocker spaniel print shown opposite, use your ruler to make lines to connect them, filling in the empty spaces of the pattern with your own lines.
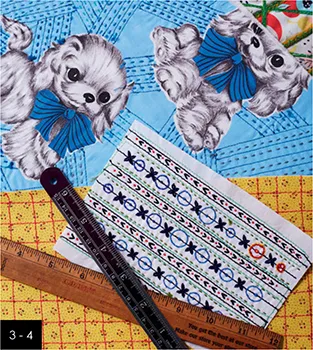
4 Once you’ve got a bunch of lines going in one direction, try adding more in the opposite direction to develop your own plaid.
5 Draw in the shapes of stitches. In addition to drawing straight lines, try adding some simple shapes like polka dots and petals, which can stand in for an area that you could cover in French knots or lazy daisy stitches. To get an idea of what shapes might work, look at the stitch diagrams in Chapter 2, or check out the myriad stitch diagrams available in vintage embroidery books at the library.
6 When you’ve finished drawing, remove the fabric from the freezer paper by peeling the two apart, and begin stitching over the markings using the stitches of your choice.
A
CONTOUR LINE DRAWING
Contour line drawing is meant to train your hand to connect with your eye automatically and spontaneously, without you consciously thinking about the process of drawing. Your eye traces the contour of an object and your hand simultaneously records that shape. Usually, this exercise is timed. Experiment to discover the length of time that suits you best, then push yourself to go a little faster and also a little slower. This is a great exercise for people who tend to be precise but want to loosen up a bit. Remember, everyone’s contour line drawings look wild and sloppy. That’s the point!
MATERIALS
Still-life subject to draw
Sketchbook or scrap paper
Pencil
Timer
Smooth cotton fabric (I used chambray), ironed
Old bedsheet or similar fabric, for practicing (if desired)
Thermo-reactive pen, such as Frixion or Fanthom
Freezer paper
Medium-weight embroidery stabilizer
Machine-embroidery hoop (8" [20cm] or larger)
Sewing machine
Sewing thread
Cone thread stand (optional)
1 Set up your still-life subject against a plain white background, such as a wall or a piece of white paper. Contour line drawings work best ...
Table of contents
- Cover
- Title Page
- TABLE OF CONTENTS
- Dedication
- INTRODUCTION
- GET READY
- STITCH!
- TRACE
- DRAW
- LAYER
- FINISH
- RESOURCES
- ACKNOWLEDGMENTS
- ABOUT THE AUTHOR
- Copyright Page