Chapter 1
The Workspace
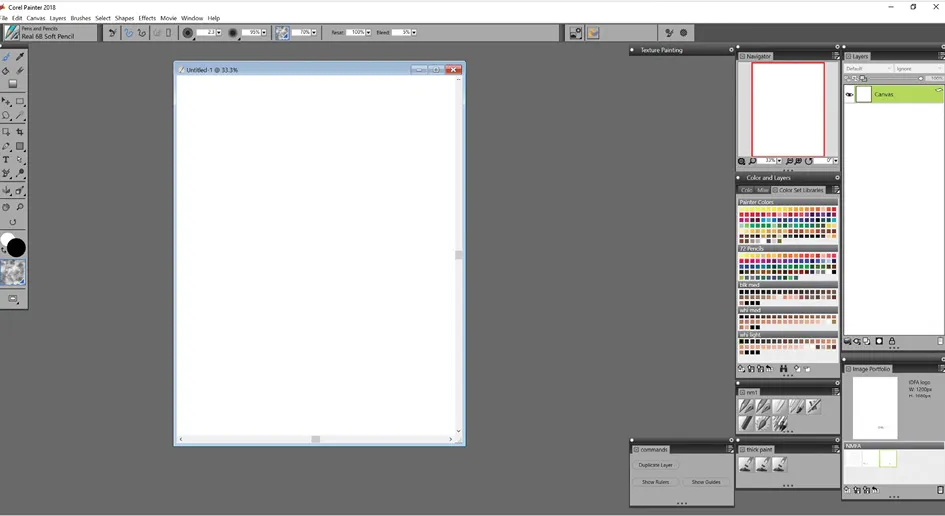
There’s a lot going on with this workspace, especially if you’re not familiar with graphics programs (Figure 1.1). You can completely customize your workspace to have the setup you use most often in a layout that works best for you, and remove the sections that you don’t use at all. Further along in this manual, you may notice my workspace layout changing. Sometimes I have different palettes open and other times I close them. I’ll show you how to move the pieces around so that you can find a layout that you like as well.
Figure 1.1Painter workspace.
We’ll take this in sections. First, the menu bar across the top (Figure 1.2).
Figure 1.2Menu bar, brush selector, and property bar.
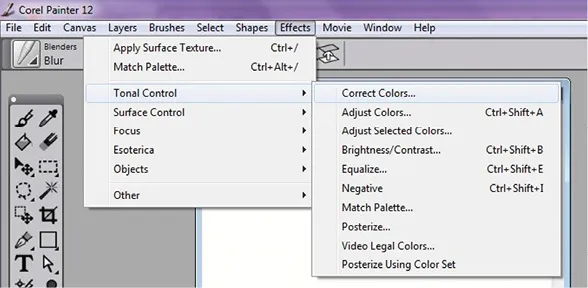
This should be familiar from just about every other program you use on the computer: The file menu, edit menu, and others. Each choice has a pulldown menu that is revealed when you click on the name. Some of the menus have additional submenus under them as well. Figure 1.3 shows the “Effects” pulldown menu with submenus.
Figure 1.3Effects menu and submenu.
In this case, I touched the Effects menu with my stylus, then moved my curser down to the Tonal Control choice, which opened up a submenu to the side for different choices in which to make tonal controls. Any choice on the menu list that has a black arrow on the right has a submenu of additional controls.
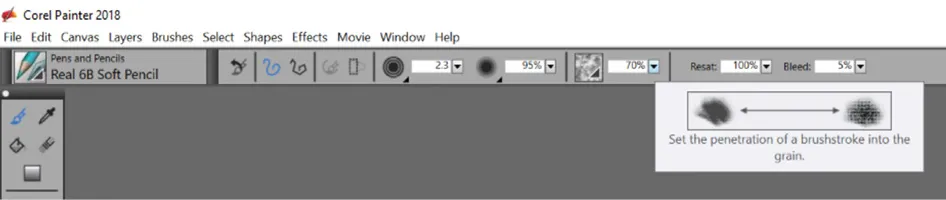
Underneath the familiar main menu is a bar divided into two parts: The brush selector bar on the left followed by a dark gray divider and the property bar on the right (Figure 1.4).
Figure 1.4Brush selector and property bar with grain hint displayed.
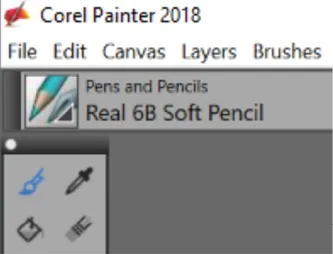
The brush selector bar shows you which brush you have chosen to work with. Figure 1.4 shows the current brush category is “Pens and Pencils,” and the brush variant is a “Real 6B Soft Pencil.”
The property bar gives you ways to make changes to that tool to customize it for the task you are working on. For example, for a basic pencil you can change the size of the stroke, the opacity, the grain, the resaturation, and the bleed. When you hover over a selection, Painter displays hints that tells you what the adjustment does. There is also a choice to reset the tool if you’ve made changes to it that you don’t like. Different tools give you different options to customize.
If you go to Window > Advanced Brush Controls, an entirely new window opens up where you can customize any brush in incredible detail: Dab profile, spacing, angle, well, size, color expression, color variability, stroke jitter. You can completely change the brush from the original settings, and then save that custom brush in a palette. To close the Advanced Brush Control window, go to Window menu and click on Advanced Brush Controls again.
On the left side of the workspace is the toolbox (Figure 1.5). You have brushes and selection tools as well as shape, photo, symmetry, composition, and navigation tools. For our purposes, we will mainly use the brushes and selection tools. The bottom portion of the toolbox shows what colors you are working with and the paper grain.
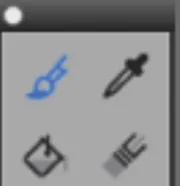
The tool that is currently selected is highlighted in blue, as in Figure 1.6.
Figure 1.6Close-up of selected tool.
In this example, the brush tool is selected. Brushes include many items that an artist wouldn’t consider a brush. Think of them as tools to lay down color and move it around. When you highlight the brush tool, the current brush is shown in Figure 1.7, in the toolbox in the brush selector bar.
Figure 1.7Current brush in brush selector bar.
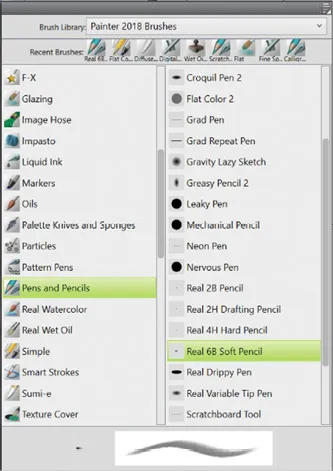
This selection shows the current brush is a real 6B pencil. Note that the picture of the pencils in the brush selector bar has a small black triangle in the bottom right corner. Click on this triangle to open up a menu of all the different brushes under that type (Figure 1.8).
Figure 1.8Pens and Pencils menu.
This is the menu that is revealed for Pens and Pencils. Note the image of the Pen and Pencils on the left side of the menu highlighted ...