On 22 January 1879 a powerful British column invading Zululand was decisively defeated beneath a hill called Isandlwana. Later on the same day, 4, 000 Zulus attacked a garrison of no more than 100 British troops at the mission station at Rorke's Drift, only a few miles from Isandlwana. The British held out against all reasonable expectations, eventually beating off their attackers and winning eleven Victoria Crosses between them. The location where these battles were fought have been places of pilgrimage ever since. Rorke's Drift & Isandlwana 1879 is a guide to assist the visitor to the two sites with details on how to get there and where to stay. It also discusses the background to the Anglo-Zulu War, the two battles themselves and seeks to make sense of the events that happened there.
- 192 pages
- English
- ePUB (mobile friendly)
- Available on iOS & Android
eBook - ePub
About this book
Trusted by 375,005 students
Access to over 1.5 million titles for a fair monthly price.
Study more efficiently using our study tools.
Information
The Fight at Rorke’s Drift
While the victorious Zulus were looting the camp at Isandlwana and the traumatised survivors were fleeing across the border back into Natal, the second engagement of this remarkable day was about to begin. The commander of the post at Rorke’s Drift, Major Spalding, had gone on an errand to Helpmekaar, leaving the engineer officer, Lieutenant John Chard, in temporary command with the famous advice that ‘of course nothing will happen’. The distant sound of firing probably reached Rorke’s Drift soon after midday, but caused no particular concern. Lord Chelmsford fully intended to bring on an engagement somewhere on the road to Ulundi, and there was no reason at all to suppose that he would lose it. But the Reverend Otto Witt (the missionary whose post this had been before it was requisitioned), Surgeon Reynolds and Chaplain George Smith decided to climb Shiyane – the hill overlooking the post, better known at the time as the Oskarberg – in the hope of seeing what was happening. From the summit the hill of Isandlwana is clearly visible, but most of the fighting was taking place on the far side of the hill, so the three men could not tell which way the battle was going. Soon, however, they could see through a spyglass several bodies of African troops moving in their direction. At first they took them for friendly NNC, until they realised that their mounted officers were also black – obviously not something that one would expect in the British Army of the period. They hurried back to alert Chard, but the alarm had already been raised by a stream of mounted fugitives who were riding past on their way to Helpmekaar.
An attack on Rorke’s Drift had not been part of the original Zulu plan. In fact Cetshwayo, still hoping to present himself as the innocent victim of British aggression, is generally thought to have forbidden his commanders to cross into Natal. But thanks to the speed and completeness of the victory at Isandlwana, the four regiments that had formed the loins had not seen action. They were all veterans, mostly older married men, and were unhappy at missing the opportunity while the youngsters from rival regiments enjoyed all the plunder and glory. Many of their best officers were not present, so their de facto commander was Cetshwayo’s half-brother Prince Dabulamanzi, who, although he held no official command, was considered to be the senior officer by virtue of his royal blood. How and why the decision was made is not clear, but Dabulamanzi either ordered an advance on Rorke’s Drift, or allowed himself to be persuaded by his impetuous troops. Nevertheless, there may have been more to the move than a desire to ‘wash their spears’: the post was well known to the Zulus, and no doubt their scouts had confirmed that it was a major British supply base. The Zulus had no arrangements of their own for resupply and the prospect of capturing the stores of gunpowder and above all food must have been enticing. Dabulamanzi’s force crossed the Buffalo River at two points between Rorke’s and Sothondose’s Drifts, the iNdluyengwe regiment downstream and the others further west, under the eastern slopes of Shiyane. Neither crossing point was visible from the mission station and the attackers did not come into view until about 4.30 p.m., when they approached around the southern flank of the hill.
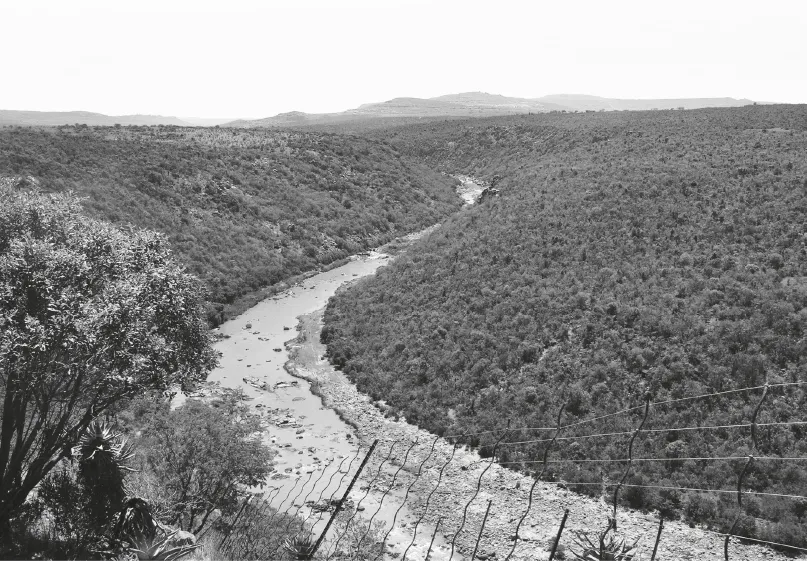
The view up the Buffalo River in the direction of Rorke’s Drift from the Fugitives’ Drift road. Somewhere on this stretch Dabulamanzi’s regiments crossed the river from the Zulu bank on the right into Natal on their way to attack Rorke’s Drift. Again, the country was probably far less densely wooded then.
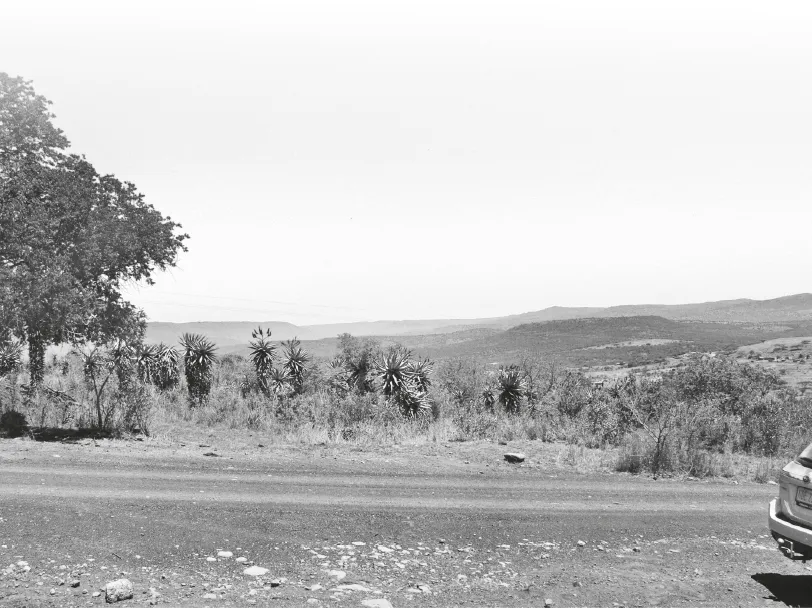
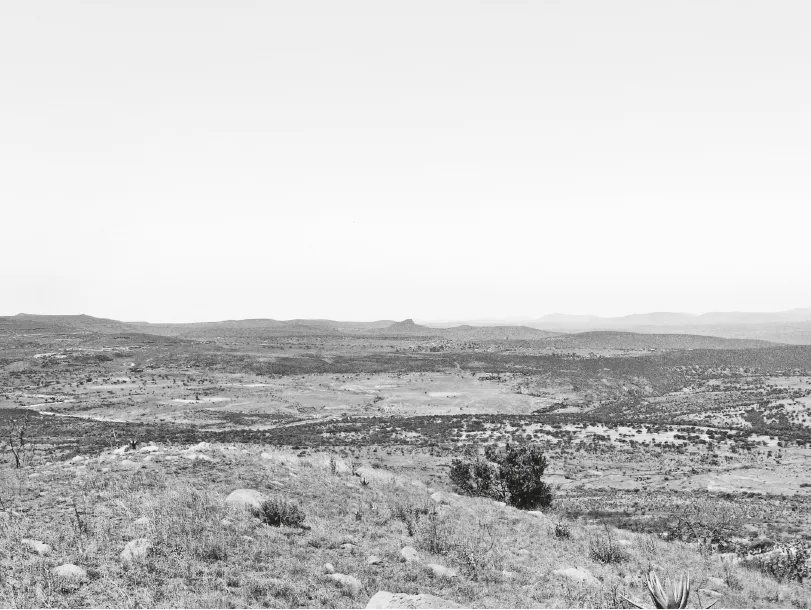
Looking in the opposite direction from the Fugitives’ Drift road just outside the entrance to the lodge property. The heights where Helpmekaar stands can be seen in the distance. Note the ubiquitous aloe bushes, a very characteristic feature of the landscape in this region.
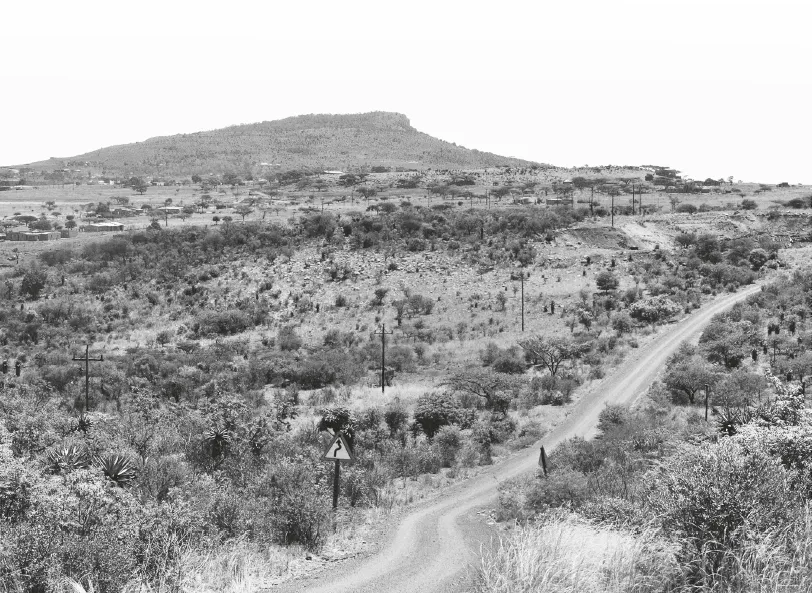
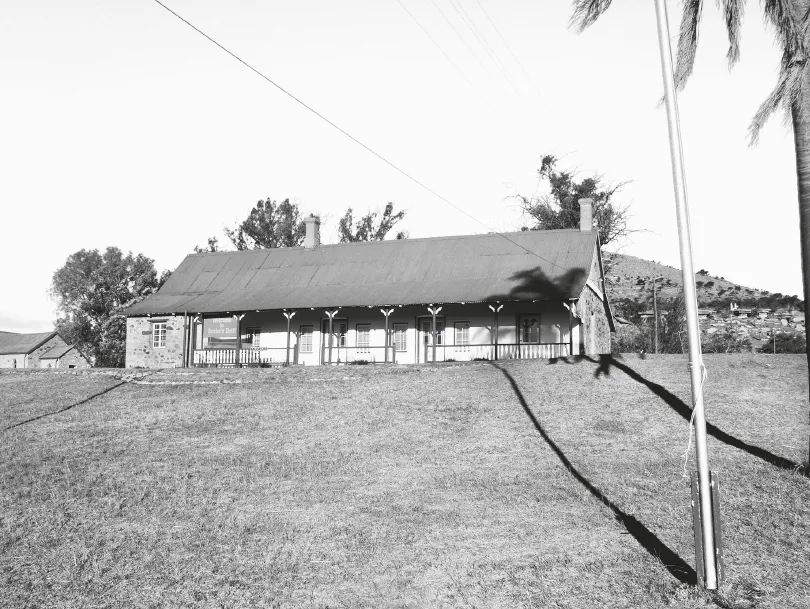
View from the same spot along the road towards Rorke’s Drift, with Shiyane Hill on the horizon.
Looking eastwards from the summit of Shiyane. Isandlwana Hill is about 15km away in the distance. This is the view that Otto Witt and his companions would have had in the early afternoon of 22 January.
By then Chard and Lieutenant Gonville Bromhead, who was in command of B Company of the 2nd/24th Foot but was junior to Chard in the Army List, had had about 90 minutes to make their preparations. The Reverend Smith claimed that Chard and Bromhead’s first thought was to load the sick from the hospital into the two wagons they had with them and evacuate the post, though it has been pointed out that Smith would probably have still been scrambling down from Shiyane when this debate took place, so he may not have witnessed it himself. According to this account it was an officer of the Commissariat and Transport Corps, Acting Assistant Commissary Dalton, who pointed out that to retreat would be suicide, as British regulars could not hope to outrun Zulus even without the heavily laden wagons, and that their only hope – admittedly a faint one – was to stand their ground. Luckily Chard, as a Royal Engineer, had the skills to create the best possible defence in the time available. Ideally the scrub surrounding the post would have been removed to provide a better field of fire, but there was no time to do this. What he could do was collect mealie bags to make barricades and link the buildings into a continuous defensive position. At this point there were still around 300 NNC troops at the post, and with their help the work of moving the heavy bags was completed just in time. The two wagons were also built into the perimeter between the hospital and the storehouse on the side facing Shiyane. On the opposite side a ‘rock step’ averaging about 5ft high made a useful natural obstacle, which was enhanced by lining mealie bags along the top of it. At the last moment it was decided to build an additional wall of biscuit boxes across the yard that separated the hospital and the storeroom, running from the north-western corner of the latter to meet the mealie bag barricade on the other side. This was a precaution to allow the men to regroup and make a last stand in case the perimeter was breached. Some accounts describe both Chard and Bromhead as rather dull, uninspiring officers, but it is not clear how much of this was motivated by jealousy among those who had not had their opportunity for glory. Their most often quoted critic was Lord Chelmsford’s eventual replacement, Sir Garnet Wolseley, who was unrelentingly critical of just about everything that had happened in Zululand before he took over, and hardly ever had a good word to say for anyone. It would not be surprising either if the events of that day had affected their characters, at least temporarily – post-traumatic stress was not recognised at the time and few contemporaries would have made allowance for its effects. But both officers must have acted decisively to have put the defences in place in such a short time, and the arrangements seem to have met with the approval of most of the military men who have visited the site since.
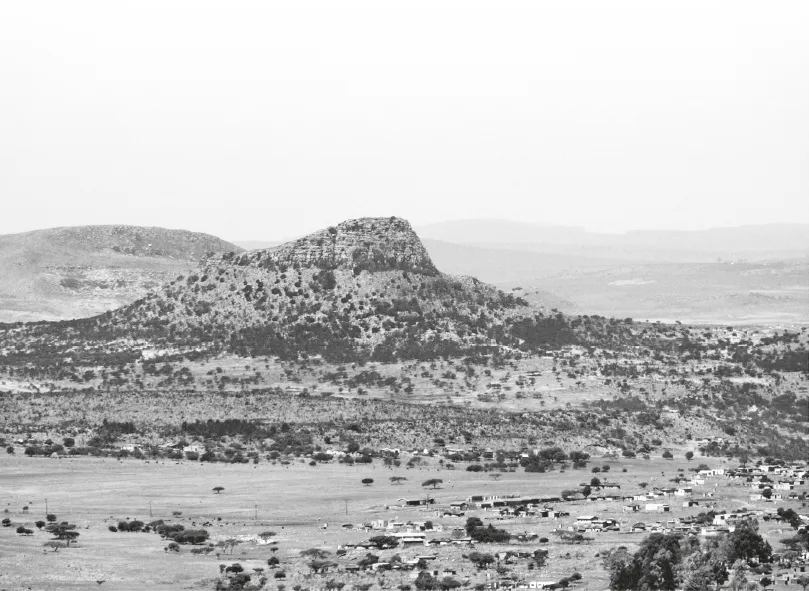
The same view at approximately thirty times magnification. The site of the British camp is hidden behind the shoulder of the hill and the nek at centre right. It is obvious that even with a telescope it would not have been possible to see much of the action at Isandlwana from a vantage point on Shiyane.
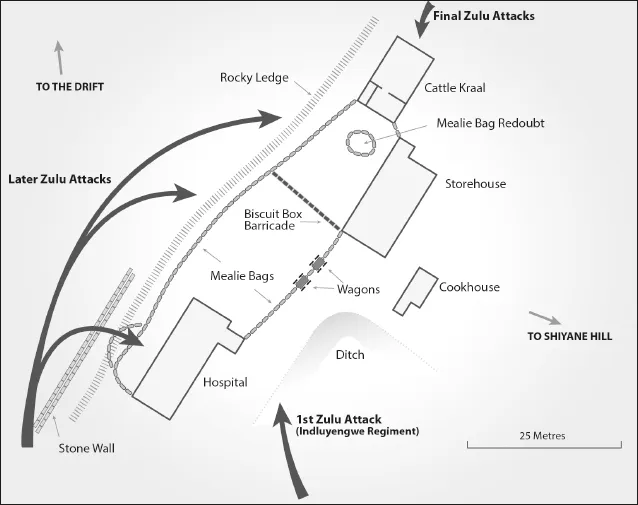
Sketch map of Rorke’s Drift as it was in January 1879, showing the improvised defensive lines erected on the afternoon of 22 January.
The battle began as soon as the iNdluyengwe regiment appeared around the corner of Shiyane. By this time B Company and a few individuals from other units were the only defenders left. Half an hour before the attack a party of around 100 Natal Native Horse fleeing from Isandlwana had arrived at the post, led by Lieutenant Henderson, who at first offered his help. Chard asked them to ride back and try to delay the enemy advance, which initially they did, but as soon as they made contact with the enemy they retired on the post, and instead of dismounting to join the garrison, kept riding in the direction of Helpmekaar. Their officer explained to Chard that his men were too demoralised by what they had seen at Isandlwana to obey his orders, but instead of staying to fight he disappeared after them. The NNC troops at the post then climbed over the barricade and followed suit; Bromhead’s men were so angry that they actually shot dead one of the white NNC NCOs as he ran. To be fair to the NNC, they had already made a major contribution to the defence by helping to build the mealie bag walls. They were poorly armed, and could hardly have been usefully deployed on the front line even if they had stayed. At least one of the survivors of Isandlwana did apparently stay to help; this was a Lieutenant Adendorff of the NNC, who was one of the first to bring the news of the disaster and subsequently took up a position inside the storehouse from which, according to Chard, he fought throughout the battle. Unfortunately for him this inconspicuous position meant that most of his comrades failed to notice him, and he was later arrested as a deserter from Isandlwana. With Chard’s report to vouch for him he escaped a court martial, but the question of whether he was actually at the battle or not remains controversial.
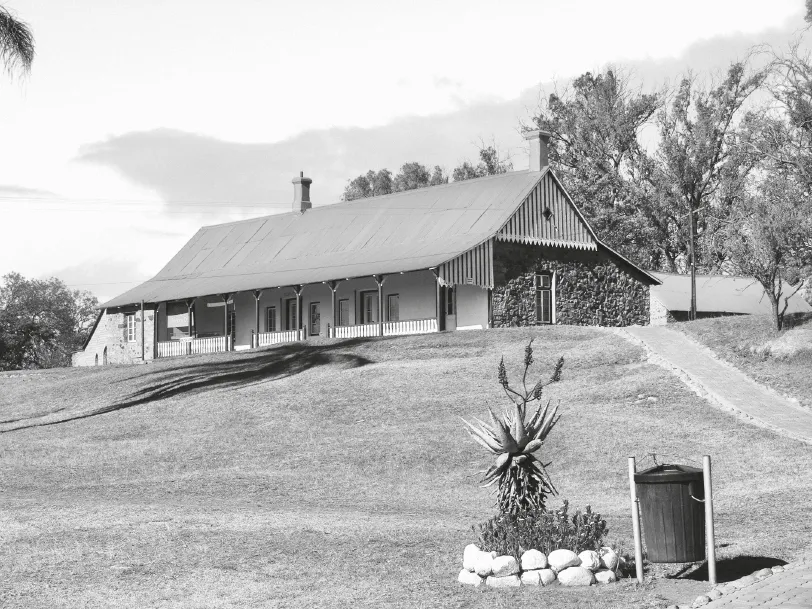
Approaching the museum building from the entrance to the Rorke’s Drift site. The building post-dates the battle, but was built on the same foundations and gives a fairly good idea of what the original hospital would have looked like. The original hospital roof was of thatch, later replaced by iron sheets. The site is roughly rectangular, with the long axis running from the entrance at the south-western end to the cattle kraal at the north-east. The defensive positions on this side of the building – usually referred to as the ‘front’ of the post – faced north-westwards towards where the car park is now. The works on the opposite side – the ‘rear’ – looked towards Shiyane Hill. Of course, during the battle the post was entirely surrounded, and the terms ‘front’ and ‘rear’ were largely irrelevant.
A view of the museum from the front, the direction from which the main Zulu attack was launched. Under the green sign at far left is a 3D model of the Isandlwana–Rorke’s Drift area, which is very helpful for understanding the nature of the terrain and its influence on the campaign. Note the steepness of the slope in front of the building. The lines of stones in the grass indicate the location of the British mealie bag defences. An additional semicircular line of defence – just visible in the picture at centre left – was added on the forward slope to strengthen what Lieutenant Chard regarded as the weakest sector of the defences. This did not prevent the Zulus from reaching the building – then the hospital – and eventually capturing it.
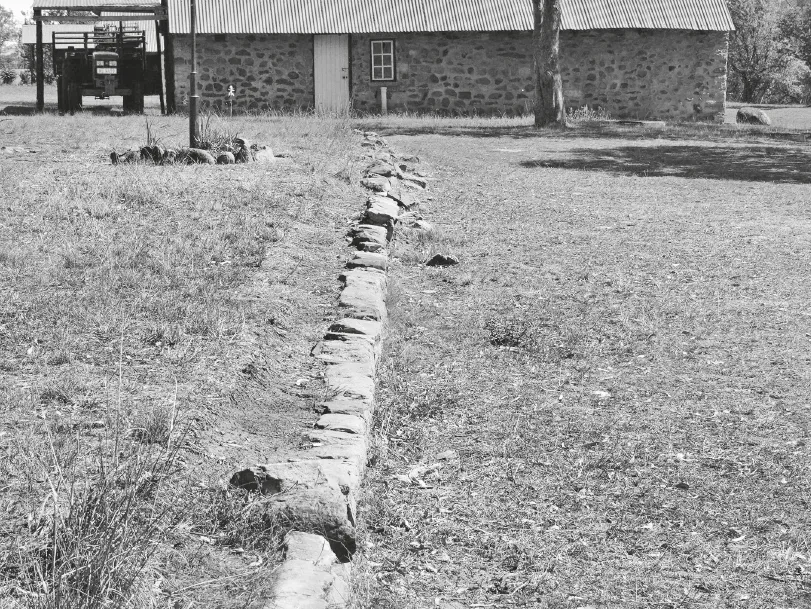
Rows of stones in the grass have been placed to show the location of the defensive works erected during the battle at Rorke’s Drift.
Looking from the ‘rear’ of the post, facing away from Shiyane Hill towards the site where the storehouse stood in 1879. To the right of the church the cattle kraal is hidden by the sloping ground. The British perimeter on this side ran in a fairly straight line from the storehouse to the hospital, out of shot to the left. Two wagons were incorporated into this section, making it higher and more substantial than the rest of the mealie bag line. It was against this sector that the initial attack by the iNdluyengwe Regiment was made.
As soon as the men of the iNdluyengwe regiment came within sight of the mission station they deployed into line and launched an attack against the sector of the defences nearest to them, between the two buildings. Today much of the ground over which they attacked has been built up and it is difficult to gain an impression of what it was like, but they had to cross about 500 yards of mainly open ground, exposed to a crossfire from the buildings and the men on the barricade as they got closer. Fifty yards from the perimeter the front ranks of the iNdluyengwe went to ground and returned fire from the cover of a ditch, but th...
Table of contents
- Cover
- Title
- Copyright
- Contents
- One: Introduction and Acknowledgements
- Two: Background to the Anglo-Zulu War
- Three: The Opposing Armies
- Four: The Campaign Begins
- Five: The Battle of Isandlwana
- Six: The Fight at Rorke’s Drift
- Seven: The Aftermath
- Eight: Getting There
- Nine: A Visit to Isandlwana
- Ten: A Visit to Rorke’s Drift
- Recommended Reading
- Bibliography
Frequently asked questions
Yes, you can cancel anytime from the Subscription tab in your account settings on the Perlego website. Your subscription will stay active until the end of your current billing period. Learn how to cancel your subscription
No, books cannot be downloaded as external files, such as PDFs, for use outside of Perlego. However, you can download books within the Perlego app for offline reading on mobile or tablet. Learn how to download books offline
Perlego offers two plans: Essential and Complete
- Essential is ideal for learners and professionals who enjoy exploring a wide range of subjects. Access the Essential Library with 800,000+ trusted titles and best-sellers across business, personal growth, and the humanities. Includes unlimited reading time and Standard Read Aloud voice.
- Complete: Perfect for advanced learners and researchers needing full, unrestricted access. Unlock 1.5M+ books across hundreds of subjects, including academic and specialized titles. The Complete Plan also includes advanced features like Premium Read Aloud and Research Assistant.
We are an online textbook subscription service, where you can get access to an entire online library for less than the price of a single book per month. With over 1.5 million books across 990+ topics, we’ve got you covered! Learn about our mission
Look out for the read-aloud symbol on your next book to see if you can listen to it. The read-aloud tool reads text aloud for you, highlighting the text as it is being read. You can pause it, speed it up and slow it down. Learn more about Read Aloud
Yes! You can use the Perlego app on both iOS and Android devices to read anytime, anywhere — even offline. Perfect for commutes or when you’re on the go.
Please note we cannot support devices running on iOS 13 and Android 7 or earlier. Learn more about using the app
Please note we cannot support devices running on iOS 13 and Android 7 or earlier. Learn more about using the app
Yes, you can access Rorke's Drift and Isandlwana 1879 by Chris Peers in PDF and/or ePUB format, as well as other popular books in History & Military & Maritime History. We have over 1.5 million books available in our catalogue for you to explore.