Chapter 1
Introduction
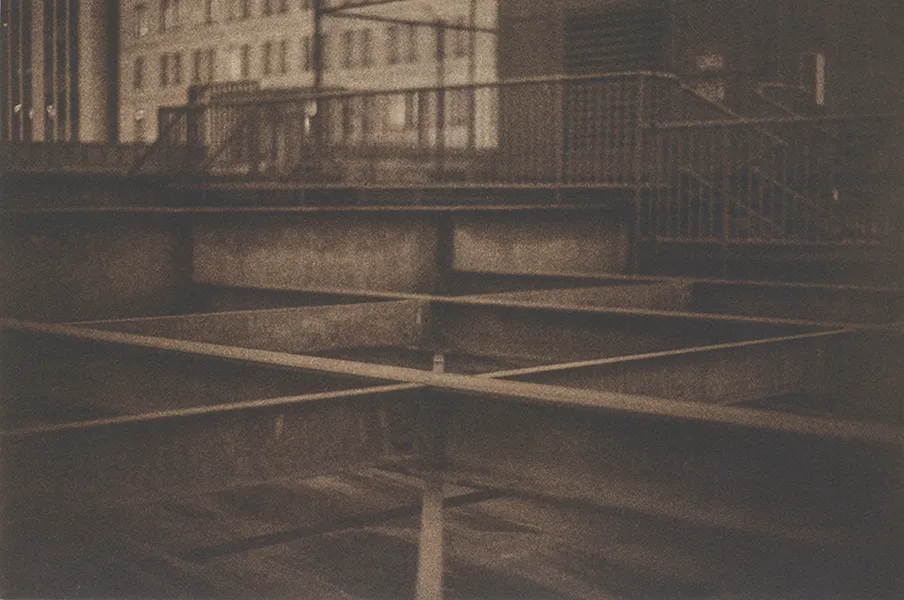
Figure 1.0 Nox Noctis 13 © Clay Harmon 2010, Houston, Texas, 10″ × 15″, polymer photogravure with 50/50 soft black/burnt sienna ink on Rives BFK.
Beginnings
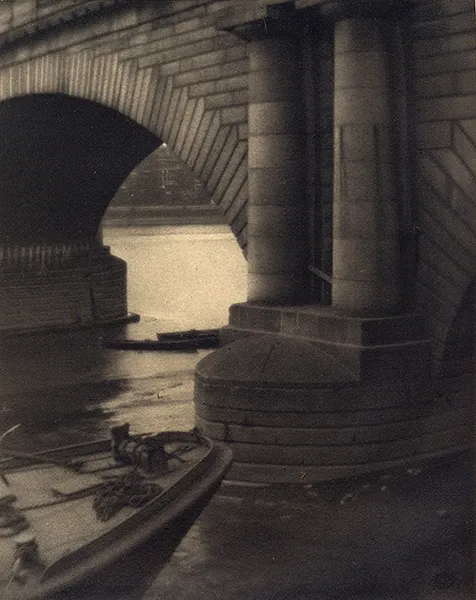
This whole thing started when I was poking through a print drawer at a photo gallery one day during my lunch hour. I saw a rich black corner of a small print enclosed in a plastic sleeve. I pulled this print out and it turned out to be an original Alvin Langdon Coburn photogravure that had been removed from a Camera Work edition.
Figure 1.1 Alvin Langdon Coburn photogravure from Camera Work 1911.
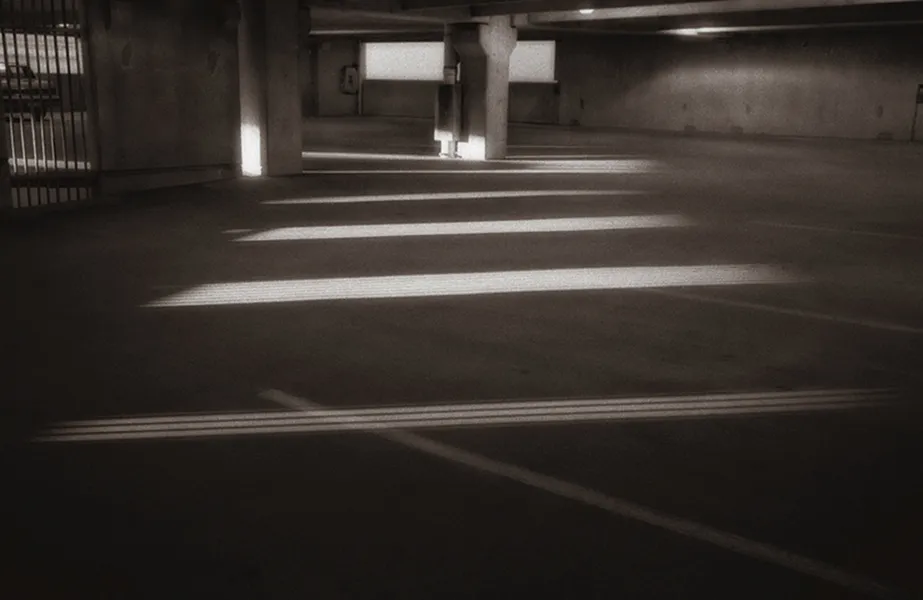
Figure 1.2 Nox Noctis # 20 © Clay Harmon 2005. One of my photos from a continuing series on parking garages. They are everywhere and often creepy but have great light. Someone has to do it.
I was immediately struck with the rich, velvety quality of the darker tonal values in the print and the impression that the image was actually in the paper instead of on the paper. I liked it and I wanted to learn how to make prints that looked like that. At that same time, I had begun a photo series that seemed to scream for that same feel in the prints. I was successfully producing prints for that series in palladium but thought I would like to see what it would look like if printed as a photogravure. I had seen some of the wonderful printing done by Russell Dodd of Working Theory Press and contacted him to do a small edition of one of the prints in this series. The results were stunning, and I was officially smitten by this printing technique.
I then embarked on the bumpy road of learning how to do photogravure. My first destination was learning the traditional Talbot-Klic copper photogravure process in a week-long workshop taught by Jon Goodman. This workshop ignited my aesthetic appreciation for making a print using simply ink and paper. The real eye-opening experience for me came when I attempted to print my first plate. The print was awful. But then Jon, without even uttering, “Watch this,” took that plate and made a beautiful print. And that was when I knew there was more to this printing process than I had expected.
Clearly, making a good plate was the beginning, and not the end of the process, and I spent the last two days of the workshop just printing the plates I had made and getting coached by a generous man with over 35 years of printing experience.
The process of making an etched copper photogravure plate was long and painstaking, and printing was much more involved than I expected, but the final product turned out to be everything I wanted it to be.
I came home excited and ready to jump into the copper process. I made a few successful plates and then a temporary move took me away from my darkroom/workroom setup that I had used for years. The new space was much more limited in what I was able to do, in particular in regard to my ability to dispose of some of the etching mordant (ferric chloride) necessary for etching copperplates.
I knew there were a few people using the polymer photogravure process successfully. I searched the internet and found some online assistance in places, in particular Jon Lybrook’s Intaglio Editions website. I corresponded with artists I knew were using the process and got tips from everyone that was willing to help. I acquired every book I could find on the process, and even one of them written in Danish. But what I discovered was a lot of conflicting advice out there on how you can do the process. Part of this is because the expectations on what the polymer photogravure process can offer the artist are highly subjective, but the nerd/scientist in me was uneasy with the idea that there could be multiple ‘right’ answers for the same basic problem.
I bought a bundle of plates and started experimenting—trying to figure out how to make this process work. Many days I would feel like I was taking one step forward and two steps back. The crappy plate pile in my trash can grew.
I made a lot of mistakes. I still make a lot of mistakes. But I finally feel that I understand how these polymer plates can be made to print continuous-tone intaglio images. The purpose of this book is to give you the benefit of all my mistakes and blind alleys I have taken. I feel confident that if you follow the instructions, you will be able to produce a nice-looking polymer photogravure print with far less wasted material than I produced.
Quite possibly, you will also find that this printing process speaks to you on a very fundamental aesthetic level and you will be able to combine this process with your creative vision and produce something new and wonderful.
Attributes of the Process
Sometimes when I describe the process steps of making polymer photogravure prints to people, they look at me curiously and ask, “Why would you want to do that?” Here are my reasons.
First, I like the way that photogravure prints look. Unlike inkjet prints, and unlike just about any other photographic process I have used, the image of a photogravure is composed of ink that has literally been jammed into the paper through the pressure of the rollers on the press. The black values have a velvety richness that is most akin to that seen in mezzotints. Further, the pressure of the rollers also smooths the rough surface of paper and produces a bitingly sharp and detailed image. The sharpness attainable in a photogravure is only rivaled by that of a silver-gelatin print or inkjet print.
Second, photogravure is an archival process. Ink has been around for far longer than any photographic process, and the final photogravure print has only two components—the paper and the ink. As long as the paper is of reasonably high quality, there should not be any worries over the long-term degradation of the image. Most inks are archival as well. While some of the pigments used in color inks can fade over time, almost all traditional black inks have a high degree of permanence. Unlike silver gelatin, there are no worries about chemical changes that can degrade the image over the years.
I like the fact that photogravure is truly a hands-on process for making prints. There is far more involved than simply pressing the print command in your image editing program. The consistent inking and wiping of a print is not a skill that is picked up immediately. It takes time to master, and new subtleties of techniques continue to appear as your abilities solidify.
Photogravure gives me a host of options on how my finished print will look. I can make a print with any color ink I choose. I have always preferred warm-toned prints. With traditional chemically based photographic processes, the color of the print is constrained by the chemistry inherent in the process. Whole books have been written on the subject of toning silver-gelatin prints. With photogravure, the ink can be made any color you desire, simply by mixing it and looking at it. I can make a print on any type of material that can handle the pressure of the press. Unlike, say, platinum-palladium printing, for example, whose chemistry constrains the number of suitable papers, the printing part of this process is purely mechanical. The pressure of the press roller is pushing ink into the fibers. There are no chemical compatibility worries.
Photogravure can be an economical way to print. When multiple prints are being made, the cost of each additional print is very low. An incremental print is merely the cost of the paper plus a small amount of ink.
And, finally, the process is compatible with the exploratory and provisional investigation of my photographic interests. That is a fancy way of saying that it provides me with the type of prints I want without becoming so burdensome to my workflow that it is only appropriate for a highly redacted subset of what I am working on. I make plenty of plates and prints of images I am not yet sure about. The cost of the process is low enough and the time commitment reasonable enough that I can easily print a half-dozen new images in a day. This sort of workflow efficiency is simply not achievable with traditional copper photogravure.
A Brief Description of Traditional Ink-on-Paper Printing Methods
Relief printing, planographic printing, and intaglio printing are the three traditional ways that ink can be applied to a piece of paper. Now, of course, we have inkjet printing as well, which is closest in its surface characteristics to planographic printing. Each technique has its own unique visual signature, as well as its own inherent expressive limitations in conveying visual information.
Relief Printing
The first technique is relief printing, and its name perfectly describes how ink is transferred to paper. In relief printing, a flat block of metal, wood, linoleum, or polymer is carved or etched so that the areas where ink is not wanted in the final print sit below the surface of the block. The areas that carry the ink stand in relief of the final removed areas of the block. The process of creating a block to be printed is a reduction process, so named because the high parts of the block are carved or etched away (reduced, in other words) to reveal the areas where ink is not needed. An unetched or uncarved block will print as a solid color. As parts of the block are removed, tone and texture is created as uninked areas begin to emerge from the solid color. Relief printing is a binary, on/off method. Where the plate is high, ink is applied, where it is low, no ink is applied. Tone is approximated by varying the spacing of these fine lines and cross-hatching which remain in relief and transfer the ink to the paper.
The relief print is made by inking the finished block with an ink roller called a brayer. The paper is then put in contact with the inked block and pressure is applied to transfer the ink to the paper. This pressure can be applied with as simple a method as rubbing the back side of the paper with a roller (or a specialized hand tool called a baren) or a mechanical roller system can be used such as is seen with letterpress printing.
Planographic Printing
The second technique is planographic printing. The most recognizable planographic technique is lithography. Unlike relief printing, lithographic printing relies on the fact that oil and water don’t like to mix. The classical method for lithographic printing is accomplished by drawing on a very smooth piece of dense limestone with a waxy crayon to create what will be the printed image. The stone is then treated to a mild acid that alters the stone differentially where the wax is present and where it is not.
Lithography works as a printing technique because water will not adhere to the parts of the stone that have been waxed. But it does adhere to the unwaxed areas. A stone with an image drawn in a wax crayon is dampened with water, and then inked. The ink will only adhere to the areas where there is no water to repel it: in other words, only in the areas that were drawn with a crayon and altered with the acid treatment.
Modern photolithography techniques use the same principle of electrochemical repulsion between ink and water. Instead of a stone, however, a grained piece of metal is covered in a photosensitive emulsion and then exposed using a negative. The clear areas of the negative allow ultraviolet (UV) light to harden the emulsion while the dark areas are protected. The unhardened areas of the emulsion are washed away, leaving the hardened areas with the emulsion layer. Water sticks to the unhardened and textured areas and is repelled from the areas of the plate where the emulsion remains. It is then inked, and once again, the ink will only adhere to the parts of the plate where the emulsion is present. The other areas are wet and repel the ink.
Intaglio Printing
The final type of printing method, and the one employed in all photogravure processes, is called intaglio printing. This particular printing method is one where the ink that is eventually applied to the paper is present in the recesses in the printing plate. The depth of these recesses determines the amount ...