The way sound travels through air (and other substances) and reflects around an environment is generally approximated and fudged in various ways for games. This is in part due to the unrealistic dimensions in game worlds, but mostly due to the massive resources it would take to calculate it accurately in real time.
Reverb: Advanced
We looked briefly at adding {Reverb Effects} to areas of the game through the [Audio Volumes] in Chapter 01, but we will now return to look at a few more advanced techniques.
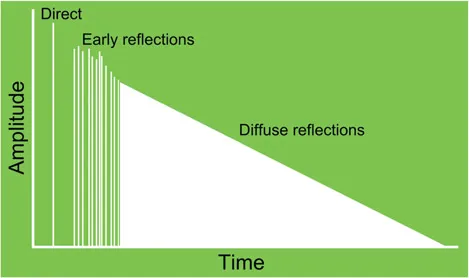
Sound emanates from a source and travels through matter in waves. Your ears either receive the sound directly (dry) or indirectly (wet) after it has bounced off the various materials it comes into contact with. We refer to this as reverb (short for reverberation). Typically you’d receive both these types of sound, and this gives you important audio-based information about the environment you are in. Non-technical people might sometimes use the word echo to describe this effect, but unlike an echo, which is a distinct separate version of the sound being reflected, reverberation is a much more dense collection of reflections.
You can create and edit your own reverb effects in the
Content Browser. If there don’t happen to be any preset
{Reverb Effects} in your game already, you can change the
View Options (bottom right) of the
Content Browser to
Show Engine Content and see some in the engine content folder you can use (enabling this will also allow you to choose these
{Reverb Effects} from the drop down menu of the
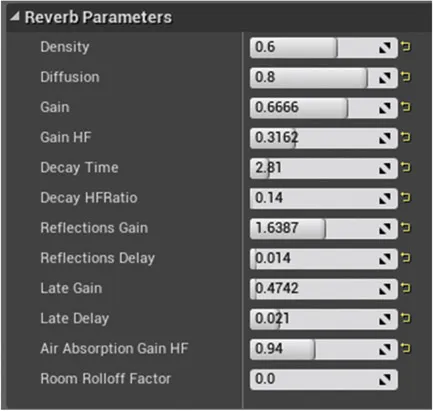
[Audio Volume]). Double-click the
{Reverb Effect} to open the
Generic Asset Editor and see the pop-up tips for an explanation of each parameter.
Constructing a reverb that sounds good is a hugely complex task in itself. Trying to model the way sound would actually reflect around a specific space in a game would require a significant amount of computing power, so in most games we usually use these kinds of precalculated reverb effects to apply to sounds in a given area.
As you’ll remember from Chapter 01, reverb is controlled using [AudioVolume]s in the game level (you can also apply reverb as an effect via the <Activate Reverb Effect> node in the [Level Blueprint]). With these you can set the reverb effect, the volume of the reverb effect, and the amount of time it takes to be applied once the player enters the [AudioVolume]. This fade time is important since a sudden change between the reverb of two rooms can sound unnatural and jarring.
Nested Reverbs and Prioritization
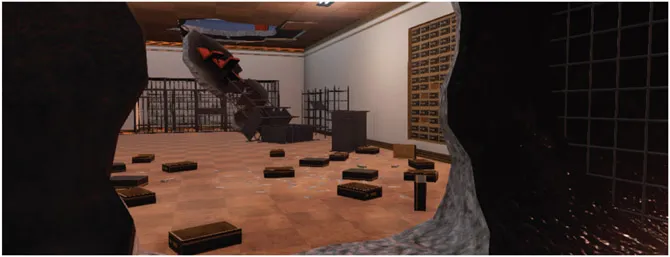
When you start the level you are in the *Sewer Pipe* (Bookmark 1), which leads into a basement room in a bank. From here you can make your way up across the debris into the bank lobby.
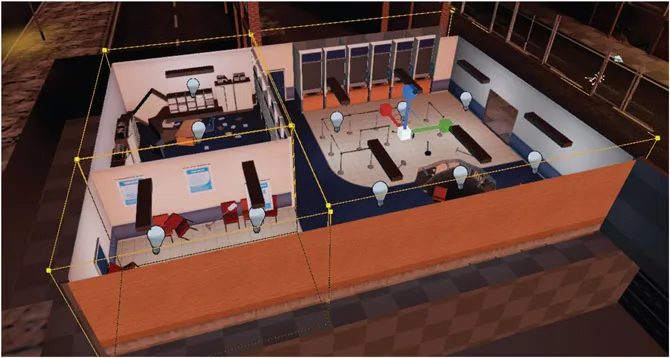
The sewer pipe and basement room are straightforward [AudioVolume] s, but the lobby and back room in the lobby are more problematic. We could make a series of volumes, but the main L-shape of the lobby is clearly the same space, and the crossover of the [AudioVolume]s could lead to some audio artifacts.
Sometimes it is useful to enter geometry edit mode (Shift + 5, and then Shift + 1 to return to place mode) to see the [AudioVolume]s more clearly, and we can use this mode to edit the shape of the volumes to better suit the environment (hold shift while selecting a corner of the volume to move it). You can also choose different brush shapes as starting point...