From the perfect glossy pages of a magazine to the larger-than-life images floating on a billboard in the sky, image retouching has become a key component of today's digital photography world. Sometimes controversial but widely accepted, and even expected, excellent retouching skills are crucial to finding success in the field of digital imaging. As you work through the clear step-by-step instructions in the book using the images provided on the downloadable resources, you'll learn how to do real retouching jobs from start to finish, including each and every technical step along the way. You'll also get behind the scenes advice for talking to clients and establishing a workflow to ensure that your client gets the results they are looking for. If you're a student or aspiring professional just starting out in the world of retouching, the information found in this book can help you find work in the advertising/retouching industry. If you're already a working photographer, you'll be able to add retouching to your repertoire as an additional offering to your clients. Carrie Beene is a professional retoucher and educator who has worked with some of the world's most prestigious companies In this new book, she'll share the techniques she has learned and developed over the years to help you navigate the often mysterious world of image retouching.
- 198 pages
- English
- ePUB (mobile friendly)
- Available on iOS & Android
eBook - ePub
About this book
Trusted by 375,005 students
Access to over 1.5 million titles for a fair monthly price.
Study more efficiently using our study tools.
Information
So let’s begin. Open your DVD, which can be found at www.routledge.com/9781138456235, and drag the folder "HIRES_FILES" onto a drive on your computer that has enough space for you to work from. Remember that this fle may grow to over 4 or 5 gigabytes in size! In a perfect world, I would prefer that you work on the fle full size, but I understand that not everybody has a computer that can handle this heavy load. If you feel like you are going to have power issues later on, go ahead and make the fle’s pixel dimensions smaller, but not the dpi (resolution). I will show you how to do this when we open our fle.
Inside the main folder you will fnd four subfolders. If you would like to open the fles to examine them at this time, go ahead and do so, but the fle that we will begin with is in the Beauty folder, so when you are ready to get started, open the fle named Vania.tif. If you are going to lower the size of your fle, do it now by choosing Image . Image size from the menu bar. Be sure that Constrain Proportions and Resample Image are both checked, and in the pop out menu at the bottom of the dialog box, choose Bicubic Sharper (best for reduction). Reduce the document size to 10 (or even 8) inches high at a resolution of 300 dpi. Changing the height dimension to 10 inches will bring down the fle size from 96 to 22.9 megabytes (Figure 1.0). Be aware that you should never do this on a job for a real studio, since this will lower the quality of your fle and the size it can print.

FIG 1.0 Resizing an image.

FIG 1.1 My workstation with two monitors and a graphics tablet.
Professional retouchers commonly work with two monitors: a high-end graphics monitor for the main screen (I use an Eizo, as does nearly every retouching studio I know) and a separate smaller monitor to store the Photoshop panels so they can be seen anytime at a glance. We also use a graphics tablet and stylus instead of a mouse. If you are serious about retouching, you must have a tablet because you cannot accurately draw with a mouse. The graphics tablet also allows for pressure sensitively, which I will explain later as we set up our retouching brushes (Figure 1.1).
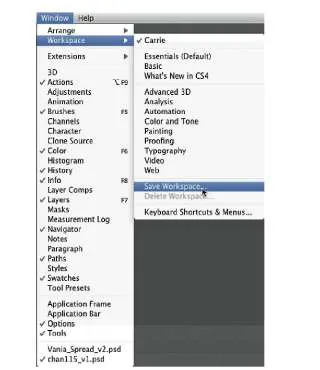
FIG 1.2 Saving a workspace.
Setting Up
As a freelancer, I sat at a diferent computer at every studio I worked at, so the frst thing I would do is arrange my panels and set up my tools the way I liked them. Thankfully, Ps has given us a way to save individual confgurations so the next time we are working on the same machine, even if it has been changed, we can get those settings back. Once you have your panels arranged to the desired positions, go to the drop-down menu Window . Workspace . Save workspace (New Workspace in CS5) and name and save your workspace. Your saved workspace will appear at the top of the Window . Workspace menu for future use (see Figure 1.2).
In this book, I am going to tell you how I do it, but that doesn’t mean that my way is the only way. I have done a lot of experimentation and conferred with many other retouchers, and I think my techniques are proven and sound. But having said that, please feel free to experiment with anything and everything in this book, and in Photoshop in general. Experimentation is how we fgure out how to create the seemingly impossible. In this particular retouch, we are going for a "polished" look, a very fnely retouched Beauty. Remember that there are many levels of retouching, and you can always dial it back, but for our purposes I want you to be able to take it all the way there (in case you are asked to do so).
The first thing I do when setting up my various brush tools (brush-based tools are the Brush tool; Clone Stamp tool; Eraser; Dodge, Burn, and Sponge tools; and Blur, Sharpen, and Smudge tools) is to turn of Shape Dynamics (which is on by default when opening Ps for the frst time) for all these brush tools. See Figure 1.2A for CS4 Brush Tool Options bar. In CS5 Adobe has added a control button on the Brush tool options bar to turn Shape Dynamics on or of, and it overrides the Brush panel setting. So be absolutely sure that you have turned of Shape Dynamics in both places. I then set all of my brush-based tools to Airbrush mode by clicking on the airbrush icon (Figure 1.2B). So all of the tools are set to Airbrush, with Shape Dynamics turned of (Figure 1.2C).

FIG 1.2a CS4 Brush tool options bar.

FIG 1.2B CS5 Making the Airbrush active on the Brush tool options bar.
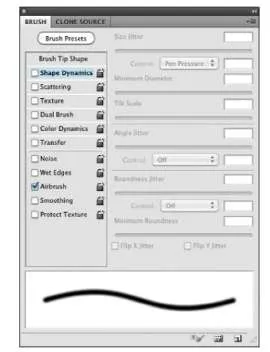
FIG 1.2C CS5 Brush panel with Shape Dynamics of.
When the Airbrush mode is selected, you will be using Flow rather than Opacity. When you hit the numbered keys on your keyboard, you will be changing the Flow percentage rather than Opacity, which is the default. To help you understand the diference between Flow and Opacity, Figure 1.3 shows the same brushstroke done with Opacity and with Flow. I began the brushstroke pressing hard and then letting up on the pressure as I moved my stylus to the right. No matter how hard I press, Opacity will only release the amount of tone I have it set to—for example, 20%, 50%, and so on. To deepen that tone, you must lift your pen and paint again. Flow builds up tone like an airbrush. To understand better and get a good feel for the diference between these two settings, it is well worth it to make an empty layer and experiment.
To get the full use of your Stylus and your airbrush settings, you need to make some adjustments in the main Brush panel. This is where you will make special preset brushes to recreate the texture of hair and lashes and many other efects. When you activate any of the brush-based tools, a button to toggle the Brushes panel will appear in the Tool Options bar (Figure 1.4A). Click the button to show the panel, or hit the F5 key. In CS5 the toggle button has been moved to the far left next to the Brush Size indicator window (see Figure 1.2C). For almost all general retouching, I have two brush settings: a soft airbrush that responds to stylus pressure, and one that I call a straight-line brush.

FIG 1.3Flow versus Opacity.
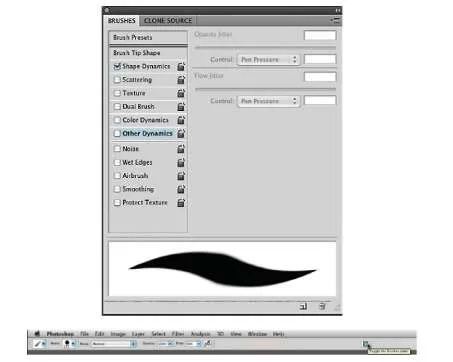
FIG 1.4a Default Brushes panel.
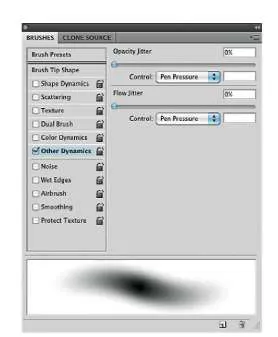
FIG 1.5 CS4 panel Setting brush tools to Pen Pressure.
As I said, Shape Dynamics is on by default in Photoshop, but I only use it for specialty brushes and almost always have it turned of. To set up the straight-line brush, simply turn of Shape Dynamics, and this setting is your straight-line brush (see Figure 1.2C). If you click once on your image to create a starting point and hold down your shift key and click again somewhere else, Photoshop will draw a straight line between the two points.
To create a soft brush for blending, click on Other Dynamics on the left side of the Brushes panel. (In CS5 Other Dynamics is now named Transfer; see Figure 1.2C. The box will become checked, and the controls will change. Set the control option for both Opacity Jitter and Flow Jitter to Pen Pressure, and leave the amount for each at 0%, as shown. Notice how the brush preview changes.
From here on I will refer to these brushes as the "straight brush" (Other Dynamics of or Transfer in CS5) and the "soft brush" (Other Dynamics [Transfer] on with Pen Pressure selected).
I keep the Brush panel open on my second screen at all times so I can see at a glance which brush setting I currently have selected. As you can see, I keep most of my panels on this monitor, with the exception of my Layers panel and Adjustments panel, both of which I keep on my main screen so my eyes don’t have to travel far between my image and these panels, which is especially important when I am color correcting, as you will soon see.
I don’t like the new double dock at the top of the screen, so I use the tab to pull out the bottom dock and move it to my panel monitor so it’s out of the way. Just pull from the far left tab to move it. If you don’t have two monitors, you can consolidate by placing one on top of the other dock at the far right end (Figure 1.6).
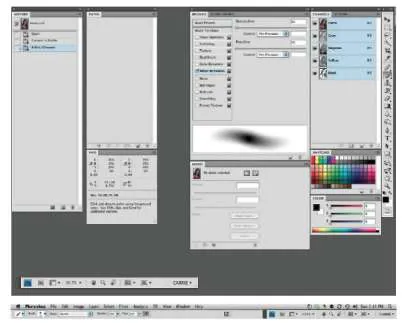
FIG 1.6 Panels set up on a second monitor, moving the dock.
We will begin by retouching the Vania Beauty fle. It’s the most important image on the spread, and we do not want to resize or transform her if possible, so we will build around her and resize the other fles to ft the composition. Duplicate your background layer; y...
Table of contents
- Cover
- Half Title
- Full Title
- Copyright
- Contents
- Acknowledgements
- Retouching Terms
- Introduction
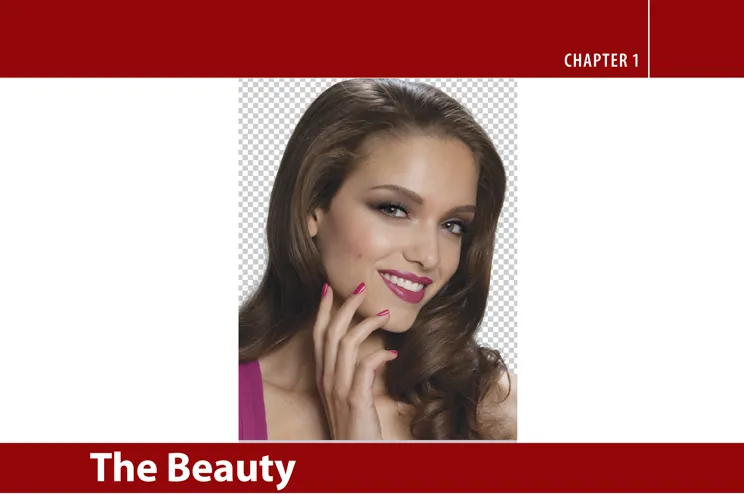
- Chapter 1: The Beauty
- Chapter 2: The Background
- Chapter 3: The Powder Products
- Chapter 4: The Tube Products
- Chapter 5: Composing the Lifestyle
- Chapter 6: Integrating the Lifestyle
- Chapter 7: Makeup and Hair
- Chapter 8: The Markups
- Chapter 9: Delivering the File
- Index
Frequently asked questions
Yes, you can cancel anytime from the Subscription tab in your account settings on the Perlego website. Your subscription will stay active until the end of your current billing period. Learn how to cancel your subscription
No, books cannot be downloaded as external files, such as PDFs, for use outside of Perlego. However, you can download books within the Perlego app for offline reading on mobile or tablet. Learn how to download books offline
Perlego offers two plans: Essential and Complete
- Essential is ideal for learners and professionals who enjoy exploring a wide range of subjects. Access the Essential Library with 800,000+ trusted titles and best-sellers across business, personal growth, and the humanities. Includes unlimited reading time and Standard Read Aloud voice.
- Complete: Perfect for advanced learners and researchers needing full, unrestricted access. Unlock 1.5M+ books across hundreds of subjects, including academic and specialized titles. The Complete Plan also includes advanced features like Premium Read Aloud and Research Assistant.
We are an online textbook subscription service, where you can get access to an entire online library for less than the price of a single book per month. With over 1.5 million books across 990+ topics, we’ve got you covered! Learn about our mission
Look out for the read-aloud symbol on your next book to see if you can listen to it. The read-aloud tool reads text aloud for you, highlighting the text as it is being read. You can pause it, speed it up and slow it down. Learn more about Read Aloud
Yes! You can use the Perlego app on both iOS and Android devices to read anytime, anywhere — even offline. Perfect for commutes or when you’re on the go.
Please note we cannot support devices running on iOS 13 and Android 7 or earlier. Learn more about using the app
Please note we cannot support devices running on iOS 13 and Android 7 or earlier. Learn more about using the app
Yes, you can access Real Retouching by Carrie Beene in PDF and/or ePUB format, as well as other popular books in Mezzi di comunicazione e arti performative & Media digitali. We have over 1.5 million books available in our catalogue for you to explore.