- 102 pages
- English
- ePUB (mobile friendly)
- Available on iOS & Android
eBook - ePub
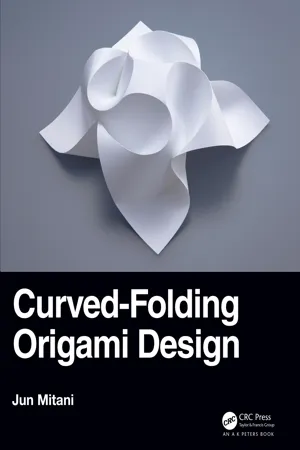
Curved-Folding Origami Design
About this book
The origami introduced in this book is based on simple techniques. Some were previously known by origami artists and some were discovered by the author. Curved-Folding Origami Design shows a way to explore new area of origami composed of curved folds. Each technique is introduced in a step-by-step fashion, followed by some beautiful artwork examples. A commentary explaining the theory behind the technique is placed at the end of each chapter.
Features
- Explains the techniques for designing curved-folding origami in seven chapters
- Contains many illustrations and photos (over 140 figures), with simple instructions
- Contains photos of 24 beautiful origami artworks, as well as their crease patterns
- Some basic theories behind the techniques are introduced
Frequently asked questions
Yes, you can cancel anytime from the Subscription tab in your account settings on the Perlego website. Your subscription will stay active until the end of your current billing period. Learn how to cancel your subscription.
No, books cannot be downloaded as external files, such as PDFs, for use outside of Perlego. However, you can download books within the Perlego app for offline reading on mobile or tablet. Learn more here.
Perlego offers two plans: Essential and Complete
- Essential is ideal for learners and professionals who enjoy exploring a wide range of subjects. Access the Essential Library with 800,000+ trusted titles and best-sellers across business, personal growth, and the humanities. Includes unlimited reading time and Standard Read Aloud voice.
- Complete: Perfect for advanced learners and researchers needing full, unrestricted access. Unlock 1.4M+ books across hundreds of subjects, including academic and specialized titles. The Complete Plan also includes advanced features like Premium Read Aloud and Research Assistant.
We are an online textbook subscription service, where you can get access to an entire online library for less than the price of a single book per month. With over 1 million books across 1000+ topics, we’ve got you covered! Learn more here.
Look out for the read-aloud symbol on your next book to see if you can listen to it. The read-aloud tool reads text aloud for you, highlighting the text as it is being read. You can pause it, speed it up and slow it down. Learn more here.
Yes! You can use the Perlego app on both iOS or Android devices to read anytime, anywhere — even offline. Perfect for commutes or when you’re on the go.
Please note we cannot support devices running on iOS 13 and Android 7 or earlier. Learn more about using the app.
Please note we cannot support devices running on iOS 13 and Android 7 or earlier. Learn more about using the app.
Yes, you can access Curved-Folding Origami Design by Jun Mitani in PDF and/or ePUB format, as well as other popular books in Mathematics & Games in Mathematics. We have over one million books available in our catalogue for you to explore.
Information
Chapter 1
Fold a Curve
For the first step, fold a single curve and see the shape you get. If this is the first time ever for you folding a curved line, then I’m pretty sure it will be a whole new entertaining experience. You will be surprised at the shape variations produced by a single curve.
1.1 Folding a Simple Curve
First, let’s fold a simple curved line. A simple curve runs in one direction, like a parenthesis “(”. It does not turn to a different direction halfway like the letter “S”. Now, let’s draw a curve on the paper, as in Figure 1.1, and fold along it. Draw the curve with a hard-pointed tool to pre-crease. A curve ruler helps draw a smooth curve, but freehand will do at first.
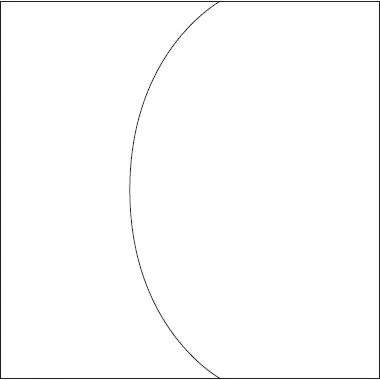
Figure 1.1 Crease pattern with a simple curve.
Figure 1.1 shows the paper contour in a thick solid line and the curve to be folded in a thin solid line. The solid line is folded as a mountain. You may want to fold it as a valley, but, as a practice for understanding crease patterns, mountain-fold it as per the figure.
Start with holding up the paper, not placing it on the desktop, and bending the entire piece. Make a crease as you bend the paper with both hands, as shown in Figure 1.2. Be careful not to press flat, otherwise the resulting folded line becomes straight. If pre-creased firmly, the line should fold beautifully. Avoid wrinkles and undesired folds. Once folded successfully, the paper becomes a shape with one side raised and another recessed across the fold line. Once you made the shape, as in Figure 1.3, hold the workpiece against a light at various angles. The curved surface produces beautiful gradual shading varying with the angle of illumination.
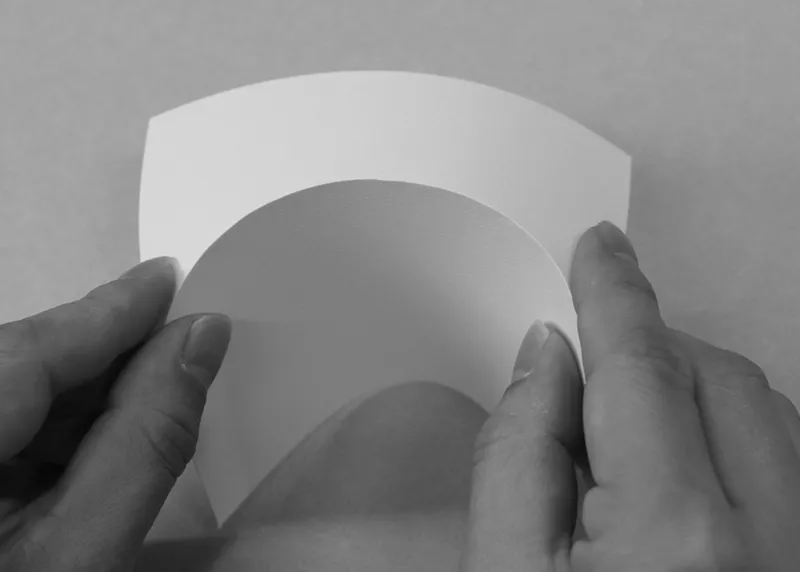
Figure 1.2 Folding a curve while bending the entire piece.
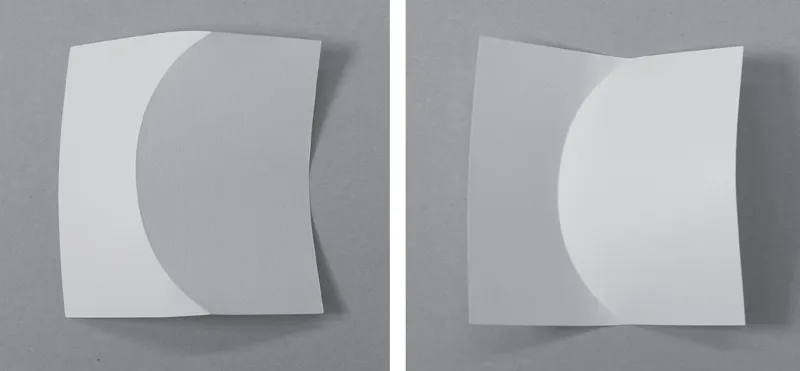
Figure 1.3 Figure 1.1 crease pattern folded (right: backside).
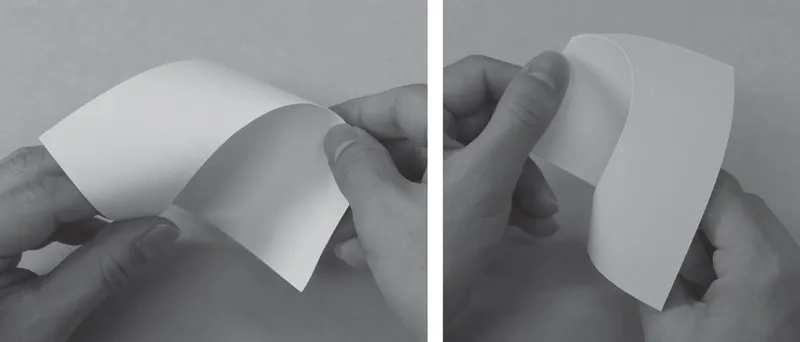
Figure 1.4 Workpiece entirely twisted into another shape.
Next, pinch the fold line at both ends and twist the workpiece freely, as in Figure 1.4. Paper is re-shapable, even after curve-folding. Avoid excessive force, otherwise wrinkles form. Twisting the entire piece spirals the fold line, producing an unexpected shape. The entire shape is changeable while remaining smooth. When you release your hands, the workpiece settles at the balance between the paper’s forces to return to its original state and those of the folded line. You can see the workpiece’s fold line settling on a plane.
By folding the line more sharply and bending the entire workpiece, the resulting shape becomes more three-dimensional. Partly fix the workpiece, instead of releasing your hands, to allow it to stabilise at the state seen in Figure 1.5 which shows cylinders with a larger bend and glued edges. The folded back portion opens outward. Figure 1.6 shows cone-like shapes with one end of the cylinder tapered. The right photo looks like a witch hat. It’s just folding a curve. But it makes all kinds of lovely shapes depending on how the whole piece is bended at whichever degree.
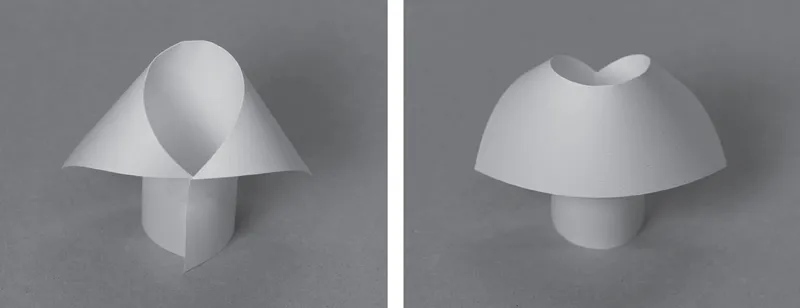
Figure 1.5 Bent largely to make a cylinder.
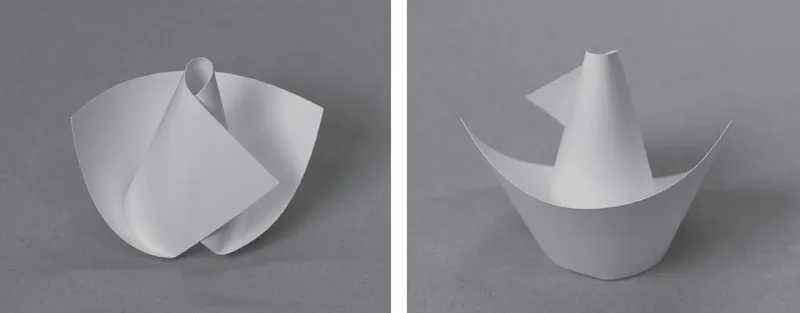
Figure 1.6 Bent largely to make a cone.

Figure 1.7 Rightmost piece folded at the largest angle.
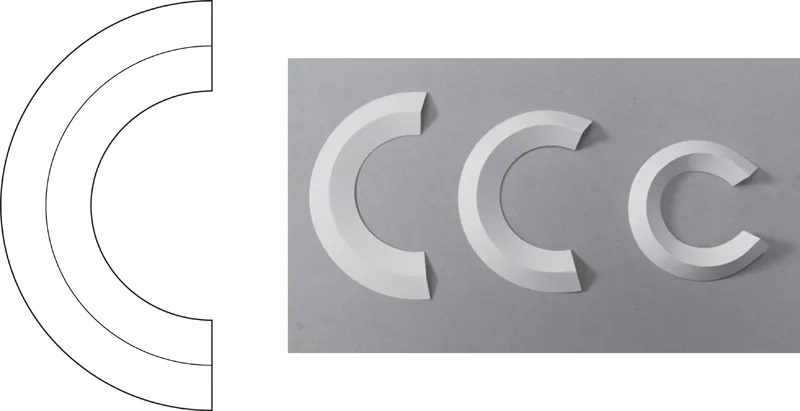
Figure 1.8 Shape varies by degree of fold. Larger fold angle bends more, resulting in a smaller shape.
The greater the fold angle is, as arrowed in Figure 1.7, the larger the fold bends, distorting it into a smaller shape. The crease pattern of Figure 1.8 with a semicircle fold line will make different shapes due to the fold angle. The fold angle becomes larger from left to right on the photo. The rightmost piece is sharply bent into a smaller size. The same crease pattern produces different finishes depending on the way the paper is bent and the folding angle. Try with different combinations.
1.2 Folding a Winding Curve
Now, let’s fold a winding line that changes the direction halfway (like an “S”), as in Figure 1.9. When testing, the curve may not necessarily be exactly identical to the one illustrated. Draw a smooth unjagged curve. Give it a try. You’ll find it not easy to fold neatly because you have to bend the paper wavily. Avoid forcing the fold. Instead, twist the entire paper to allow it to fold itself. Hold the paper with both hands, as in Figure 1.10. Apply proper force as you carefully watch the paper bending. The folded result should look like Figure 1.11. The paper has two wavy curved surfaces across the fold. One side is raised, and the opposite side crossing the fold is recessed.
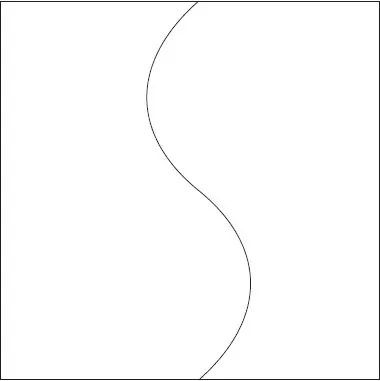
Figure 1.9 Crease pattern containing a winding curve.
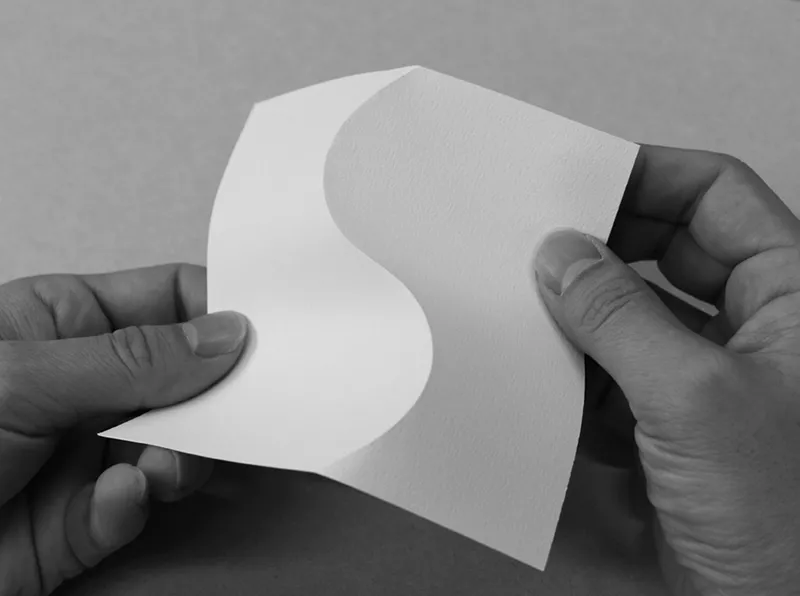
Figure 1.10 Folding Figure 1.9 crease pattern.
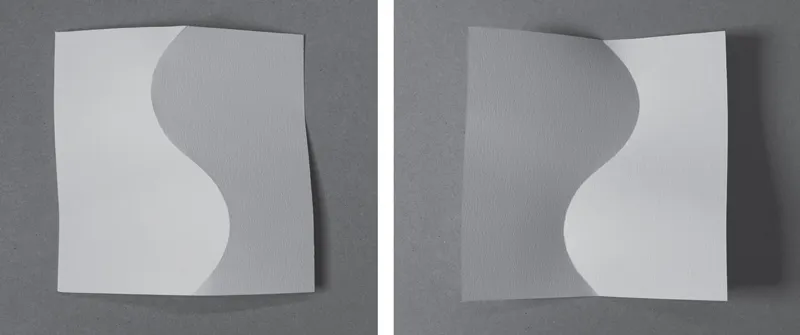
Figure 1.11 Figure 1.9 crease pattern folded (right: backside).
Try...
Table of contents
- Cover
- Half Title
- Title Page
- Copyright Page
- Table of Contents
- Preface
- Prologue: Folding a Curve Means a Lot
- Author
- 1. Fold a Curve
- 2. Aligning Curves
- 3. Aligning Rotated Curves
- 4. Tucking
- 5. Folding Cones
- 6. Folding Back at Straight Line
- 7. Other Techniques
- Afterword
- Index