Beginners and accomplished artists alike are attracted to the beauty and versatility of acrylic painting. In this comprehensive book, you will find all the instruction and inspiration you need to master the medium or improve your painting skills. Accomplished artist Tom Swimm guides you step by step through 12 stunning acrylic projects, offering easy-to-follow instructions along with his personal artistic insights. Acrylic Painting Step by Step covers dozens of beginning and advanced acrylic techniques, from underpainting and glazing to impasto and texturizing. You will learn to paint a variety of subjects, including a lively floral, a striking still life, an eye-catching street scene, and a gorgeous seascape.
eBook - ePub
Acrylic Painting Step by Step
Discover all the basics and a range of special techniques for creating your own masterpieces in acrylic
- 64 pages
- English
- ePUB (mobile friendly)
- Available on iOS & Android
eBook - ePub
Acrylic Painting Step by Step
Discover all the basics and a range of special techniques for creating your own masterpieces in acrylic
About this book
Trusted by 375,005 students
Access to over 1.5 million titles for a fair monthly price.
Study more efficiently using our study tools.
Information
Topic
ArtSubtopic
Art TechniquesBeginning with an Underpainting
When you want to produce a painting with a particular mood, remember that the first applications of acrylic paint will influence the “temperature” and feeling of the completed painting. So begin by applying a warm or cool base coat to the canvas before defining any objects in the composition. Unless applied extremely thickly, acrylic paint is not an opaque medium. Therefore this base coat—or underpainting—will show through and interact with the subsequent layers of paint, unifying the painting with an even sense of temperature. For the bright, sun-drenched shore in this painting, I choose a warm, medium magenta for the underpainting—a rich color that glows through even the final layers of the painting, resulting in a warm, tropical feel.

Step One First I work out my sketch, using both a pencil and a permanent marker to make a rough drawing. I define the basic shapes of the boats, as well as the outline of the clouds and the shadows on the beach. Then I use a large brush and cover the surface with a warm, water-thinned, transparent layer of medium magenta.
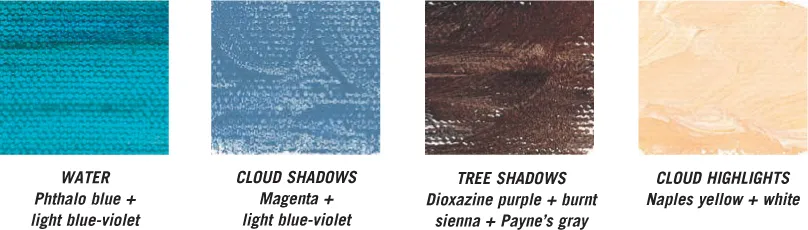
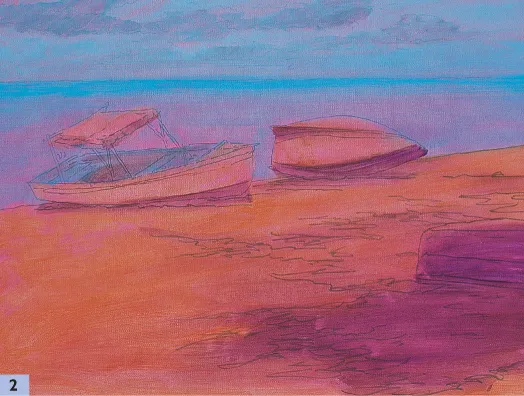
Step Two I begin blocking in color using a large flat brush and paint thinned with acrylic gloss medium and water. I apply light blue mixed with phthalo blue for the sky and water, using raw sienna for the boats and beach. I also add a little of the blue mix to the inside of the boat on the left to represent reflected light. And I define the shadow areas using Payne’s gray for the underside of the clouds and dioxazine purple for the shadows in the foreground and on the boats.

Step Three I apply color more thickly at this stage, using light blue for the sky between the clouds and phthalo blue for the water. I also paint around the hulls of the boats, adding dioxazine purple and Payne’s gray to the shadows. Then I darken the shadows with burnt sienna, and I add a layer of raw sienna to the boats and the beach. Finally I add details to the foreground boat, using light blue-violet mixed with Payne’s gray for the hull and burnt sienna for the stripe.
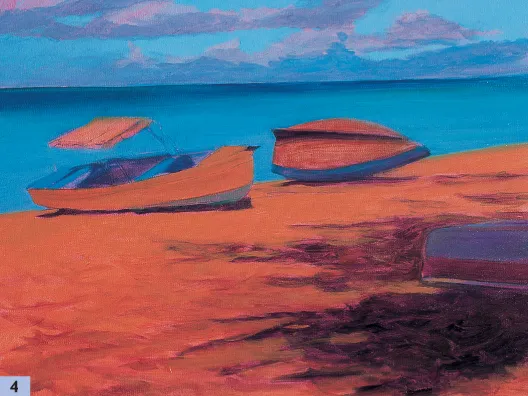
Step Four Now I darken the underside of the clouds using Payne’s gray mixed with light blue-violet. I mix phthalo blue, phthalo green, and white with an acrylic gloss medium to keep the paint wet and help it blend smoothly; then I apply a graded wash (see page 8) to the water with a medium flat sable brush, starting at the horizon line. I also apply this mix inside the boat on the left. Next I add another layer of color to the boat hulls and the beach, using the same mixes from step two.
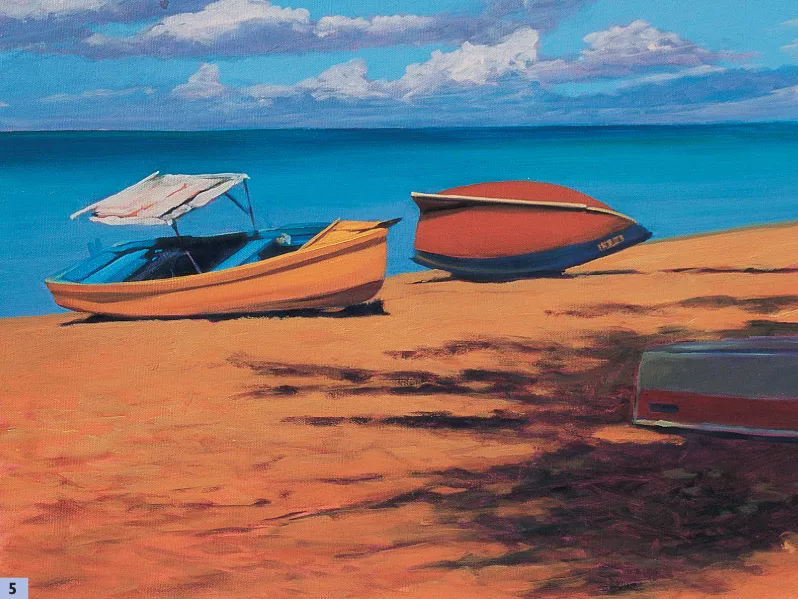
Step Five I paint the tops of the clouds, boat canopy, and hull highlights with a thick mix of unbleached titanium, Naples yellow, and flesh. Then I define the shadows with a grayish brown mix of dioxazine purple, Payne’s gray, and burnt sienna, and I define the edges and seats with light blue. For the hull of the boat on the right, I apply a mix of cadmium red, burnt sienna, and raw sienna; for the boat hull on the left, I apply a mix of cadmium red light and yellow ochre. Next I brighten the highlights with a mix of cadmium yellow medium and cadmium red light. For the boat on the right, I mix cadmium red light with burnt sienna for the hull, also adding a few accents to the underside. Finally I drybrush darker shadows in the foreground and apply highlights using Payne’s gray mixed with light blue-violet.
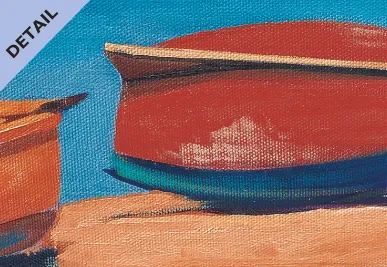
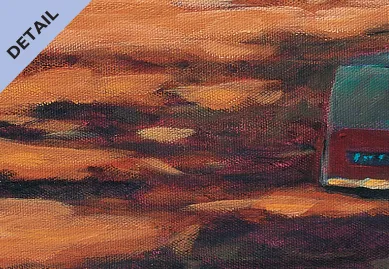
Boat Detail To add highlights to the boats, I apply just a few strokes of drybrushing using unbleached titanium. As I brush lightly over the grain of the canvas, the bristles create a coarse, wood texture that mimics the surface of the boat.

Clouds Detail I finish the clouds by highlighting them with a light mix of Naples yellow and white. I squiggle a few areas of color over the lightest parts of the clouds to show where the sunlight hits the most strongly.
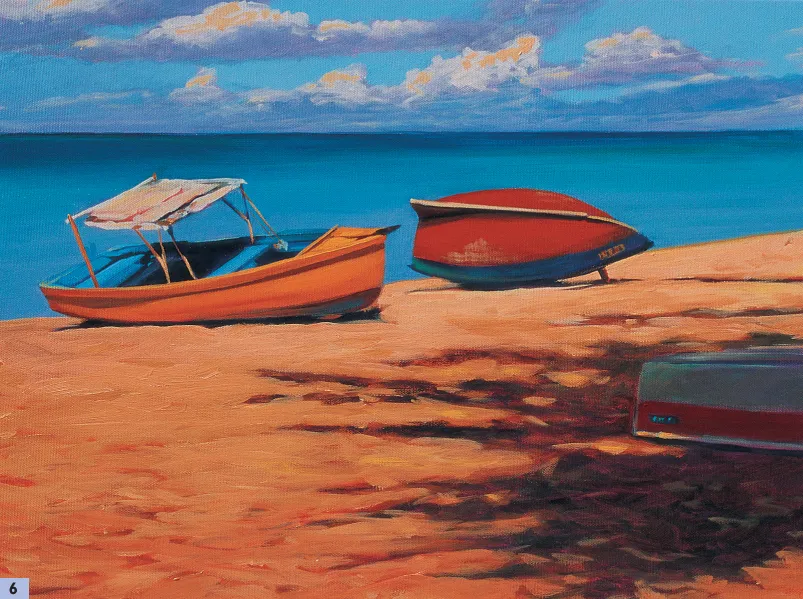
Step Six To finish, I mix several paint colors for the beach using cadmium yellow medium, raw sienna, Naples yellow, flesh, and white. To add contrast and interest in this area, I create several mixes, using varying proportions of each color. With a large flat sable brush and a thicker mix of these colors, I apply highlights on the beach, varying the direction of the brushstrokes. I continue to build up the colors overall, finishing with the final details to the clouds, boat hull, and support posts. I also finish the far boat by drybrushing a few strokes for the highlight.
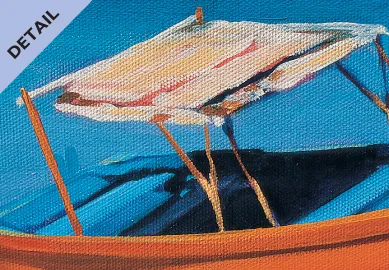
Canopy Detail Painting a white object doesn’t mean applying only white paint; in fact, white subjects can be very colorful since they reflect surrounding colors. To keep the canopy warm, I let the underpainting show through the strokes. I add warm, light yellow highlights with a mix of white, Naples yellow, and unbleached titanium, and I tint the shadows with raw sienna.
Shadow Detail To create greater contrast between the sunlit and shadowed areas of sand, I drybrush a dark brown mix for the shadows and highlight the holes with a mix of cadmium yellow medium, raw sienna, and white. This shadow pattern—created by an overhanging tree outside the composition—adds interest and leads the eye toward the two boats.
Focusing on a Single Subject
The subjects of your paintings don’t always have to be grand landscapes or carefully assembled still lifes. By zooming in on one object, you can often create an appealing composition that gives the viewer a sense of intimacy with the subject. And flowers are an ideal subject for a simple, close-up composition; their bright colors and delicate curves can fill your canvas with richness and interesting shapes. You can also heighten the drama by focusing on the foreground blossoms, contrasting their vibrant hues and crisp edges with a neutral, less detailed background, as I do in this painting of a simple iris bloom.

Step One Using a photograph as a reference, I create a fairly detailed pencil drawing of the iris. I choose pencil over waterproof ink because I intend to paint translucently. I am also careful to outline the areas of the lightest highlights because I will be “saving” these white areas from paint. After attaching my paper to a drawing board with masking tape to keep it flat, I paint the outlined highlight areas with liquid frisket. (See page 11.)
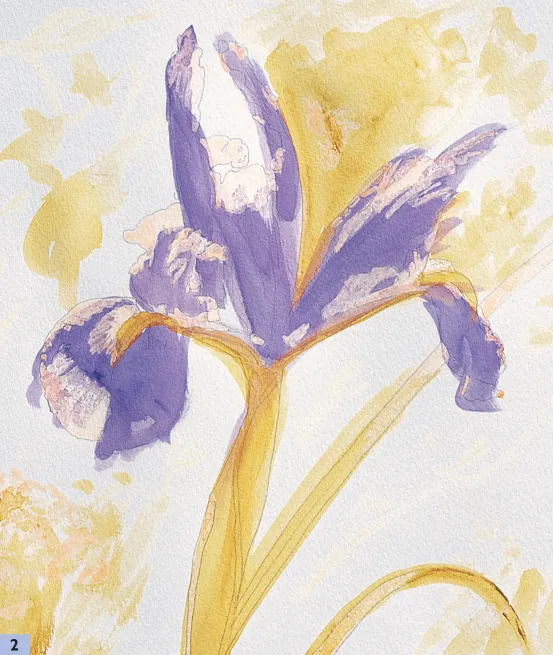
Step Two As I will be using my acrylic paints thinly, like water-color paints, I begin by applying the lightest color first; in this case, I apply a light wash of raw sienna. Using a large flat brush, I thin the paint with water and apply it in quick, wet strokes. I use the edge of the brush to work around the drawing, but I’m not too concerned with “staying inside the lines”; I can always tighten the outlines at a later stage if they are too unwieldy. Ultimately I want to achieve a loose, free feeling. Next I apply thinned dioxazine purple to the iris petals in the same manner, varying the color intensity to add a sense of dimension.
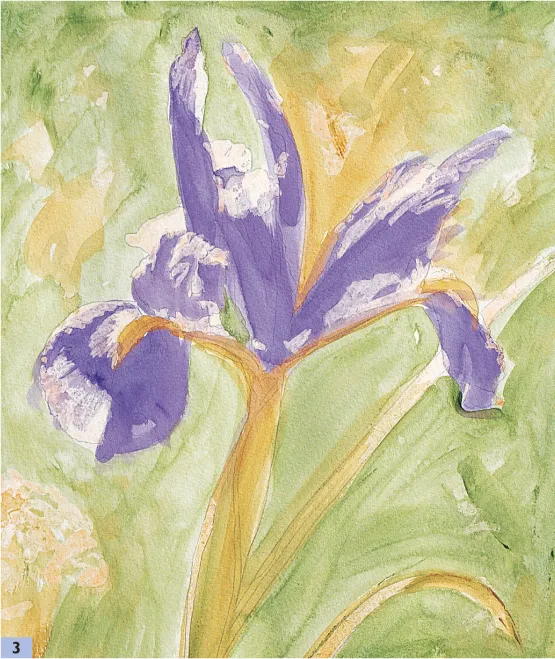
Step Three I continue to apply the paint thinly, giving these beginning stages a “watercolor feel.” I add sap green to the background, stroking roughly without worrying about the details or about perfect edges. At this point, the painting looks a bit messy—but, believe it or not, the hardest w...
Table of contents
- Cover Page
- Title Page
- Introduction
- Tools and Materials
- Color Theory and Mixing
- Acrylic Techniques 8
- Lesson 1: Beginning with an Underpainting
- Lesson 2: Focusing on a Single Subject
- Lesson 3: Painting Reflections
- Lesson 4: Glazing to Build Warmth and Texture
- Lesson 5: Working with Translucent Washes
- Lesson 6: Depicting Light and Shadow
- Lesson 7: Setting Up a Still Life
- Lesson 8: Applying Linear Perspective
- Lesson 9: Using Multiple References
- Lesson 10: Choosing a Viewpoint
- Lesson 11: Simplifying a Scene
- Lesson 12: Creating Depth
- Conclusion
- Copyright Page
Frequently asked questions
Yes, you can cancel anytime from the Subscription tab in your account settings on the Perlego website. Your subscription will stay active until the end of your current billing period. Learn how to cancel your subscription
No, books cannot be downloaded as external files, such as PDFs, for use outside of Perlego. However, you can download books within the Perlego app for offline reading on mobile or tablet. Learn how to download books offline
Perlego offers two plans: Essential and Complete
- Essential is ideal for learners and professionals who enjoy exploring a wide range of subjects. Access the Essential Library with 800,000+ trusted titles and best-sellers across business, personal growth, and the humanities. Includes unlimited reading time and Standard Read Aloud voice.
- Complete: Perfect for advanced learners and researchers needing full, unrestricted access. Unlock 1.5M+ books across hundreds of subjects, including academic and specialized titles. The Complete Plan also includes advanced features like Premium Read Aloud and Research Assistant.
We are an online textbook subscription service, where you can get access to an entire online library for less than the price of a single book per month. With over 1.5 million books across 990+ topics, we’ve got you covered! Learn about our mission
Look out for the read-aloud symbol on your next book to see if you can listen to it. The read-aloud tool reads text aloud for you, highlighting the text as it is being read. You can pause it, speed it up and slow it down. Learn more about Read Aloud
Yes! You can use the Perlego app on both iOS and Android devices to read anytime, anywhere — even offline. Perfect for commutes or when you’re on the go.
Please note we cannot support devices running on iOS 13 and Android 7 or earlier. Learn more about using the app
Please note we cannot support devices running on iOS 13 and Android 7 or earlier. Learn more about using the app
Yes, you can access Acrylic Painting Step by Step by Tom Swimm in PDF and/or ePUB format, as well as other popular books in Art & Art Techniques. We have over 1.5 million books available in our catalogue for you to explore.