![]()
PROJECT 1: MAN
We now begin the step-by-step method for drawing. I have done four projects—an adult male, an adult female, a young girl, and a young boy. Each of these projects is broken down into what I consider the seven stages of drawing: the lay-in, plumb lines, volume, edges and outlines, tonal pattern, finishing, and polishing. The first project provides the most detail on these seven stages, so it’s best to start here. However, I urge you to read all four projects because I include slightly different information in each. Actually copying the stages (drawing each step over the previous) would be commendable. (Note that all projects call for the 9B pencil, only switching to 5B or 2B for small details.)
STAGE 1
The Lay-In Because the lay-in and the next step, plumb lines, seem so basic (and ugly), artists usually rush through them. But these steps ensure the success of the drawing. You can always adjust your shading, but if sloppy work now leads to bad proportions, then the drawing will require major surgery later. The first measurements must be exact to achieve a likeness.
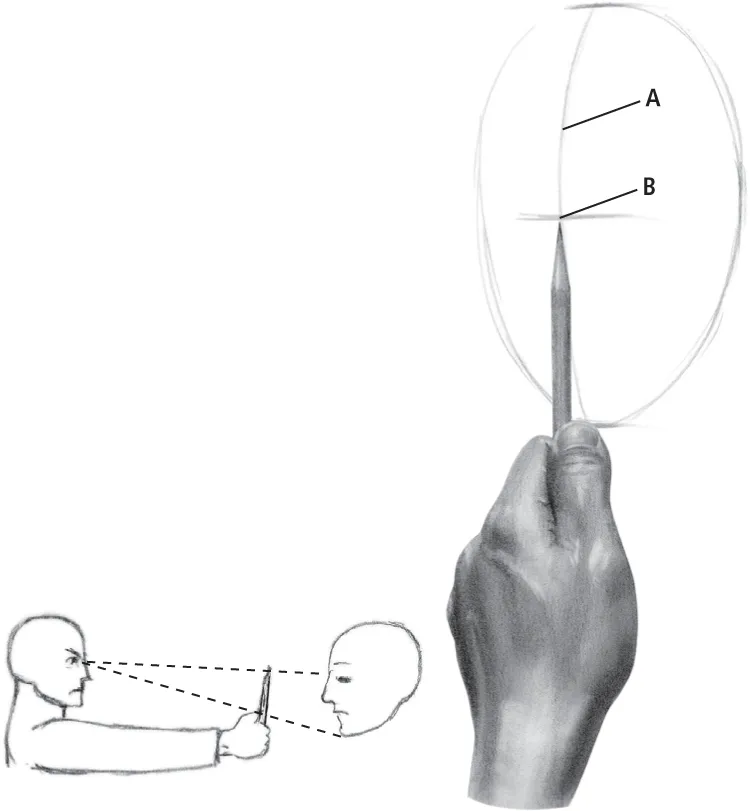
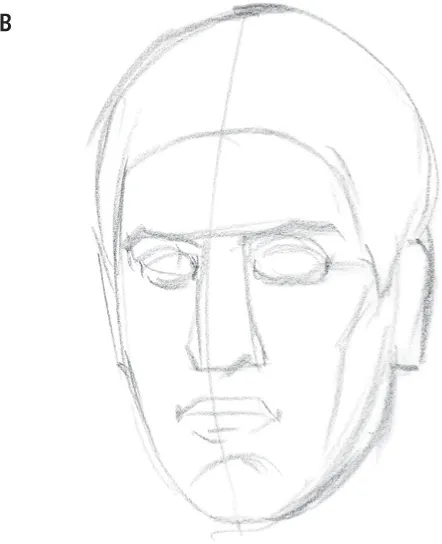
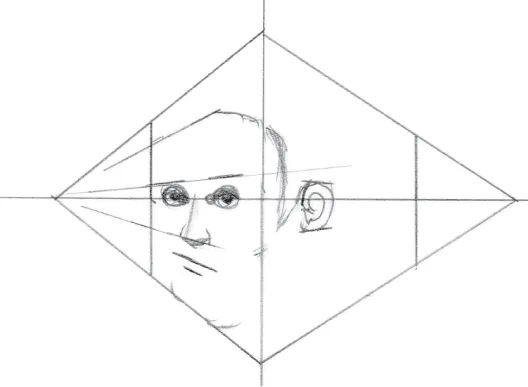
1. Draw an oval; then add a vertical arc (A) that follows the curvature of the model’s face. Place horizontal marks at the top, bottom, and midpoint (B) of the oval. Next determine the midpoint of the model’s face by extending your arm—elbow locked—and placing the tip of the pencil where you imagine the center to be and placing your thumbnail in line with the model’s chin (see diagram below).
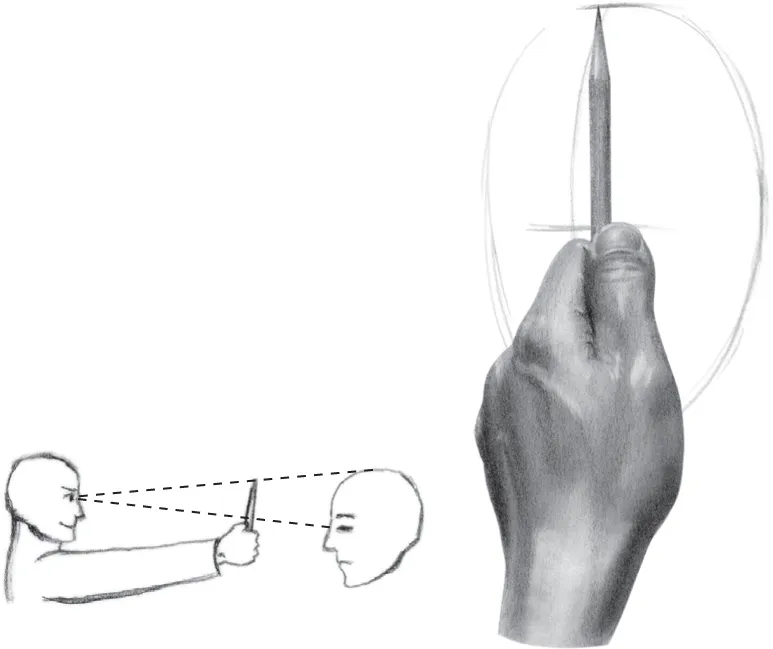
2. Now raise your arm so that your thumbnail is where the tip of the pencil was. If the tip is now at the top of the model’s head, then you’ve found the center. If not, simply keep adjusting the pencil and your thumb, repeating steps 1 and 2 until your nail and the tip consistently fall halfway up the model’s face (the midpoint).
*NOTE: If this is a private session and you’re working at life-size, you should actually measure the distance from the inner corner of the model’s eyebrow to the bottom of his chin with a ruler and place this measurement on your paper. It’s not the center, but it’s very accurate. Don’t poke him in the eye with the ruler.
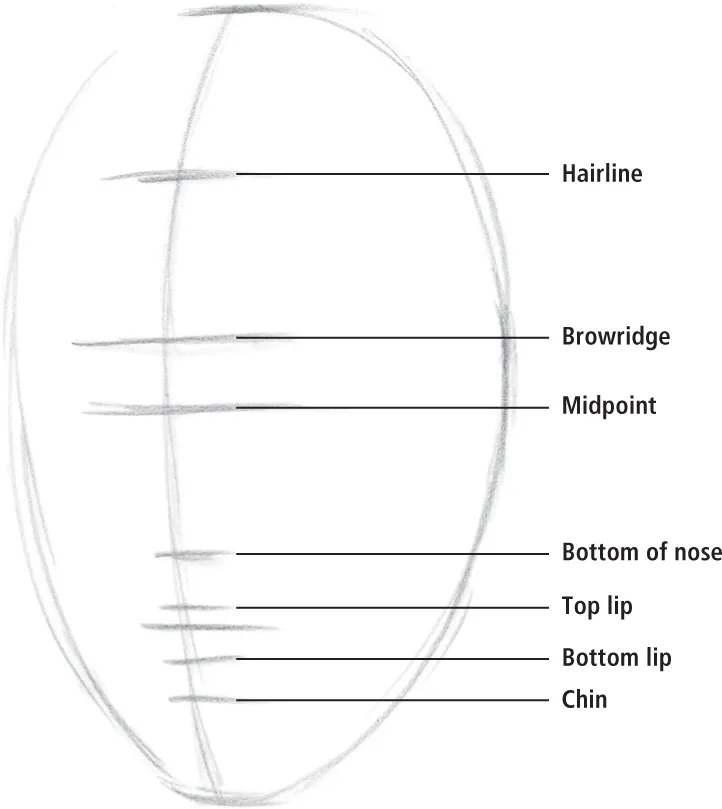
3. Note the form that you found at the midpoint of the face (for example, the tear ducts). Then use this to guesstimate the distances of other features from top to bottom, including hairline to browridge, eyes to bottom of nose, lips to chin, top to browridge, nose to chin, and so on. Don’t measure these with the pencil because the forms are so small that it’s easy to make a mistake. If you put the drawing next to the model, it may be obvious what the distances should be.
Make sure these horizontals are placed along the vertical arc so you can establish the center of the face. Draw lightly—these guidelines are for you, not for art history. Also, remember basic proportions of the head: hairline to brow is roughly one-third of the head’s length, brow to bottom of nose is roughly one-third, and bottom of nose to bottom of chin is roughly one-third.
*NOTE: All hands in this book used to show measurement are drawings.
STAGE 2
Plumb Lines Now that we have the proportions roughly laid out from top to bottom, we can work on the widths. Always work out the vertical measurements first because it’s easy to narrow a form but big trouble to lengthen one (in this case, everything has to move).
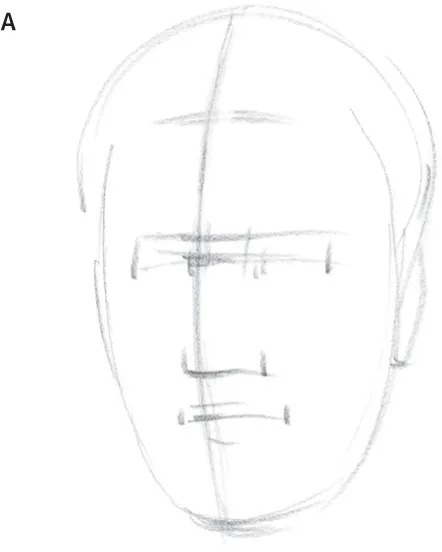
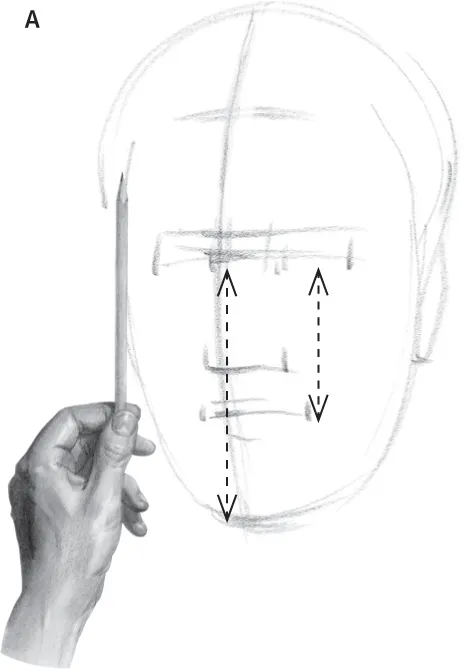
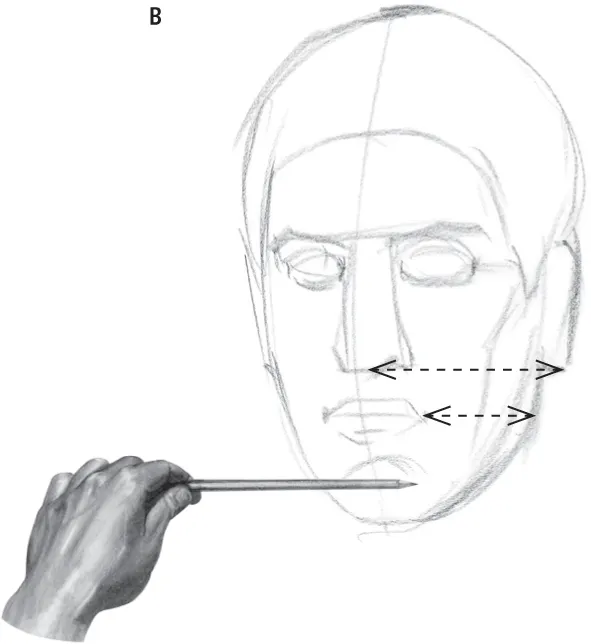
1. In this step, you’ll use your eyes to guesstimate a rough shape that would fit between the marks you measured in stage 1. This will not be a precise outline. We just want a shape that has the basic width and size of the model’s features. To do this, first mark a width for each feature that corresponds to the marks you made for the lay-in (A). Then compare general sizes: How much space does the nose occupy on the face? Which takes up more space—the lips or one eye? Compare back and forth between the features. Then begin to suggest the basic shape of each feature (B).
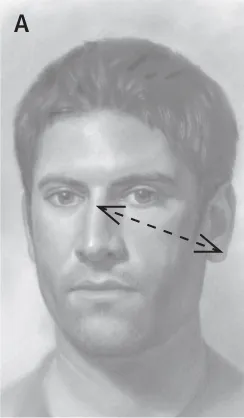
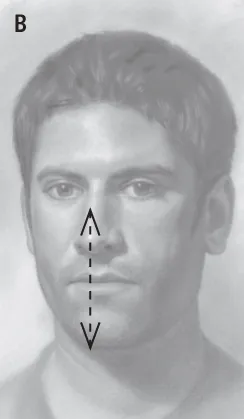
2. You now must use plumb lines to make sure the forms are aligned properly above and below one another. Wouldn’t it be helpful to know if the tear ducts are directly above the nostrils? Does the side of the neck line up directly below the corner of the mouth? Put your pencil in front of the model’s face vertically and check (A). Then place the pencil horizontally to gauge the alignments, including earlobe to nose, mouth to corner of jaw, and so on (B). Adjust the drawing accordingly.
3. Pay attention to negative space (the space between the forms). If you ignore it, you won’t achieve a likeness and may never figure out why. The space between the forms is as important as the forms themselves. Continue checking these distances as you draw.
Don’t forget that there is a slight skewing effect from perspective. Here it’s exaggerated to make a point.
Always compare the two key measurements above. Hold your pencil out and have your thumbnail touch the bridge of the nose while the tip touches the ear (A). Now turn the pencil and see how this length compares with the same point on the nose to the chin (B).
STAGE 3
Volumes Michelangelo either imagined or faintly drew volumes before he began shading. At this stage in the drawing, we will follow him. It’s true that he uses obvious outlines in his drawing, but I think he did this to make the drawing hyper clear so he could easily refer to it to create a mural (the final painting on the Sistine Chapel). Be sure to keep your outlines much lighter as you draw.
My study for the Libyan Sibyl on the Sistine Chapel (after Michelangelo)
My interpretation of the forms based on Michelangelo’s work
I’ve added some core shadows and a little shading to emphasize the volumes. You can do this too—lightly.
STAGE 3
Volumes (continued) With an accurate lay-in on the paper, there’s no chance of making a huge mistake, so you can relax and develop the structure on top of the plan. Faintly draw a simple volume that might protrude beneath the surface of each form. Beginners sometimes resist this practice, as I first did. But when I finally began drawing them, my drawings immediately had more structure and a greater sense of three-dimensionality. Understand that the artist isn’t making anything up. If the model were hollow, the volumes could fit inside the skin; but they are obscured by the surface of the skin. Therefore, you will shade over the volumes, erase them, and leave them, depending on what makes the drawing look more real. But having them there initially gives you a guide—a framework upon which to add details and lighting. You can’t be distracted by the surface because the volumes remind you of the mass underneath. If you look at the portraits of late Titian, late Rembrandt, and Pontormo, you’ll see that the heads could be reduced to spheres hovering in space. The great realist always draws the big mass, integrating smaller masses into it. The way to do this is to draw a large shape—an egg or a cube for the head—and then spheres and blocks on top of it. The shapes of these forms are your choice, as they’re suggested to you by the model’s appearance.
STAGE 4
Edges and Outlines Using the volumes as guides, draw the outlines and the core shadows. The core shadows are on the edges of the shadows (A). Amateurs leave out core shadows because they don’t notice them, but core shadows give the forms corners and, hence, a three-dimensional quality. Core shadows are darker parts of the shadows, and they’re always soft. Don’t draw them as sharp lines. Please don’t. Just don’t, o...