![]()
SHADING YOUR DRAWINGS
Once you sketch the basic shape of your subject, you can create realism and form by applying a variety of shading techniques. The information on these two pages will help you discover which methods of shading best suit your style—and you’ll find that you can use the same techniques with virtually any medium, from graphite pencil to charcoal and ink. When deciding which medium to use, consider the appearance of your subject—does it have soft, fluffy hair or rough, cracked scales? Think about the textures you want to render; then refer back to these pages to see the effects you can achieve with each medium. Whichever method or medium you choose, remember to shade evenly. Instead of shading in a mechanical, side-to-side direction, use a back-and-forth motion over the same area, often changing the direction of your strokes.
UNDERSTANDING VALUE
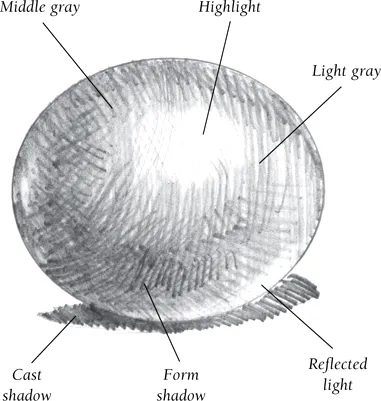
Shading gives depth and form to your drawing because it creates contrasts in value (the relative lightness or darkness of black or a color). In pencil drawing, values range from black (the darkest value) through different shades of gray to white (the lightest value). To make a two-dimensional object appear three-dimensional, you must pay attention to the values of the highlights and shadows. Imagine the egg at upper right with no shading, just an outline. The egg would be just an oval. But by adding variations of value with light and shadow, the egg appears to have form. When shading a subject, you must always consider the light source, as this is what determines where your highlights and shadows will be. The angle, distance, and intensity of the light will affect both the shadows on an object, called “form shadows,” and the shadows the object throws on other surfaces, called “cast shadows.” But before you start drawing, look at a few objects around your home and study them in terms of their values. Squint your eyes, paying attention to all the lights and darks; look at the different values in the shadows cast by the objects. Then find the values you see in the value scales shown later.
Light and Shadow The highlight is the lightest value, where the light source directly strikes the object. The light gray area surrounds the highlight, and the middle gray is the actual color of the egg, without any highlights or shadows. The cast shadow is the shadow that the egg casts onto the ground. The form shadow is the shadow that is on the object itself. Reflected light bounces up onto the object from the ground surface.
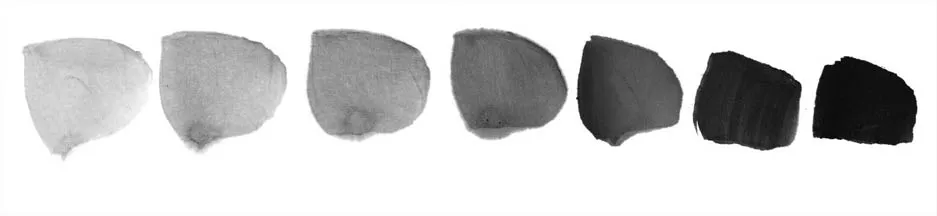
Value Scale Making your own value scale, such as the one shown above, will help familiarize you with the different variations in value. Work from light to dark, adding more and more tone for successively darker values. Different pencils produce varying value ranges; this scale was drawn with a standard HB pencil.
Pencil Scale As the scale above demonstrates, I can produce a range of values using different pencils. A 2H pencil creates a very light tone, whereas a charcoal pencil makes the softest, darkest tone.
BASIC SHADING TECHNIQUES
By studying the basic techniques on this page, you’ll be able to give your drawings a specific look or feel. The effect will vary among media, but the methods are the same. For example, shading with charcoal will give your drawing a dramatic, dark look, whereas shading in pencil can produce a subtler, softer appearance. And shading in ink adds a slick, smooth feel!
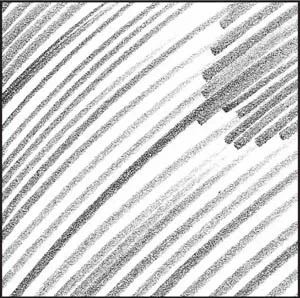
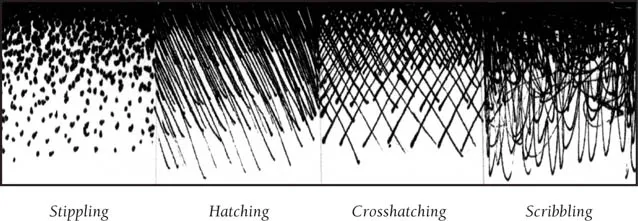
Hatching The most basic method of shading is to fill an area with hatching, which is a series of parallel strokes.
Crosshatching For darker shading, go over your hatching with a perpendicular set of hatch marks.
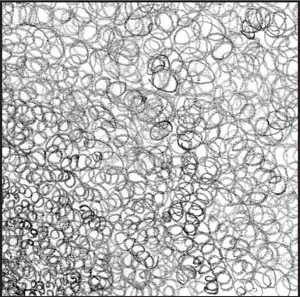
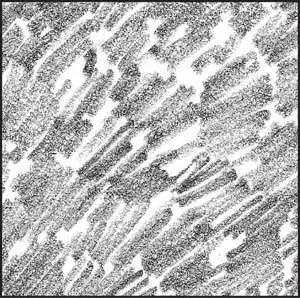
Circular Strokes By moving your pencil in tight, small circles, you can create a texture that is ideal for a mop of unruly hair.
Blending For smooth shading, rub a tissue, cloth, or blending tool over heavily shaded areas to merge the strokes.
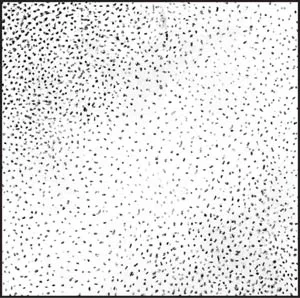
Stippling A series of dots can create a mottled texture for skin, scales, and hair; the denser the dots, the darker the tone.
Scribbling To create loose, spontaneous strokes, hastily move the pencil around in quick, random motions.
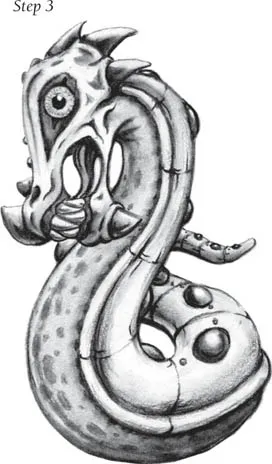
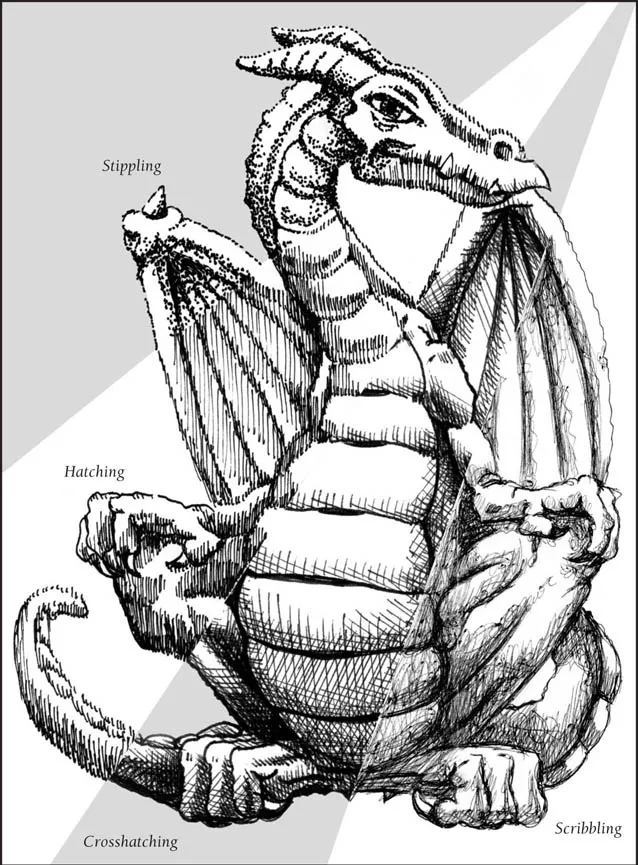
Putting Ink Strokes to Use In this sectioned drawing, you can see how each shading technique results in a different look and feel for the finished piece. In the uppermost section, I stipple with an ultra-fine permanent marker to create dynamic shadows; for darker values, I apply denser dots. For the next area, I use a .3 mm ink pen to create closely spaced hatch marks that suggest a rough texture. I crosshatch the next section with a .5 mm ink pen to create a rough, scaly look. For the final section, I build up a loose scribble with a ballpoint pen to achieve a cracked, worn texture.
Using Ink You can use the same shading techniques with ink as those used with pencil, as the example above demonstrates. However, ink is a much less forgiving medium than pencil—you cannot erase your marks. To avoid making mistakes, sketch the entire drawing (including details) in pencil first; then apply the ink. When the ink is completely dry, gently go over the entire drawing with an eraser to pick up any stray pencil marks. If you’ve diluted the ink to a wash, be sure to allow more time for drying.