
eBook - ePub
Intarsia Woodworking Projects
21 Original Designs with Full-Size Plans and Expert Instruction for All Skill Levels
Kathy Wise
This is a test
Share book
- 250 pages
- English
- ePUB (mobile friendly)
- Only available on web
eBook - ePub
Intarsia Woodworking Projects
21 Original Designs with Full-Size Plans and Expert Instruction for All Skill Levels
Kathy Wise
Book details
Book preview
Table of contents
Citations
About This Book
A collection of 21 full-size intarsia patterns ranging from beginner to expert. Includes a complete step-by-step tutorial to get you started, as well as helpful information on wood and blade selection, shaping, and more.
Frequently asked questions
How do I cancel my subscription?
Can/how do I download books?
At the moment all of our mobile-responsive ePub books are available to download via the app. Most of our PDFs are also available to download and we're working on making the final remaining ones downloadable now. Learn more here.
What is the difference between the pricing plans?
Both plans give you full access to the library and all of Perlego’s features. The only differences are the price and subscription period: With the annual plan you’ll save around 30% compared to 12 months on the monthly plan.
What is Perlego?
We are an online textbook subscription service, where you can get access to an entire online library for less than the price of a single book per month. With over 1 million books across 1000+ topics, we’ve got you covered! Learn more here.
Do you support text-to-speech?
Look out for the read-aloud symbol on your next book to see if you can listen to it. The read-aloud tool reads text aloud for you, highlighting the text as it is being read. You can pause it, speed it up and slow it down. Learn more here.
Is Intarsia Woodworking Projects an online PDF/ePUB?
Yes, you can access Intarsia Woodworking Projects by Kathy Wise in PDF and/or ePUB format, as well as other popular books in Tecnología e ingeniería & Oficios técnicos y manufactureros. We have over one million books available in our catalogue for you to explore.
Information
INTERMEDIATE PROJECTS
Mallard Demonstration
Wood
1" x 4" x 4" medium-dark wood such as cherry (front grass)
½" x 8" x 8" medium-dark wood such as cherry (rear grass, background)
1" x 6" x 10" medium-light wood such as bird’s eye maple (body)
1" x 2" x 3" light wood such as yellowheart (beak)
1" x 5" x 8" medium wood such as beech (wing)
1" x 8" x 10" dark wood such as black walnut (head, tail, chest)
1" x 4" x 6" white wood such as poplar (neck, feathers)
½" x 4" x 18" medium-light with a dark streak, such as beech (water)
¼" x 1" x 1" black wood such as ebony, or your stained or painted wood of choice (eyes)
¼" x 12" x 14" lauan plywood or Baltic birch plywood (backing board)

Mallard Drake
At 50 pieces, this mallard project is easy to cut and allows you to focus on details such as pattern layout, wood choice and shimming up pieces to add depth.
Remember that a pattern is simply a starting point for your finished work of art. If you want to have less pieces, eliminate some of the lines and cut areas in larger sections. You can remove some of the lines in the water area, or make the grass clump as an overlay and cut the underlying water as one piece. As you work on more intarsia projects, you will become more comfortable making design changes.
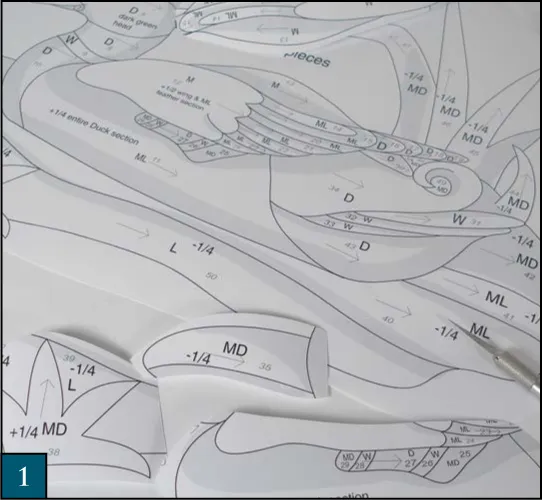
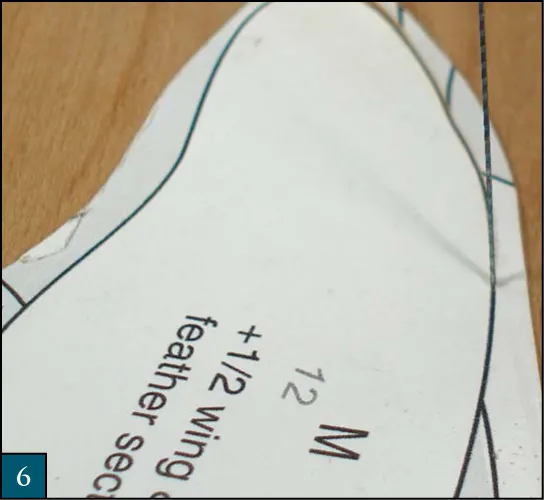
Examine the pattern. If any areas bother you or look too difficult to cut, change them. Determine where you can cut large sections of the same color with the same grain direction. You will need seven copies of the pattern. Keep one for your master copy. Cut apart each pattern piece.
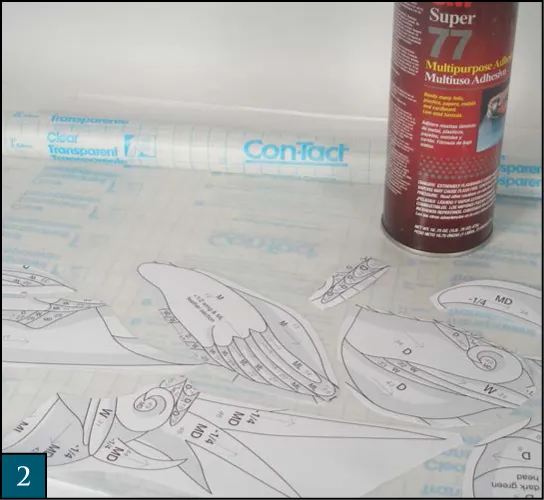
Attach the patterns to contact paper. Apply spray adhesive to the back of the pattern pieces and position the pieces on the shiny side of the contact paper. Cut apart each pattern piece and group them together according to the color and thickness of the wood.
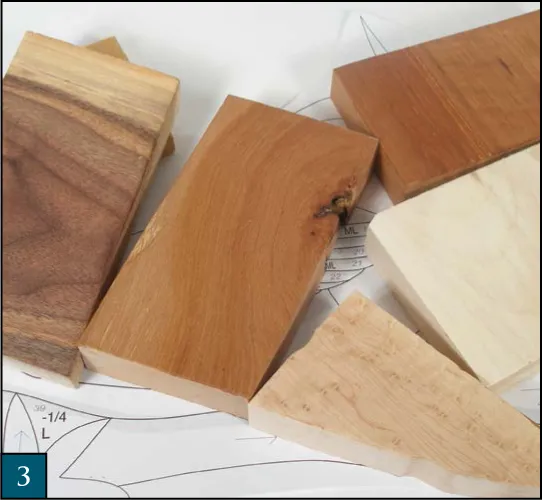
Choose your wood. Start with white and light-colored woods, then dark wood, and finally medium tones. 1"-thick stock gives you more room to add detail and texture. The dimensions listed are the bare minimum; if searching for good grain patterns, you may need twice as much. Have extra wood on hand in case you have to re-cut a piece.
Choose grain patterns. I chose bird’s eye maple for the body. The contrasts of light and dark in the grain produce a natural feathery effect. Be sparing with your use of wild grain; it may detract from your piece. Sometimes it helps to trace the outline of your piece onto your wood to see if the grain pattern gives the desired effect.
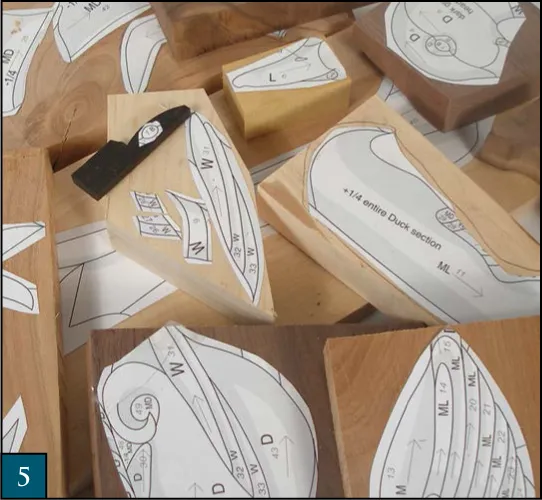
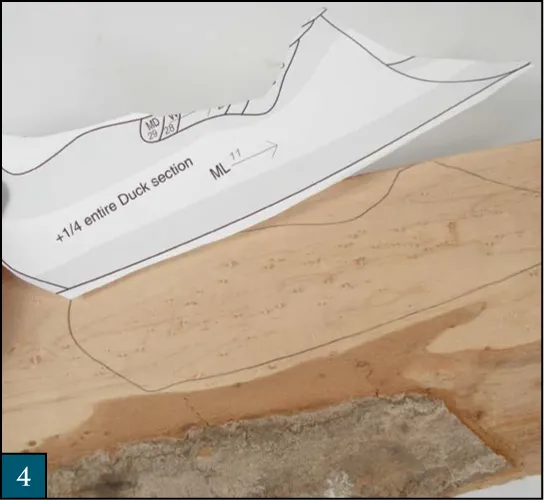
Peel and stick the patterns to the wood. Make sure your wood is clean, dry, and free of dust. I use yellowheart for the beak to add a spark of color. Black walnut is used for the dark areas of the bird and ebony is used for the eye. Cut the pieces down to manageable sizes on a band saw or with a large scroll saw blade, such as a #9 or #12.
Cut the perimeter of the larger pieces and sections. Make sure the blade is square to the saw table. I use a #5 blade. Sand off the burr on the bottom of the wood after each cut if necessary. Keep your blade in the middle of the line. As you gain more experience, leave more of the line for a more exact fit. Number the back of each piece and place it onto a full pattern.
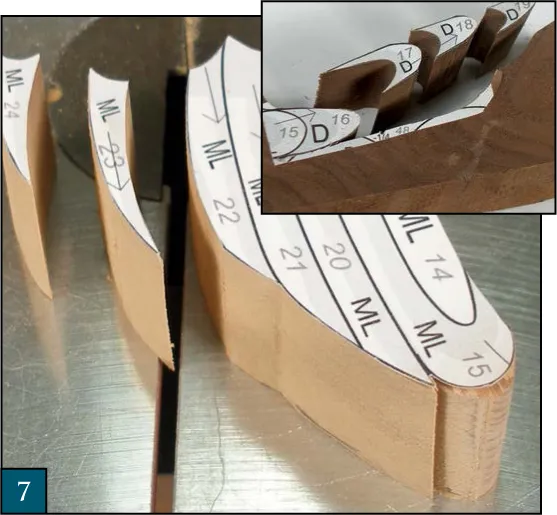
Cut the sections into individual pieces. Switch to a small blade, such as a #2 or #3 blade. On are...