- 178 pages
- English
- ePUB (mobile friendly)
- Available on iOS & Android
eBook - ePub
About this book
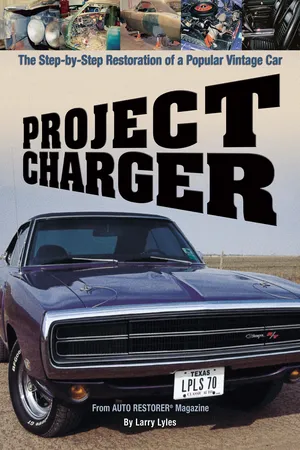
Join the restoration craze with the first automotive book from BowTie Press. This is a comprehensive, nuts and bolts approach to automotive restoration that will demonstrate the best way to bring a car back to its original brilliance. Restoration expert Larry Lyles makes the process come alive with over 200 color images and step-by-step details. While the vehicle being restored is a 1970 Dodge Charger, the techniques and ideas presented here can be employed to restore any vehicle. Originally conceived and written as a twenty-four article series for Auto Restorer magazine (the premier publication for die-hard restoration enthusiasts), this compilation delves into a complete, ground up restoration of a classic muscle car. It offers as much real-world information on how to accomplish such a restoration.
Information

PHOTO 1: This is the interior from the passenger side. Notice the missing glove box and the hole where the radio was located.
CHAPTER ONE
Starting the Project
Ask any expert in the field of automotive restoration where you should begin a restoration project and chances are he’ll know the exact spot. Many restoration projects never get off the ground until someone points to a specific location on the vehicle and announces it is the place to begin. I can’t agree more. You have to start somewhere or the work never gets done. I just don’t agree that you should start your restoration project by working on the vehicle itself; you should start with documentation.
Oh sure, I could stand in front of any project vehicle, point to a location on the car, and pronounce it as the place you should start. You would cheerfully begin working on the vehicle, taking off parts, piling them here, and stacking them there. But within a short period of time the project would take on a life of it’s own. Expensive parts would suddenly be scattered here, boxes of nuts and bolts would grow up out of the floor there, and chrome trim and bucket seats would take up valuable space near the only work bench in the shop. New parts purchased six months ago, but not needed until next year, would strangely disappear; while old parts you will never need again would find places of permanent residence in the shop. The question of what to do next would become paramount in your mind. It doesn’t have to be like that. Restoring an old car ought to be fun. For me, it kept me out of my wife’s hair for quite some time.
The good news about restoring an old car is that any anointed place to begin is a good place to start. The bad news is the starting point is a long, long way from the ending point. A lot of tear down, repair, overhaul, replacement, and assembly must occur in the meantime. Unfortunately, all this “meantime” work can become daunting and sometimes downright depressing. A writer friend of mine once told me that all good books have a great first chapter and a blockbuster final paragraph. Everything that happens in between is just interesting filler designed to keep the reader turning pages. Restoring old cars is the same. The beginning is always filled with great promise, while the climatic end is something that can only be reached by turning every sweat-dripped and grease-smeared page in between. So where do we go from here?
Documentation
Step one in your restoration project should be documentation. By documentation, I don’t mean tracking down the history of the vehicle from the first oil change to the last tire rotation, or even from owner to owner or engine swap to engine swap. Having this information, however, does make the vehicle more valuable in the long run. Let’s face it—most of us are not trying to build a concours-grade vehicle worth millions of dollars, which translates into many millions of dollars spent in the process. What we are building is referred to as a driver, a dependable vehicle in which we can comfortably sport around town. Of course, having something everyone stares at doesn’t hurt either.
For this type of vehicle restoration, documentation means making several lists. You need a list for the new parts you have to purchase as well as separate lists for parts requiring overhauling, repairing, and refinishing. Having such lists allows you to determine where to begin your restoration project and how to systematically work your way through the process to a successful conclusion.
The first step in forming a list of new parts needed is to order catalogs. Every aftermarket parts supplier on the planet has a catalog. Some are dedicated parts suppliers, meaning they cater to one specific area of automotive restoration such as rubber weather stripping or suspension components. Others offer everything from lock knobs to hinge bushings. Some catalogs are free, but others are not. Of the ones that are not free, most will refund the cost of the catalog with your first purchase. Since most companies that charge for their catalogs offer extensive parts inventories, shelling out a few bucks to see what they stock is often worth the cost.
Next, go on-line. Many suppliers have excellent Web sites with products, prices, and helpful hints on how to use their products. Others have just enough Web presence to let you know they are out there. Reference the sites that look promising in a Favorites file (or Quick Reference file) for future use, or jot down the addresses on a note pad for safekeeping.
Finally, get input from your friends. I’ve never met a restoration buff who wasn’t happy to talk about his latest project, and I have never talked to one who didn’t leave me with more information than I had when we started talking.
Sources List
Armed with catalogs, Web sites, and friendly advice, you are ready to start building a file folder of your restoration lists and notes. Usually my file folder is filled with printouts from my computer. I open a word processing file on the computer and give it a project label; in this case I label the file Project Charger. In that file I make a sources list. This list includes every catalog I have along with the general contents (such as “Chrysler sheet metal source”) of each catalog. Next, I list the Web sites I like along with a brief content note on sites that contain information I may need. Last, I note the sources my friends offer plus the names of all the old car salvage yards in my area that still stock the types of vehicles I am working on.
The equivalent late model salvage yard is a different animal altogether. Late model salvage yards cater to the newer car market, which means they rarely stock any vehicle over 10 years old. They crush older vehicles to make room for the later models. Old car salvage yards keep cars until nothing is left but the rust. However, they, too, will eventually crush the remains of everything in the yard to make room for the newer old cars our grandchildren will want to restore.
The salvage yards I frequent identify the crusher candidates by painting a big X on the roof. Every time I make a trip to the salvage yard, I make sure the vehicles I am scavenging are not marked for crushing. If they are, I pick the carcasses clean of anything I might need before the crusher shows up.
Master Checklist
The next item in the file folder should be the master checklist. Compiling this list is a little more involved. I purchase a couple of loose-leaf notebooks, a package of ruled paper, and about one hundred pages of photo keepers. The photo keepers allow me to photographically record the entire restoration in chronological order, which helps when I’m ready to assemble the car again and serves to wow my friends once I’m done with the project. The packages of ruled paper let me write down every step of the restoration as I perform it, again to help during assembly of the car; and the notebooks give me a place to temporarily list broken, missing, or damaged parts before I forget about them. Of course, you may also choose to enter your master checklist information in a Word or Excel document. I find, however, that my low-tech method comes in handy when I am working in the shop because I don’t have to stop everything to clean up, go in the house, and turn on my computer. The choice is entirely up to you.
Photographs
After I identify and research my major rebuild issues, I document the original condition of the Charger with photographs. You will want photographs of everything about the car. For example, what decals or labels are on the car? Where are they located? How about those engine labels located under the hood; what do they say? Good close-up photography preserves this information. It is to your benefit to invest in a quality camera and film. Be sure the camera you are using takes clear close-ups, and have all of your photographs developed before you remove or alter the actual parts.
As I am photographing each and every part of the vehicle, I am also making entries in the master checklist. Later, when I look at my master checklist, I see that although the vehicle has rear bumper guards, it never had front bumper guards. Having this note reminds me I won’t need to add front bumper guards to my new parts list once I compile it.
Photographs also give me a visual reference to use when I’m rebuilding the car. For example, what was the original color of the brake booster on this car? A year from now when I start opening box after box looking for a brake booster and can’t find it, a quick look at photo 3 will tell me the car never had a brake booster in the first place.
Salvage Parts List
Armed with a plethora of photographs and page after page of notes and entries on my master checklist, it is time to put everything into some kind of order. First, I assemble a list of damaged or missing parts I may be able to locate at salvage yards. I make a copy of that list and take it with me every time I darken the gate to my favorite vintage car salvage yard. Having such a list means I don’t have to remember all those individual parts I need to locate for the car. Would you remember you need new defroster vents for the dash if you didn’t make a note of it? I wouldn’t.
New Parts List
Here, I list the new parts I need to purchase, a source for those parts, and the price of each part. One thing I learned a long time ago is when ordering new (aftermarket) parts from reputable companies, not all prices are created equal. That is why I keep so many source catalogs. Compiling a list of parts and sources allows me to build an order sheet for each source so I can make one large order instead of several small orders. The more money you spend in one place at one time, the more likely that source will offer you a discount. If not a discount, believe me, they will remember you the next time you place an order and treat you accordingly.
Overhaul List
I list everything in need of rebuilding in the overhaul list. You, or someone with the right equipment, can rebuild many old parts. The trick is to find the right parts to use when doing a rebuild. For example, door hinges are notorious for requiring overhaul. Alternators, starters, steering boxes, rear axles, and brake assemblies also come to mind. All of these parts can be overhauled but will require new parts and a little professional help in the doing.
Parts Needing Repair List
This is probably the easiest list to compile. If it is bent and you can repair it, add it to this list. If nothing else, it will give you a schedule to follow. Many of the parts will contain components that require overhaul, replacement, and/or refinishing. This list helps you keep track of the progress of the work on the other lists.
Refinishing List
Every part on your project vehicle is one color or another, whether that color is cast iron gray, Plum Crazy purple, or semigloss black enamel. I list each part that needs refinishing. Later, after it’s been painted, I will check it off. Does the part require priming? Is it best clear coated or will a single stage (enamel or lacquer) finish do? Is the part an interior piece or an exterior part? Having a refinishing list ensures every part gets painted before it is scheduled for installation back on the vehicle.

PHOTO 2: Begin compiling your restoration checklist from the ground up starting with the tires and suspension components. While these tires are badly worn, several new suspension components were found after looking under the vehicle.

PHOTO 3: This photograph was intended for referencing the color of the hood hinge, but it also helps me remember that the car doesn’t have a brake booster.

PHOTO 4: The interior of the vehicle is shot. Notice the missing driver’s door trim panel and the extremely worn driver’s seat cushion. Also notice the aftermarket steering wheel. This will go on the Salvage List because new, replacement steering wheels are almost impossible to find.

PHOTO 5: Having a photograph of the rear of the vehicle tells many stories about what the previous owner added to the car—in this case, rear bumper guards.

PHOTO 6: Yikes! Rust! At least this is repairable. I add a note to my overhaul list for future reference.

PHOTO 7: More rust! Where you find one spot of rust you will always find two spots of rust. This floor pan can be replaced with new metal. Again, I make a note on the overhaul list.
Initial Inspection
Armed with my checklist notebook and a good camera, the next step is the vehicle itself. Perhaps it is just ritualistic with me, but after purchasing a restoration project I walk around the vehicle and look it over. I may do this for a week or more before actually committing anything to paper or film. When I’m ready, I start taking notes. I write down everything about the v...
Table of contents
- Front Cover
- Copyright
- Table of Contents
- Acknowledgments
- Introduction
- 1 Starting the Project
- 2 Teardown Begins
- 3 Glass Removal
- 4 Exterior Teardown
- 5 Moldings and Body Lines
- 6 Removing the Engine
- 7 Cowl Teardown
- 8 Reassembly Begins
- 9 Restoring the Trunk Floor Plan
- 10 Sheet Metal Repair
- 11 Refinishing the Underbody
- 12 Priming and Blocking
- 13 Refinishing the Exterior and Interior
- 14 Refinishing the Components
- 15 Powder Coating
- 16 Machine Work
- 17 Trim Work Begins
- 18 Window Tint and Door Glasses
- 19 Suspension Installation
- 20 Drive Line Installation
- 21 Front Sheet Metal
- 22 Bumpers, Decals, and Stripes
- 23 Interior Trim
- 24 A Look Back
- Resources and Restoration Costs
Trusted by 375,005 students
Access to over 1.5 million titles for a fair monthly price.
Study more efficiently using our study tools.
Frequently asked questions
Yes, you can cancel anytime from the Subscription tab in your account settings on the Perlego website. Your subscription will stay active until the end of your current billing period. Learn how to cancel your subscription
No, books cannot be downloaded as external files, such as PDFs, for use outside of Perlego. However, you can download books within the Perlego app for offline reading on mobile or tablet. Learn how to download books offline
Perlego offers two plans: Essential and Complete
- Essential is ideal for learners and professionals who enjoy exploring a wide range of subjects. Access the Essential Library with 800,000+ trusted titles and best-sellers across business, personal growth, and the humanities. Includes unlimited reading time and Standard Read Aloud voice.
- Complete: Perfect for advanced learners and researchers needing full, unrestricted access. Unlock 1.5M+ books across hundreds of subjects, including academic and specialized titles. The Complete Plan also includes advanced features like Premium Read Aloud and Research Assistant.
We are an online textbook subscription service, where you can get access to an entire online library for less than the price of a single book per month. With over 1.5 million books across 990+ topics, we’ve got you covered! Learn about our mission
Look out for the read-aloud symbol on your next book to see if you can listen to it. The read-aloud tool reads text aloud for you, highlighting the text as it is being read. You can pause it, speed it up and slow it down. Learn more about Read Aloud
Yes! You can use the Perlego app on both iOS and Android devices to read anytime, anywhere — even offline. Perfect for commutes or when you’re on the go.
Please note we cannot support devices running on iOS 13 and Android 7 or earlier. Learn more about using the app
Please note we cannot support devices running on iOS 13 and Android 7 or earlier. Learn more about using the app
Yes, you can access Project Charger by Larry Lyles in PDF and/or ePUB format, as well as other popular books in Technology & Engineering & Automotive Transportation & Engineering. We have over 1.5 million books available in our catalogue for you to explore.