- 104 pages
- English
- ePUB (mobile friendly)
- Available on iOS & Android
Progressive Perspective Drawing for Theatrical Scene Design
About this book
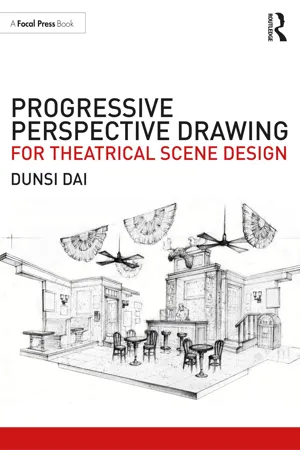
Progressive Perspective Drawing for Theatrical Scene Design provides theatrical scenic designers with the tools to create quick and precise perspective drawings.
The book explores three methods of perspective drawings at progressive skill levels – the Grid Method, the Frame Method, and the Freehand with References Method – allowing scenic designers to build on their drawing technique consistently. Replete with discussions on pencil techniques, step by step instructions, and set sketches from professional set design projects, this volume guides readers from the basics of the cube system to the more challenging freehand drawing.
Progressive Perspective Drawing for Theatrical Scene Design is an excellent resource for students of Scene Design, Stage Design, Set Design, Scenography, Stagecraft, and Design for Theatre, as well as an accessible self-study guide for those with an interest in scene design.
The book includes access to downloadable pre-made perspective grids, to help readers familiarize themselves with one and two vanishing point grids.
Frequently asked questions
- Essential is ideal for learners and professionals who enjoy exploring a wide range of subjects. Access the Essential Library with 800,000+ trusted titles and best-sellers across business, personal growth, and the humanities. Includes unlimited reading time and Standard Read Aloud voice.
- Complete: Perfect for advanced learners and researchers needing full, unrestricted access. Unlock 1.4M+ books across hundreds of subjects, including academic and specialized titles. The Complete Plan also includes advanced features like Premium Read Aloud and Research Assistant.
Please note we cannot support devices running on iOS 13 and Android 7 or earlier. Learn more about using the app.
Information
CHAPTER 1
INTRODUCTION
- Drawing in proportion is the key. Because scene designers are working in a tangible environment—a stage where the set is interactive with actors in real dimensions—whatever you draw will eventually establish a proportional relationship with the ultimate reference: the actor. In other words, you need to draw with the actor in mind as the basic proportional reference.
- Draw clearly (readability). This way, your production team (director, other designers, shop, etc.) can understand what you want to tell them in terms of how various objects of the set relate to one another.
- Relate your perspective drawing to your floor plan. This helps to bring your artistic dream into the physical specifics of the given production space—your set on a given stage.
CHAPTER 2
MATERIALS AND TOOLS
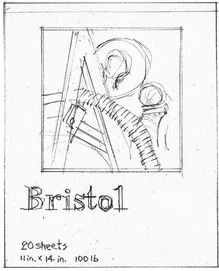
- Paper:You can draw on just about any paper for a perspective drawing (including your drafting vellum). For presentational quality, my favorite paper is 100-pound Bristol Board (in 11” × 14” size). Most of the example sketches shown in this book are done on this paper. This paper’s surface is durable, erases well, and is strong enough to stand up by itself when in presentation. it is reasonably priced, especially if you buy it in pad size.

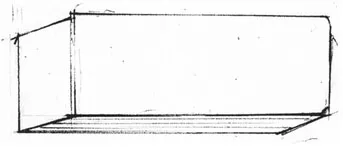
- Vellum:This is the same vellum (or clear print) you used for your hand drafting project. it is transparent. it is handy to use, if you plan to use those pre-made grids, which are downloadable from the publisher’s website (www.routledge.com/9780367860790). Just choose a pre-made grid PDF file and print it out (check “fit” in the printing window). Tape the printout down, then tape down a sheet of vellum over it. You are ready to draw with the Grid Method.
- Pencil:Regular #2 pencil is good enough in most cases. Pencils with various hardness and softness, such as 2H, 4H, and 2B, are optional and fun to play around with. For all of the example sketches shown in this book, I only used a regular #2 pencil, because that has been what I do with my freelance design projects.
- EraserAny good eraser will do. I recommend using I-by-2-inch “pink erasers.” These are the most common erasers on the market. They erase well, in large size, and with low cost, which encourages users to feel free cutting the erasers to obtain sharp edges to apply the erasing techniques introduced in this book.


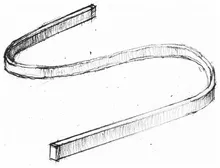
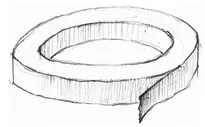
- Rulers:An architecture scale ruler (used to take measurements from floor plans, set up grids with the Grid Method, and set up the frame with the Frame Method).a 12-inch straight ruler for drawing lone straight lines.A small ruler around 4 inches is very convenient to use for drawing detail lines. it could be a small triangle, a straight ruler, or you might want to have both.Those will help you to draw most of the straight lines in your drawing when you need to clean up your work.
- Flexible Curve:This is a drafting tool that many scenic designers prefer to have. It helps you to draw smooth curve lines. However, it is not a must-have. You could opt not to use it. Personally, I do not use it much. In most cases, I draw curves freehand. On the positive side, this tool gives you more accuracy in curve drawing. Many of my students find having a flexible curve handy.
- Masking Tape (or Drafting Dot):This is another drafting material that is especially helpful when you are working with the Grid Method. It helps keep your drawing in place while you are setting up the grid and working out all of the perspective lines.

- Clear Latex Spray:I use Krylon Clear Matte Finish to seal my pencil sketches. 3M’s product also works well. it is usually applied to the drawing after the show is over, when you want to archive your work and want to make sure your pencil drawing will not get smudged. At that point, you spray a coat of Clear Matte Finish Latex Spray over your drawing. Some people apply it right after their drawings are done. however, if you do so, it will make further changes to your drawing difficult.
Table of contents
- Cover
- Half Title
- Title Page
- Copyright Page
- Dedication
- Contents
- Preface
- Acknowledgments
- CHAPTER 1 INTRODUCTION
- CHAPTER 2 MATERIALS AND TOOLS
- CHAPTER 3 PERSPECTIVE BASICS
- CHAPTER 4 PERSPECTIVE DRAWING METHOD BASIC: CUBE SYSTEM
- CHAPTER 5 PERSPECTIVE DRAWING METHOD I: GRID METHOD
- CHAPTER 6 DRAWING TECHNIQUE
- CHAPTER 7 PERSPECTIVE DRAWING METHOD II: FRAME METHOD
- CHAPTER 8 PERSPECTIVE DRAWING METHOD III: FREEHAND WITH REFERENCES METHOD
- CHAPTER 9 DRAWING FIGURES IN PERSPECTIVE DRAWING
- CHAPTER 10 PERSPECTIVE DRAWING PROJECTS
- CHAPTER 11 THE NEXT STEP: EDIT AND DEVELOP PERSPECTIVE DRAWING IN PHOTOSHOP
- SUPPLEMENTARY MATERIAL A SAMPLE CLASS SCHEDULE
- Index