- 128 pages
- English
- ePUB (mobile friendly)
- Available on iOS & Android
eBook - ePub
About this book
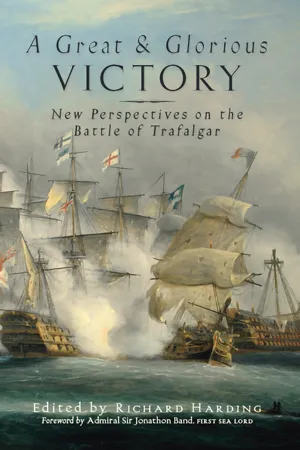
In October 2005 an international naval conference was held at Portsmouth and well-known historians and naval officers from around the world, including Colin White, Brian Lavery, Contre Amiral Remi Monaque and Admiral Sir Jonathan Band, now First Sea Lord, gave a series of papers on aspects of the battle of Trafalgar. Containing a wealth of new information they are now form the core of this book. Twelve chapters cover every aspect of the battle but also explore important associated themes such as the Grand Armee and the invasion threat, and the British defenses against invasion in the years before 1805. On the battle itself there are pieces on the ships, men and the tactics, and important chapters from the French and Spanish perspectives. Perhaps the most groundbreaking contribution is from the Inshore Squadron, a naval war-gaming group, which produced a timeline that is the most accurate yet available and reveals, amongst other things, the nature of the ship-on-ship actions and the timing of some of the set events. Put into its strategic, political and economic context, the battle is brought to life in a way which distinguishes it from all the other accounts that have appeared and offers enthusiasts and historians the most up-to-date and important reassessment that is available.
Trusted by 375,005 students
Access to over 1.5 million titles for a fair monthly price.
Study more efficiently using our study tools.
Information
– 1 –
The Reconstruction of Trafalgar

The Battle of Trafalgar has been so thoroughly threshed out by historians that little new light is thrown on the incidents of the action by the narratives contained in the log books.
T Sturges Jackson, Logs of the Great Sea Fights (1900)1
WRITTEN OVER A CENTURY ago, this statement admirably describes the Inshore Squadron’s main concern in preparing for the Trafalgar Conference. After two hundred years, what could possibly remain unsaid about this iconic battle?
The Traditional View – Commencement of the Battle of Trafalgar
The traditional view of Trafalgar has become part of the national consciousness. The British fleet, formed into two lines, sails directly for the combined Franco-Spanish line under a barrage of fire before breaking the line at right angles and overwhelming the Combined Fleet with devastating close-range broadsides. A simple case of getting into action as quickly as possible, Nelson’s attack seems devoid of tactical interest. As with our previous reconstructions of the battles of the Nile and Copenhagen, preparations for Trafalgar began with a review of as many previously published accounts of the battle as could be obtained. Once again, it was found that successive historians placed great reliance on their predecessor’s works, in this case particularly the works of James2 in 1837 and Taylor3 in 1950, to the extent that inconsistencies in those versions have been faithfully repeated and accepted as received wisdom.
Even the recollections of those actually present need to be treated with care. As well as the natural confusion caused by the chaos of battle, several accounts were written many years after the battle and some writers seem to have checked their memories with the published accounts (particularly James) to confirm the identities of their opponents. In common with their British counterparts, French and Spanish accounts sometimes exaggerate the part played by an individual ship, but were essential in confirming ship positions and identities.
We concluded that reliance had to be placed upon contemporary material and eye-witness accounts as recorded in logs and journals, comparing the sequence and timings of these records by drawing up a coordinated timeline of key events. Each ship’s course during the battle was mapped out and a running plot created using a computer simulation.
It quickly became apparent that the traditional version of Trafalgar was far too simplistic. How could Victory’s mizzen be shot away if she was approaching the Combined Fleet at right angles to the line? Why did her Master’s Log4 clearly report passing ‘down the enemy line’? What was the explanation for the forty-five minute difference between Royal Sovereign and Victory breaking the line? And how did the actual attack compare with Nelson’s famous Memorandum and the dramatic sketch of his intentions discovered by Colin White5 during the Nelson’s Letters project?
In the run-up to the first centenary celebrations the wisdom of Nelson’s apparent headlong rush into battle generated such controversy that an Admiralty Committee was appointed to report on the tactics used at Trafalgar. As part of the preparations for the Bridge Report published in 1913,6 we found that Captain TH Tizard of the Royal Navy had collated the details of the approach phase of the British ships in a manner reminiscent of our own researches.
The work of the Bridge Report finished with a diagram of the battle at noon on the 21 October 1805. For the Bicentenary Conference, the Inshore Squadron determined to resolve the questions we had raised and produce a twenty-first-century follow-on to the Bridge Report from noon until the end of the battle. Using the advantages of modern technology, the course and actions of each individual ship during the battle were reconstructed using a computer simulation and the resulting animation presented to the conference, together with a scale model showing the height of the battle at 13.00.
06.00–12.00: The Approach
When dawn broke shortly before 06.00 on the morning of 21 October 1805, Horatio Nelson looked on the culmination of two years of planning and implacable pursuit. Silhouetted by the rising sun around ten miles to the north-east lay the Combined Fleet, a total of thirty-three ships formed into three squadrons and sailing south-south-east towards the Straits of Gibraltar and the Mediterranean.
Nelson’s own force of twenty-seven vessels was in night-cruising formation, with only Africa out of position – having missed an instruction to wear during the night – now well off to the North. At 06.10 he issued the order to Form the Order of Sailing in Two Columns, followed by the order to Bear Up and Sail Large (the fastest point of sailing) to the east-north-east.
At 06.22 Nelson gave the order to Prepare for Battle, followed twenty minutes later by a course change to steer directly to the east. The fresh breezes and squalls of the previous night had now died away, and even with every sail set it would take at least five hours to cross the intervening distance.
On board Bucentaure, Villeneuve watched as the British fleet deployed into two loose lines, described by onlookers as peletons. Today this term is most commonly used to describe the main pack of cyclists in the Tour de France, and this gives a good impression of the irregular linear formations that formed, unhindered by any pre-determined order of battle. Nelson’s instruction for the order of sailing as per order of battle was already having the desired effect of saving precious time during the deployment.
As soon as it became apparent that the British main body was present, as well as the shadowing frigates, Villeneuve knew that battle was inevitable. At around 06.20 he issued the order to form Line of Battle on the Starboard tack, with himself in the Bucentaure in the centre division, Dumanoir in the Formidable commanding the rear and Alava in the Santa Ana the van, accompanied by Gravina’s Squadron of Observation commanded from the Príncipe de Asturias.
Villeneuve’s tactical options were limited – by the weather, the position of the British fleet and, as he well knew, by the levels of training in the varied fleet he had under his command. Any attempt to escape into the Atlantic would only hasten their interception, given the direction of the wind – the British were holding the windward position. The decreasing south-westerly winds were also accompanied by an ominous heavy swell, a sure sign of an approaching storm pressing the waters ahead of it into rolling undulations several metres high.7
An easterly course into the Mediterranean also presented problems. Villeneuve knew that Nelson had detached a strong squadron of six ships towards Gibraltar, indeed, its departure was one of his reasons for sailing. To Villeneuve, Nelson’s course showed an intention to concentrate on the rear and cut the Combined Fleet off from the refuge of Cádiz. He had already seen the results of Nelson overwhelming one end of a fleet while the remainder lay paralysed at the Nile, and had predicted such a move in his own tactical instructions. After a long period of deliberation, Villeneuve ordered the fleet to reverse course and wear around, keeping Cádiz to leeward – a potential retreat from storm or battle damage.
Given the lightness of the winds and the effect of the swell, such a manoeuvre would have tested any fleet used to operating together and in regular order. The Combined Fleet was neither of these, and the manoeuvre took almost two hours to perform, each ship struggling to get around and trying to reach its allotted place in the reformed line. Many ships never found their intended station and slotted in where they could.
In the reversed formation Dumanoir now commanded the van, steering a course as close to the wind as possible, followed by Villeneuve in the centre. To the rear, Alava in the Santa Ana pressed on to try to close up to the centre, being increasingly forced out to leeward. Gravina’s Squadron of Observation, although intended to remain to windward to form a mobile reserve and intercede where needed, steered into the wake of Alava’s division to form a continuous line. This resulted in the familiar crescent, sometimes two or three ships deep and with the van steering generally to the north-north-west.
Writing after the battle, Collingwood considered that this formation could have been a deliberate counter to ships breaking the line, as British ships passing through were often faced with further ships firing at them, but the truth is that this was accident rather than intention. Overlapping had the effect of substantially reducing the defensive firepower of a line of battle, and many ships were unable to fire at the British during the approach as they did not have a clear field of fire. Once the haze of the day was replaced by enveloping clouds of powder smoke, blown back into the faces of the Combined Fleet by the feeble breeze, long-range gunnery became increasingly impractical.
The lightness of the wind was also a concern to Nelson, as this increased the time that his ships would be in danger from enemy fire before reaching the line. To minimise this risk, the lead ships went into action with virtually every sail set, including the unwieldy studding sails on their extended booms. Even so, with the ships managing a maximum of two knots, each would be vulnerable to incoming fire for around fifteen minutes as it crossed the thousand-yard effective range of the opposing guns.
It is popularly supposed that French and Spanish gunners preferred firing high to disable the rigging, but there is no documentary evidence of any such doctrine. The leeward position, with the broadside facing into the wind, tended to make fire go high, as did a lack of experience at the guns. There was also a technological difference, as all of the British guns were fitted with purpose-built flintlocks that allowed firing at a particular instant in the ship’s roll. These were by no means standard in the Combined Fleet – an improvised solution using musket locks was in use on at least some.
Records of gunnery exercises between Formidable and Bucentaure in 18048 showed that the best-manned ships of the Combined Fleet could achieve rates of fire comparable with those of the Royal Navy, yet the fact remains that not a single British ship was prevented from reaching the line by rigging damage during the approach. Lying broadside-on to the swell, and making scarcely enough progress to maintain steerage way, the gunners of the Combined Fleet had to cope with an undulating motion which made accurate sighting for elevation, and therefore range, practically impossible. As a result, the British squadrons were able to close the distance in the face of hundreds of guns without suffering crippling damage – the majority of shot either flew too high or ploughed into the sea. As the range diminished however, the situation would become more even.
Trafalgar is unique in that it is the only battle at which Nelson was in overall command where both sides were in motion. It is possible to show both the Nile and Copenhagen using static diagrams, as the opposition were at anchor, but Trafalgar does not lend itself to this approach as the ships of the Combined Fleet travelled over three miles between the time taken for the first and last ships in the British squadrons to engage. The creation of a computer animation allowed an understanding of the development of the battle and the relationship between the separate actions fought by Collingwood and Nelson (Figure 1).
The most comprehensive study of the formation of the Combined Fleet was undertaken by Edouard Desbrière in1907,9 the results of which were adopted by the Bridge Committee without revision. The 1933 English translation of this study, now one of the rarest of the Trafalgar volumes and never reprinted, gives a justification for the initial positions of the ships based on log entries and reports of the battle from French and Spanish participants.
This analysis was reviewed and cross-checked with Edward Fraser’s 1907 The Enemy at Trafalgar10 and the British logs and journals, and provided sufficient evidence to indicate that the relative positions given by Desbrire, and included in the Bridge Report, were largely accurate, with the exception of the spacing between the ships. As will be seen, many British ships encountered difficulties in breaking through the line due to the closeness of the ships of the Combined Fle...
Table of contents
- Cover
- Title Page
- Copyright
- Contents
- Contributors
- Editor’s Acknowledgements
- Foreword by Admiral Sir Jonathan Band
- Introduction – The Battle of Trafalgar: New Departures and Positions
- Chapter 1: The Reconstruction of Trafalgar
- Chapter 2: ‘Eager and Happy to Exert themselves in forwarding the Public’s Service’
- Chapter 3: Trafalgar: Myth and History
- Chapter 4: Trafalgar: Myth and Reality
- Chapter 5: Trafalgar: A French Point of View
- Chapter 6: Behind the Wooden Walls: The British Defence against Invasion, 1803–1805
- Chapter 7: La Grande Armée of 1805: From the Great Ocean to the Great Continent
- Chapter 8: Austerlitz and the French
- Notes
Frequently asked questions
Yes, you can cancel anytime from the Subscription tab in your account settings on the Perlego website. Your subscription will stay active until the end of your current billing period. Learn how to cancel your subscription
No, books cannot be downloaded as external files, such as PDFs, for use outside of Perlego. However, you can download books within the Perlego app for offline reading on mobile or tablet. Learn how to download books offline
We are an online textbook subscription service, where you can get access to an entire online library for less than the price of a single book per month. With over 1.5 million books across 990+ topics, we’ve got you covered! Learn about our mission
Look out for the read-aloud symbol on your next book to see if you can listen to it. The read-aloud tool reads text aloud for you, highlighting the text as it is being read. You can pause it, speed it up and slow it down. Learn more about Read Aloud
Yes! You can use the Perlego app on both iOS and Android devices to read anytime, anywhere — even offline. Perfect for commutes or when you’re on the go.
Please note we cannot support devices running on iOS 13 and Android 7 or earlier. Learn more about using the app
Please note we cannot support devices running on iOS 13 and Android 7 or earlier. Learn more about using the app
Yes, you can access A Great and Glorious Victory by Richard Harding in PDF and/or ePUB format, as well as other popular books in History & European History. We have over 1.5 million books available in our catalogue for you to explore.