- 144 pages
- English
- ePUB (mobile friendly)
- Available on iOS & Android
eBook - ePub
Pegasus Bridge & Horsa Bridge
About this book
This battlefield guide is the companion work to Merville Battery & The Dives Bridges. Together, these two books form the fully revised and updated edition of the previous best selling Battleground Europe Series book Pegasus Bridge & Merville Battery.This book examines, in great detail, the attack by 2 Oxf Bucks and engineers of the British 6th Airborne Division, in six gliders, on the Caen Canal and River Orne bridges in the early hours of D-Day, 6 June 1944. It also describes part of the battle for the village of Bnouville by 7 Para and Ranville by 13 Para. It was the combination of these actions that allowed the link-up between the commandos and airborne troops on D-Day. Thereby, forming a bridgehead to help secure the eastern flank of the greatest combined military operation in history; Operation OVERLORD.In addition to explaining how these objectives were achieved, this battlefield guide relates the battles to the area as it is today. The book contains details of the museums, memorials, cemeteries and associated organizations. All of which will unravel the history of the area to the visitor and armchair traveler alike.To further aid the battlefield tourist, GPS data is also provided for either satellite navigation by vehicle or for viewing on Google Earth.
Trusted by 375,005 students
Access to over 1 million titles for a fair monthly price.
Study more efficiently using our study tools.
Information
CHAPTER ONE
PLANNING THE INVASION
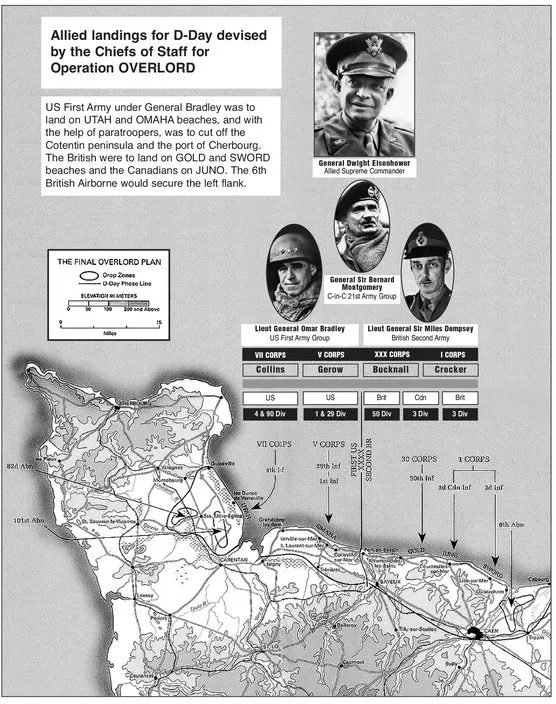
THE ALLIED PLAN
Operation OVERLORD involved the initial landing of six divisions – three American, two British and one Canadian – on five beaches over a 50-mile (80.46km) stretch of Normandy coastline between Quinéville on the east coast of the Côtentin Peninsular and Ouistreham at the mouth of the River Orne. It had been decided that the best time to land on the beaches was just after first light in the morning, just below mid tide, and on a flooding tide, as this gave the advantage that most of the beach defences would be seen and could therefore be destroyed or avoided. Low tide would have created too large an area of open ground for the troops to cross, up to 600 yards (549m) in places, making the beaches a killing field. High tide would leave the beach defences of mines and obstacles undetectable and also leave too small an area for the troops to disembark and organise themselves.
Due to the distance involved, and the run of the tide, the First (US) Army were due to land first on UTAH and OMAHA Beaches at 0630hrs. These would be followed by the Second (British) Army at GOLD and SWORD Beaches at 0725hrs, and JUNO Beach at 0750hrs.
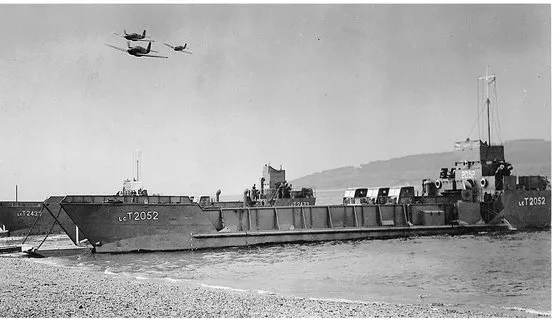
Pre-invasion exercises at a Training Centre of Combined Operation Command. RAF Mustangs come in low over landing craft in a simulated attack.
In order to protect the outer flanks of the seaborne invasion and help disable the German Atlantic Wall from the rear, an additional assault of three airborne divisions, two American and one British, would precede the beach assault at just after midnight on the night of the 5/6 June, 1944. On the right flank 15,000 troops of the 82nd (All American) and 101st (Screaming Eagles) US Airborne Divisions would land on the Côtentin Peninsula and, on the left flank, approximately 12,000 troops of the British 6th Airborne Division would come to ground and secure an area around and between the Caen Canal and River Dives (see Map 1).
After the firm establishment of a bridgehead on the beaches and a link-up of the British and Canadian armies with the 6th Airborne Division, General Montgomery planned to use the threat of a breakout in the 6th Airborne Division sector to draw and contain enemy reserves on the eastern flank.
My plan was to make the breakout on the western flank, using for this task the American armies under General Bradley, and to pivot the whole front on Caen. The American breakout thrust was to be delivered southwards down to the Loire and then to be developed eastwards in a wide sweep up to the Seine about Paris. This movement was designed to cut off all the enemy forces south of the Seine, over which river the bridges were to be destroyed by air action.1
GENERAL MONTGOMERY, COMMANDER, 21ST ARMY GROUP
Within the first forty-eight hours of the invasion General Eisenhower, the Supreme Commander of the Allied Expeditionary Force, planned to land, by sea, 176,475 men along with 20,111 vehicles (these included 1,500 tanks, 5,000 tracked vehicles, 3,000 guns and 10,611 assorted vehicles from jeeps to bulldozers). In total, by D-Day,1 thirty-seven divisions (twenty-three infantry, ten armoured and four airborne) were to be available in Britain to carry out the mission of invading north-west Europe. The use of 5,000 ships and 4,000 additional landing craft and air cover supplied by 171 fighter squadrons2 ensured that D-Day was set to be the greatest combined operation ever attempted.
Subsequent books in this Battleground Europe series cover, in detail, the beach and American airborne landings in Normandy. This book Pegasus Bridge & Horsa Bridge and the accompanying book in this series, Merville Battery & The Dives Bridges, will concentrate on the objectives and operations of the British 6th Airborne Division; looking in detail at the events that surrounded their landings on the left flank of the invasion force on 6 June 1944.
FORMATION OF THE 6th AIRBORNE DIVISION
Orders were issued by the War Office on 23 April 1943 for the formation of the 6th Airborne Division.3 On 7 May 1943, Major General Richard Gale, the appointed commander, arrived at Syrencot House near Durrington, on Salisbury Plain in Wiltshire and formed the divisional headquarters (HQ). Meanwhile 6 Airlanding Brigade (6 Airldg Bde) HQ was formed at Amesbury. It was around this time that the decision was made that the 1st Airborne Division sign – Bellerophon mounted astride the winged horse Pegasus, the first recorded airborne warrior – should be adopted as the airborne forces sign. This now famous emblem was also supported by a divisional motto that Major General Richard Gale placed in one of the first copies of Divisional Routine Orders – GO TO IT.
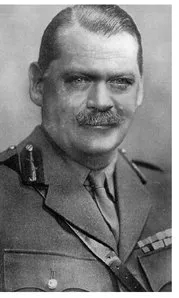
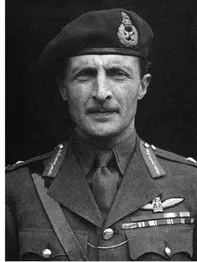
Major General Richard Gale.

This motto will be adopted by the 6th Airborne Division and as such should be remembered by all ranks in action against the enemy, in training, and during the day to day routine duties.
In this wise and from these beginnings was the 6th Airborne Division born.4
MAJOR GENERAL RICHARD GALE, GOC 6TH AIRBORNE
DIVISION
Although 6th Airborne Division was in fact Britain’s second airborne division, the number six was chosen in order to mislead enemy intelligence. From May to 22 September the division grew in size to its full strength; then on 23 December 1943, the division was ordered to complete its training and mobilize in preparation for operational duty by 1 February, 1944. In less than nine months after its initial formation the 6th Airborne Division was assembled and ready for active service. Considering that some 12,000 men were involved, it was a remarkable achievement. Sixteen days later Lieutenant General Frederick ‘Boy’ Browning, commander of I Airborne Corps, briefed Major General Gale on the role his division would play in the Normandy invasion.
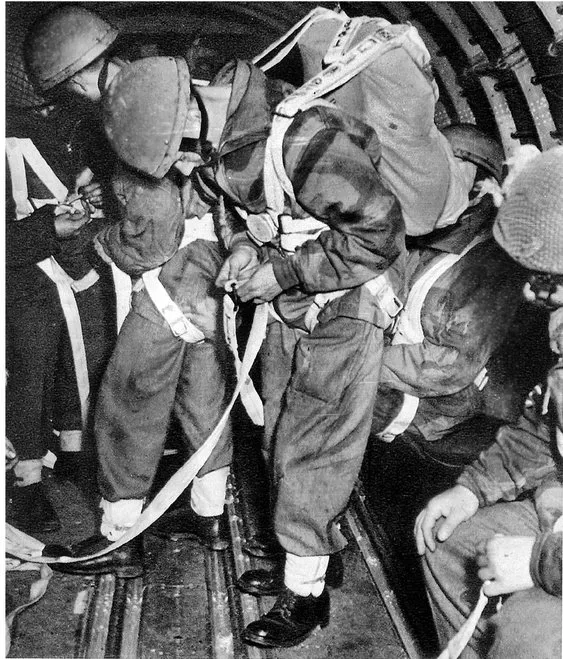
British paratroopers check their equipment before making a practise jump.
So it came about that on the 24th February, the 6th Airborne Division was definitely placed under command of the I British Corps for Operation OVERLORD. For planning, a small party consisting of myself,
Lieutenant General F. ‘Boy’ Browning.
Bobby Bray, my GSO 1, Lacoste, my GSO 2, Intelligence, one GSO 3, Shamus Hickie... my CRA and Frank Lowman my CRE with the chief clerk went up to I Corps Headquarters in Ashley Gardens, London.
It was here that I received my orders and here that we worked out our outline plan. A plan which, save for very minor modifications, we never altered.5
MAJOR GENERAL RICHARD GALE, GOC 6TH AIRBORNE DIVISION
OBJECTIVES OF THE 6th AIRBORNE DIVISION
The 6th Airborne Division had three primary tasks6 as part of their role in covering the eastern flank of the invasion:
TASK ONE (see Map 2, page 60)
The bridges over the Caen Canal (Bénouville Bridge) and the River Orne (Ranville Bridge) were to be captured intact in order to allow the rapid deployment of reinforcements from SWORD Beach. This would then greatly help the defence of the bridgehead, which by then would have already been established by the rest of the 6th Airborne Division, so that it could be maintained and exploited. This operation was to be carried out in a coup de main glider operation by one reinforced company (six platoons) from B and D Company (Coy) of 2nd Battalion Oxfordshire and Buckinghamshire Light Infantry (2 Oxf Bucks) of 5 Parachute Brigade (5 Para Bde).
Under the command of Major John Howard the infantry were accompanied by thirty engineers from No. 2 Platoon of 249 Field Company Royal Engineers (Fd Coy RE). All were due to land at Landing Zone (LZ) X & Y at approximately 0020hrs in six gliders.
Simultaneously, three advance parties of pathfinders from the 22nd (Independent) Parachute Company [22 (Ind) Para Coy] would drop at Landing Zone/Drop Zone (LZ/DZ) N, V & K and mark the LZ/DZs for the main body of 3 Parachute Brigade (3 Para Bde) at DZs V & K and 5 Para Bde at DZ N at 0050hrs.
5 Para Bde, commanded by Brigadier Nigel Poett, would then reinforce the coup de main par...
Table of contents
- Title Page
- Dedication
- Copyright Page
- Table of Contents
- Dedication
- ACKNOWLEDGEMENTS
- INTRODUCTION
- ADVICE FOR VISITORS
- GLOSSARY
- CHAPTER ONE - PLANNING THE INVASION
- CHAPTER TWO - THE GERMAN DEFENCES IN NORMANDY
- CHAPTER THREE - PEGASUS BRIDGE
- CHAPTER FOUR - HORSA BRIDGE
- CHAPTER FIVE - COUNTER-ATTACK AND REINFORCEMENTS
- CHAPTER SIX
- CHAPTER SEVEN
- APPENDIX A - CHAPTER NOTES AND SOURCES
- APPENDIX B - RECOMMENDED READING AND BIBLIOGRAPHY
- APPENDIX C - ORDER OF BATTLE
- APPENDIX D
- APPENDIX E - FALLEN HEROES PROJECT, MEMORIAL PEGASUS, CWGC & AANT
- APPENDIX F - THE MEN IN GLIDERS
- MERVILLE BATTERY & THE DIVES BRIDGES
- INDEX Locators in italics refer to references in maps NB. Index does not include prelims or appendices
- Postscript
Frequently asked questions
Yes, you can cancel anytime from the Subscription tab in your account settings on the Perlego website. Your subscription will stay active until the end of your current billing period. Learn how to cancel your subscription
No, books cannot be downloaded as external files, such as PDFs, for use outside of Perlego. However, you can download books within the Perlego app for offline reading on mobile or tablet. Learn how to download books offline
Perlego offers two plans: Essential and Complete
- Essential is ideal for learners and professionals who enjoy exploring a wide range of subjects. Access the Essential Library with 800,000+ trusted titles and best-sellers across business, personal growth, and the humanities. Includes unlimited reading time and Standard Read Aloud voice.
- Complete: Perfect for advanced learners and researchers needing full, unrestricted access. Unlock 1.4M+ books across hundreds of subjects, including academic and specialized titles. The Complete Plan also includes advanced features like Premium Read Aloud and Research Assistant.
We are an online textbook subscription service, where you can get access to an entire online library for less than the price of a single book per month. With over 1 million books across 990+ topics, we’ve got you covered! Learn about our mission
Look out for the read-aloud symbol on your next book to see if you can listen to it. The read-aloud tool reads text aloud for you, highlighting the text as it is being read. You can pause it, speed it up and slow it down. Learn more about Read Aloud
Yes! You can use the Perlego app on both iOS and Android devices to read anytime, anywhere — even offline. Perfect for commutes or when you’re on the go.
Please note we cannot support devices running on iOS 13 and Android 7 or earlier. Learn more about using the app
Please note we cannot support devices running on iOS 13 and Android 7 or earlier. Learn more about using the app
Yes, you can access Pegasus Bridge & Horsa Bridge by Carl Shilleto in PDF and/or ePUB format, as well as other popular books in History & World War II. We have over one million books available in our catalogue for you to explore.