eBook - ePub
The Great War Illustrated 1918
Archive and Colour Photographs of WWI
- 520 pages
- English
- ePUB (mobile friendly)
- Available on iOS & Android
eBook - ePub
About this book
A pictorial history of events that occurred during World War I in 1918.
The final book in a series of five titles which graphically cover each year of the war. Countless thousands of pictures were taken by photographers on all sides during the First World War. These pictures appeared in the magazines, journals, and newspapers of the time. Some illustrations went on to become part of postwar archives and have appeared, and continue to appear, in present-day publications and TV documentary programs—many did not. The Great War Illustrated series, beginning with the year 1914, includes in its pages many rarely seen images with individual numbers allocated, and subsequently they will be lodged with the Taylor Library Archive for use by editors and authors.
While some of the images in The Great War Illustrated 1918 will be familiar, many will be seen for the first time by a new generation interested in the months that changed the world for ever.
Praise for The Great War Illustrated 1918
"Add this book to the others in the series and you have the most comprehensive photographic record of WWI." —The Armourer, Editor's Choice
"This has been a fantastic series of books and this last volume has maintained the standard from first to last." —War History Online
Trusted by 375,005 students
Access to over 1.5 million titles for a fair monthly price.
Study more efficiently using our study tools.
Information
Chapter One: Zeebrugge and Ostend Raids – Naval War
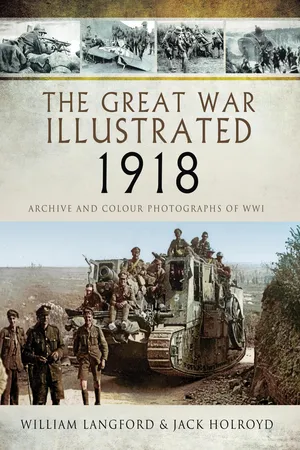
18GW001 German marine infantry manning positions on the Belgian coast. Raids by the allies were expected.
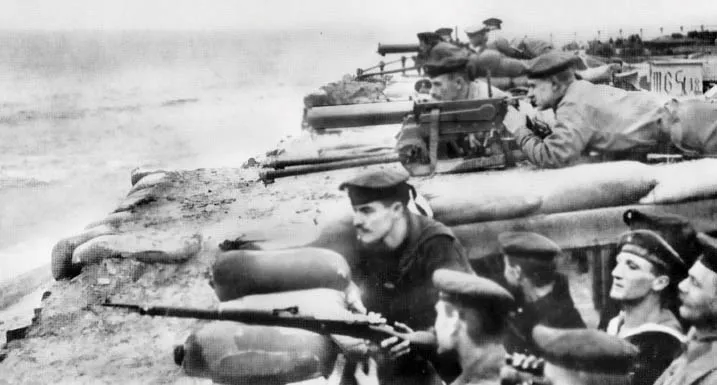
18GW002 Old cruisers were to be used as block ships in the raid on the German bases; here they are being converted at Chatham Docks.
The port of Zeebrugge fell into German hands in the autumn of 1914, and, with the neighbouring port of Ostend, soon became a thorn in the side of the British, French and Belgians by reason of its increasing use as a base for destroyers and submarines. Canals connected the inland port of Bruges with Zeebrugge and Ostend along which Unterseeboot, u-boats, destroyers and torpedo boats sailed from their pens at Bruges along the canal to the open sea at Zeebrugge to prey on the busy shipping lanes. Zeebrugge was especially useful, protected as it was from the rough sea by a crescent-shaped mole thirty feet high enclosing the harbour.

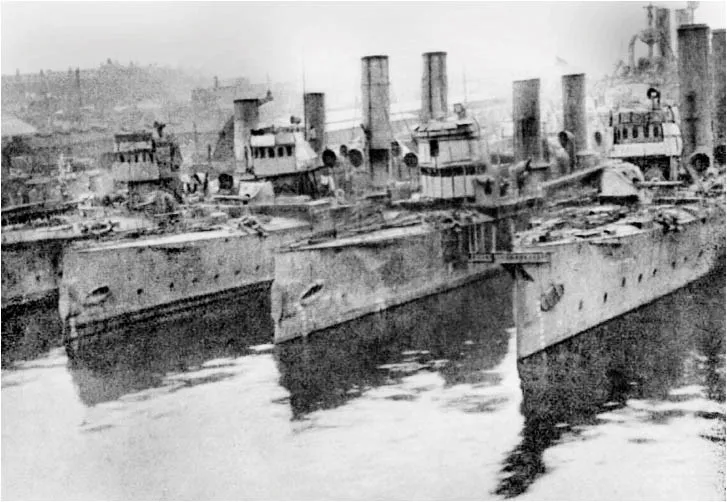
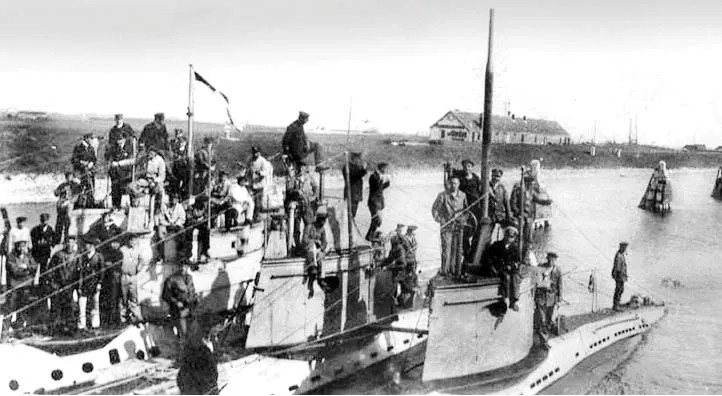
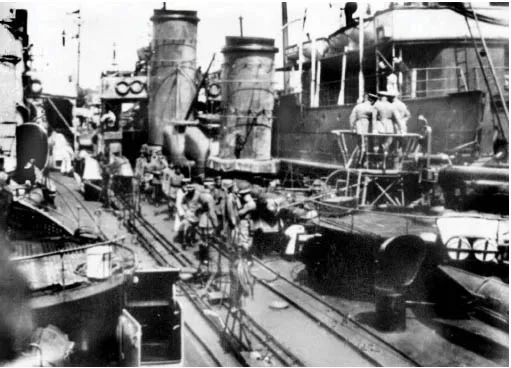
18GW012, 18GW007, 18GW006. The busy Belgian port of Zeebrugge, which served as a base for German submarines, minelayers and destroyers operating in the North Sea and English Channel. Concrete submarine pens along the canal at Bruges ensured protection against attack from the air.
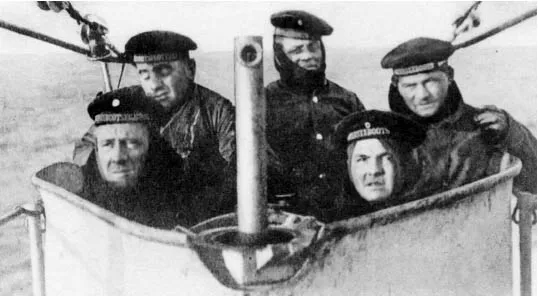
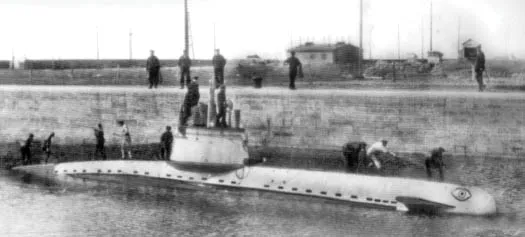
18GW011 A German submarine returning to the Kapersnest, ‘Pirates’ Lair’, at Zeebrugge. The camera has caught the strain on the faces of this crew. The original German caption could be translated as ‘the hideous crew of a U-boat’.

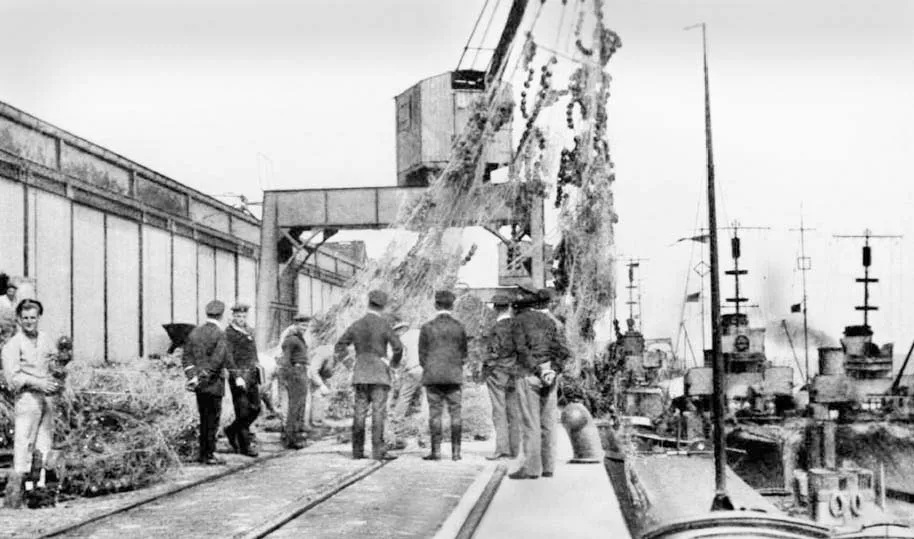
18GW004 Maintenance of anti-submarine nets at Zeebrugges.
18GW005 German V class torpedo boats steaming up at Zeebrugge.
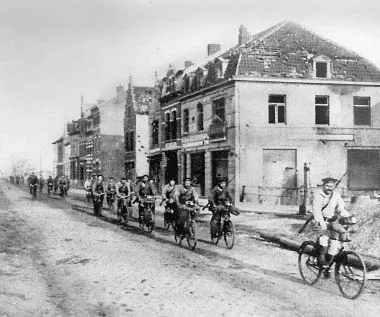
18GW008 German marines of one of the Flanders divisions riding through Zeebrugge. More effecient and cheaper than cavalry, these soldiers manage to keep in impeccable formation.
18GW010 Crew inspection on the aft port side deck of a torpedo boat destroyer at Zeebrugge. This type carried a crew of ninety-eight to one hundred officers and men.
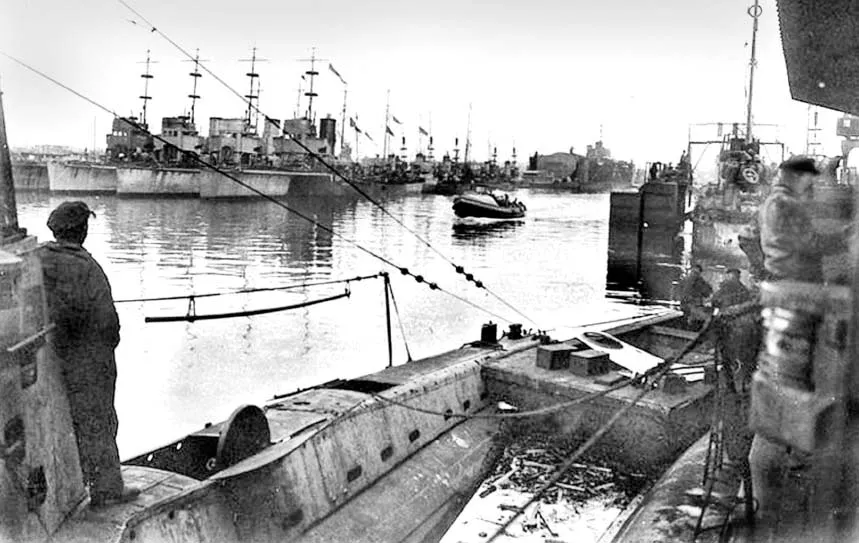
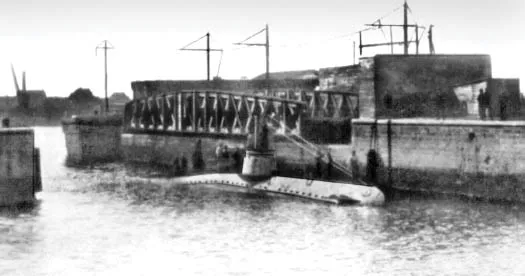
18GW013, 18GW014 Submarine U-B 10 leaving the pens at Bruges and passing through the canal to Zeebrugge. It carried two torpedos only and was mainly used in coastal waters.

The Dover Patrol was a unit of the Royal Navy based at Dover and Dunkirk during the First World War. Its main task was to prevent German shipping – mainly submarines – from entering the English Channel en route to the Atlantic Ocean, thereby forcing German naval vessels to travel the longer route around Scotland, where the Royal Navy Northern Patrol operated to hinder their passage. It performed several duties in the Southern North Sea and the Dover Straits, which included: anti-submarine patrols; escorting merchantmen, hospital and troop ships; laying sea-mines and constructing mine barrages; and sweeping up German mines. Among its many duties it was responsible for bombarding German military positions on the Belgian coast, which incuded the outlets for Germany’s submarines and destroyers at the ports of Ostend and Zeebrugge based at Bruges.
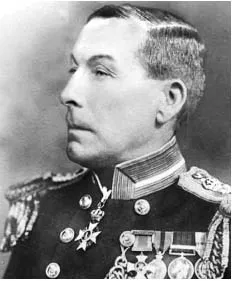
18GW017 Admiral Sir Reginald Hugh Spencer Bacon. He became Commander-in-Chief, Dover and commander of the Dover Patrol from 1915 until his replacement by Vice Admiral Sir Roger Keyes in January 1918.

18GW019 Royal Navy monitors bombarding Ostend from behind a smoke screen laid down by motor launches. Despite the cover, a cloud of cordite smoke from one of the ships’ guns can be seen above, revealing the position of the monitors to the Geman batteries.
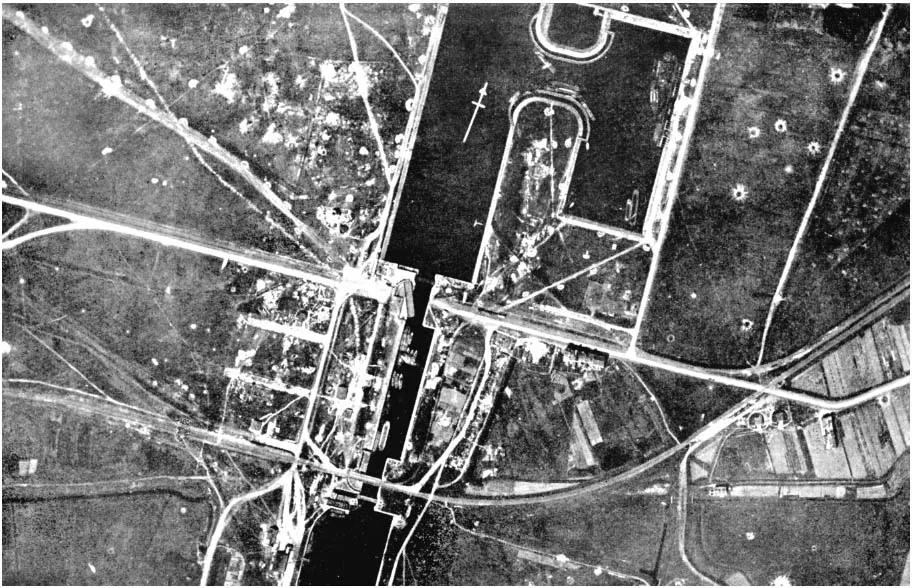
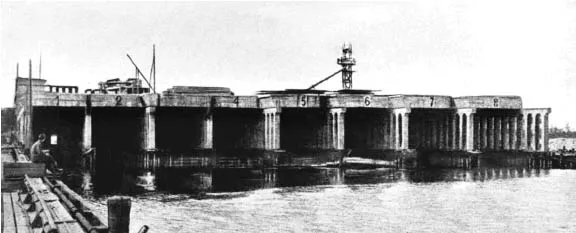
18GW020 The all-important large canal lock at Zeebrugge, with German submarines moored along the dockside; the aerial photograph was taken in May 1917 and shows shell and bomb cratering. Following an intensive bombardment on 16 May 1917 the lock itself was no longer used as a base.

18GW022 HMS Sir John Moore, a monitor of the Lord Clive class. Main armament consisted of two 12 inch guns from disarmed battleships; two 12 pdrs; one 3 pdr anti-aircraft gun; four 4 inch guns added in 1918. Deck armour was six inches. Based at Dover for most of the war, she was used to bombard the German held ports of Zeebrugge and Ostend.
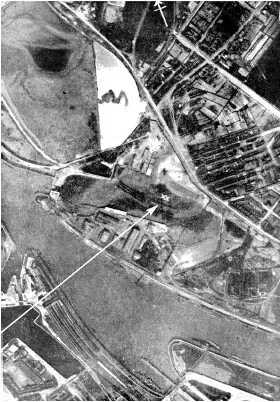
18GW021 The results of a bombardment carried out on Ostend, 22 September, 1917, showing the damaged floating dock which had been sunk (marked with a double xx). Ostend and Zeebrugge had to be neutralized denying German easy access to the English Channel.
On the night of 22-23 April, 1918, a British naval raiding party under Vice Admiral Sir Roger Keyes, aided by French destroyers, undertook to wreck the stone mole at Zeebrugge and to block the entrances to the cana...
Table of contents
- Cover
- Title
- Dedication
- Copyright
- Contents
- Foreword by Nigel Cave
- Introduction and Acknowledgements
- Chapter One Zeebrugge and Ostend Raids – Naval War
- Chapter Two The German Spring Offensives – the Kaiserschlacht
- Chapter Three Salonika, Mesopotamia, Palestine
- Chapter Four The Italian Front
- Chapter Five Battles of the Aisne and the Marne rivers
- Chapter Six Americans at Cantigny, Château-Thierry, St Mihiel, Meuse-Argonne
- Chapter Seven Battle of Amiens – The Hindenburg Line – Advance to Victory
- Chapter Eight Some Consequences of this Global War
- Plate section
Frequently asked questions
Yes, you can cancel anytime from the Subscription tab in your account settings on the Perlego website. Your subscription will stay active until the end of your current billing period. Learn how to cancel your subscription
No, books cannot be downloaded as external files, such as PDFs, for use outside of Perlego. However, you can download books within the Perlego app for offline reading on mobile or tablet. Learn how to download books offline
Perlego offers two plans: Essential and Complete
- Essential is ideal for learners and professionals who enjoy exploring a wide range of subjects. Access the Essential Library with 800,000+ trusted titles and best-sellers across business, personal growth, and the humanities. Includes unlimited reading time and Standard Read Aloud voice.
- Complete: Perfect for advanced learners and researchers needing full, unrestricted access. Unlock 1.5M+ books across hundreds of subjects, including academic and specialized titles. The Complete Plan also includes advanced features like Premium Read Aloud and Research Assistant.
We are an online textbook subscription service, where you can get access to an entire online library for less than the price of a single book per month. With over 1.5 million books across 990+ topics, we’ve got you covered! Learn about our mission
Look out for the read-aloud symbol on your next book to see if you can listen to it. The read-aloud tool reads text aloud for you, highlighting the text as it is being read. You can pause it, speed it up and slow it down. Learn more about Read Aloud
Yes! You can use the Perlego app on both iOS and Android devices to read anytime, anywhere — even offline. Perfect for commutes or when you’re on the go.
Please note we cannot support devices running on iOS 13 and Android 7 or earlier. Learn more about using the app
Please note we cannot support devices running on iOS 13 and Android 7 or earlier. Learn more about using the app
Yes, you can access The Great War Illustrated 1918 by Jack Holroyd,William Langford in PDF and/or ePUB format, as well as other popular books in History & Military & Maritime History. We have over 1.5 million books available in our catalogue for you to explore.