eBook - ePub
How to Draw Like a Fashion Illustrator
Skills and techniques to develop your visual style
- English
- ePUB (mobile friendly)
- Available on iOS & Android
eBook - ePub
How to Draw Like a Fashion Illustrator
Skills and techniques to develop your visual style
About this book
This step-by-step guide provides an insight into how to illustrate fashion designs and get your ideas down on paper. It is of interest to any designer, from the complete beginner or someone hoping to improve their skills and establish a career as a fashion illustrator, to professionals wanting to strengthen their visual impact. Using inspiration from past artists and illustrators, readers will learn how to adopt new and different ways of drawing.
Trusted by 375,005 students
Access to over 1.5 million titles for a fair monthly price.
Study more efficiently using our study tools.
Information
Topic
DesignSubtopic
Fashion DesignChapter 1WHERE DO I START?
The tools and materials you use for your drawings will help to convey your individual style. If you can’t decide what to use at first, then experiment. You will soon find the medium you feel most comfortable with.
DIFFERENT MEDIA
Watercolour
Watercolour is great for loose, sweeping strokes, but also good for fine detail. It’s available in pans or tubes, and which you use is a matter of personal preference. Make sure you buy professional, or artist, quality colours: at college, I was one for a bargain so I used student quality, which look great while you are using them, but lose their vibrancy once they have dried.
With watercolour, you use flat brushes to cover large areas with a ‘wash’ and round brushes that taper to a fine point for figure work (nos. 8–12 are best). All brushes come in synthetic or natural hair, with sable the most expensive. Sable are great to use, but they don’t make your work any better, just a tiny bit easier. Synthetic brushes are good too – try a few in different sizes and you’ll soon work out which are best for you.
Before starting to paint, make sure you’ve a couple of jars of clean water handy – one for rinsing brushes, the other to use generally (otherwise you’ll soon have a jar of muddy water which will ruin your picture). It’s good to have some toilet paper handy to mop up wet areas or mistakes.
Watercolour has a great transparent quality. For precise detail, sharp edges and no colour running, apply colour with a nearly dry brush, using just enough water to grab the colour (dry brush technique). For soft-edged marks and natural-looking transitions of different colours, use a damp brush to apply colour to damp paper (wet on wet technique). For greater control and more defined edges, use a moist brush on dry paper (wet on dry technique).
Coloured pencils
I don’t use these very often, but they are great for detailed drawing that requires lots of control, and techniques such as layering, with cross-hatching, blending and other different strokes. An eraser is useful in this instance. The choice of paper type is up to you – smooth paper is great for creating glossy images; textured paper catches the colours more readily. Watersoluble pencils enable you to blend your mark-making with water for a more painterly effect.
Inks
For strong, vibrant colour, try inks. These can look incredible when blended on really wet paper – the bleeds create their own interest. You need to exercise control so that the medium does not overpower the design. Black ink with a dipping pen is something I use a lot, especially when I want crisp, thin lines to show delicacy and detail. There is still an element of chance as ink is likely to splatter occasionally, especially if you are using quick, hard lines which are great for edgy drawing.
Charcoal
I highly recommend using charcoal sticks for life drawings. They are great for creating bold, heavy marks and smudgy shaded areas. If you think you’ve made a mistake, just smudge over it with your hand and redraw. I love it when I press too hard and the stick crackles and snaps! Charcoal pencils are also great for detailed linework. They range from soft to hard, with the harder ones best for more detailed work.
Collage
This is a great way to start with illustration, especially if you want strong colour added quickly and boldly. If you want to create, say, a gingham print, an effective way of doing it is to cut strips of tissue paper and glue them horizontally and then vertically to express the bold characteristics of the fabric.
Marker pens
I’ve recently started using marker pens and I love them, as the range of colours is terrific and they are a strong way of expressing line. But, be warned, they’re not for the faint-hearted! Maybe start by using some of the softer pastel shades and build up your confidence. I love the chiselled tip, which allows you to create two different thickness of line; the double-ended ones are also great. For finer work, use fine-liner, felt-tip nib pens. Have fun and experiment!
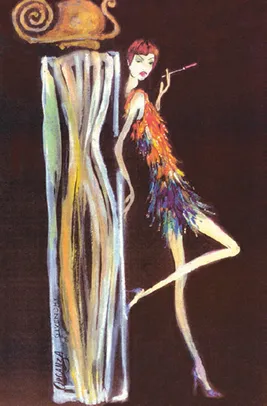
Pastels
The advantage of pastels is that you don’t have to wait for the colours to dry; they are great to blend or draw over to create unblended strokes. When blending colours, you do it directly on the paper instead of with, for example, gouache, where you use a mixing palette. The paper needs to have a texture for the pastel to stick. Ingres, watercolour or rough rice paper are all good, and your results will be even better if you use a coloured paper. I’ve used black paper in the example. If you store your pastels in one big box, they will rub against one another and get dirty. Trying placing them in a box of sawdust or uncooked rice and shaking it – they will come out as good as new.
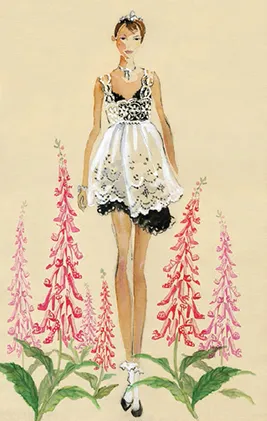
Gouache
Gouache is more opaque than watercolour. It dries quickly so you can paint layers on top. You can dilute it with water for washes or use it straight from the tube and apply with brushes, sponges or palette knives – anything that might give an interesting texture. In the example above I’ve used gouache in soft washes and then applied it more thickly for the detailing over the background colour.
LIFE DRAWING AND LINE
Drawing from life, with a clothed or naked subject in a studio, or just drawing people you see in the street, is a great way to hone your skills at rendering a good and convincing figure. Knowing how the body connects together in different poses will increase your confidence and lead you to better results.
Life drawing is the basis of all art and a practice you should never give up, no matter how long you’ve been drawing. If you aren’t lucky enough to attend classes, either through college or run by your local council or privately, you can draw your friends clothed. When you first begin, it is best to have models in garments that don’t obscure or distort the body too much. You need to be reasonably practised before you start changing the silhouette and experimenting with the body’s shape.

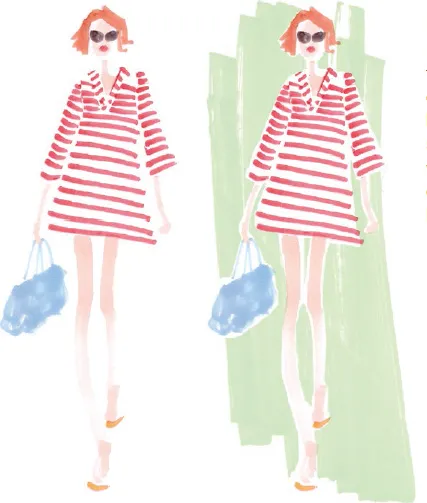
Backgrounds
The way in which a body fits into a scene is really important – for example, the scale of a building outside which a couple are eating, and that of the table, food, chairs and waiter in relation to the central figures. Drawing scenes with backgrounds will help you gain a sense of proportion.
A great way to draw clothed figures is on public transport – on a train or waiting for a bus. Most journeys last at least 15 minutes, which is plenty of time to capture the likeness of a person sitting in a relaxed manner. Look at the draping and the shape of the clothing and add some personality to the facial features. Don’t just use young people as your models, but a wide range of characters. You’ll soon get an idea of the kind of figures you prefer to draw and this will show in your work. Any size of pad can be used, just something you feel comfortable carrying around with you and whipping out when a subject appears. But remember, not everyone wants to be captured on paper, so be sensitive to this!
Don’t bother using expensive paper or materials for these sketches – plain newsprint paper is great or even old newspapers (especially if you find it daunting to make the first marks on a pristine sheet of white paper). Brown wrapping paper, lining paper, wallpaper, striped sweet bags and old envelopes are all great surfaces. I sometimes make a collage, using newsprint for the darker shaded areas and the figures, ripping it and sticking it down with a glue stick, then drawing on top with charcoal.
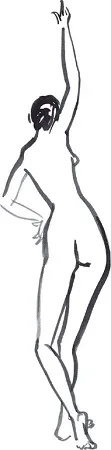
Line
Line is very subjective, a bit like writing your signature. It should give you a sense of the garment – the form, cut, textile. This is where the focus should be, not on the figure; the star should be the outfit. Therefore don’t pay too much attention to the linework on the unclothed parts of the figure when you are starting out.
When using a brush to create your linework, think about the type of lines you want to use for different fabrics – fast and scratchy or slow and smooth, short and controlled – and work out which are best for capturing the feel of your subject.
Think about the different fabrics. A fuzzy, blurred line applied with the dry brush technique works well for wool and mohair. A quick, crisp line is best for taffeta. Silk should have a sensuous, undulating line. Chiffon calls for soft, short, straight lines. Look at a range of fabrics and see how they move differently; hold them up and let them drape, move them around to see what kind of folds they create. Are they smooth, big, even folds or crisp and too numerous to count? Where does the light fall on the folds? How will the fabric react to being folded around a body? Silk will hug a figure and move with it and taffeta will stick out at crazy angles. Think how you might want to represent these different characteristics.
Scale
Find out what size of ...
Table of contents
- Cover Page
- Title Page
- Copyright
- Contents
- Introduction
- Chapter 1: Where Do I Start?
- Chapter 2: Body Basics
- Chapter 3: Poses
- Chapter 4: Faces and Other Features
- Chapter 5: Drawing Fashion
- Chapter 6: Drawing Fabrics
- Acknowledgments and Stockists
- Back Cover
Frequently asked questions
Yes, you can cancel anytime from the Subscription tab in your account settings on the Perlego website. Your subscription will stay active until the end of your current billing period. Learn how to cancel your subscription
No, books cannot be downloaded as external files, such as PDFs, for use outside of Perlego. However, you can download books within the Perlego app for offline reading on mobile or tablet. Learn how to download books offline
Perlego offers two plans: Essential and Complete
- Essential is ideal for learners and professionals who enjoy exploring a wide range of subjects. Access the Essential Library with 800,000+ trusted titles and best-sellers across business, personal growth, and the humanities. Includes unlimited reading time and Standard Read Aloud voice.
- Complete: Perfect for advanced learners and researchers needing full, unrestricted access. Unlock 1.5M+ books across hundreds of subjects, including academic and specialized titles. The Complete Plan also includes advanced features like Premium Read Aloud and Research Assistant.
We are an online textbook subscription service, where you can get access to an entire online library for less than the price of a single book per month. With over 1.5 million books across 990+ topics, we’ve got you covered! Learn about our mission
Look out for the read-aloud symbol on your next book to see if you can listen to it. The read-aloud tool reads text aloud for you, highlighting the text as it is being read. You can pause it, speed it up and slow it down. Learn more about Read Aloud
Yes! You can use the Perlego app on both iOS and Android devices to read anytime, anywhere — even offline. Perfect for commutes or when you’re on the go.
Please note we cannot support devices running on iOS 13 and Android 7 or earlier. Learn more about using the app
Please note we cannot support devices running on iOS 13 and Android 7 or earlier. Learn more about using the app
Yes, you can access How to Draw Like a Fashion Illustrator by Robyn Neild in PDF and/or ePUB format, as well as other popular books in Design & Fashion Design. We have over 1.5 million books available in our catalogue for you to explore.