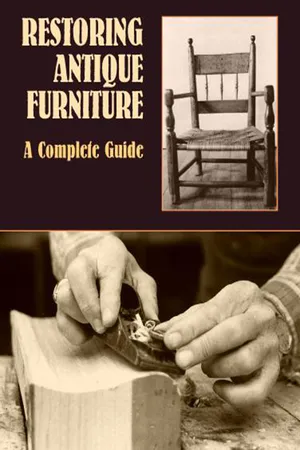
If you're one of the many people who like to buy and restore antique furniture, then this is the book for you! Brimming with tips and advice from a skilled craftsman and teacher, this profusely illustrated woodworking guide will enable you to determine the age of an antique, assess its quality, and learn how to restore and preserve it effectively and profitably.
Focusing on American furniture made between 1750 and 1850, the author explains how to repair construction joints, replace lost hardware, strengthen fractured parts, cover damaged areas, and much more. In addition, readers will find clear, step-by-step instructions for restoring an early rocker and chest of drawers, repairing a table leg, constructing a drawer using a dovetail joint, replacing the swing rail on a gateleg table, forming a molding, and more. Numerous examples, with over 250 illustrations and photographs, include such restored pieces of furniture as a Shaker tilt-top table, c. 1810; a cherry chest of drawers, c. 1800–20; an American Empire secretary, c. 1825; a primitive chest, c. 1840; and a country cupboard, c. 1850.
Hobbyists, collectors, dealers, and woodworkers will find this excellent guide contains not only the clear, practical directions they need, but also indispensable advice on avoiding mistakes commonly made in the restoration process.
- 144 pages
- English
- ePUB (mobile friendly)
- Available on iOS & Android
eBook - ePub
About this book
Trusted by 375,005 students
Access to over 1.5 million titles for a fair monthly price.
Study more efficiently using our study tools.
Information
1
Rules and Tools for Restoration of Antique Furniture
Restoring, as the name implies, is the act of bringing something to its original condition. Restoring does not permit improving or changing, which means that the restorer must overcome the temptation to change the original, even if the change might add convenience. It would be unthinkable, for example, to replace a worn turnbuckle with a magnetic latch, or to replace a warped or cracked board at the back of a cupboard with a piece of plywood. Such changes would greatly reduce the value of the piece.
If learning what restoring means is the first step in working with antique furniture, the second is surely learning when a piece of furniture is worth restoring. That decision depends on the purpose in saving the piece. If a person is restoring a piece of furniture because it is solid wood and can be used, then almost any solid wood piece is worth the effort. In most cases, it will be less expensive to restore an old piece than to buy a new one, and the old one will be of better quality. For the most part, the furniture produced in this country today is made of poorer woods than in earlier times, and it is stapled together, its drawers are assembled with butt joints and super-glue, and little craftsmanship goes into the design.
If an item is to be restored because it is an heirloom, nothing else about the piece has any bearing on the decision. Whether or not the piece has antique value does not matter because the prime purpose is to preserve a part of a family’s history so that it can be enjoyed by future generations. Of all the reasons for restoring, this is probably the most noble—but here we may find our greatest challenges because some of these pieces may be in such poor condition that the owner is about to abandon them. The Shaker table shown in Plate 6–9, for example, was on a trash truck headed for a landfill when it was rescued.
If a piece is being considered for restoration because of its possible antique value, the decision becomes more complicated. One important factor here is its overall condition. That is, if as much as one-fourth of the principal parts are missing, the true value is lost. If a single major part (say, a carved skirt on a Queen Anne highboy) is missing, the antique value will be reduced considerably. However, if excellent craftsmanship can be employed and the part replaced with old wood, then the piece should be restored. Obviously, this course of action will enable future generations to enjoy the piece, and if the work is done well enough, it may not even be detectable by the inexperienced eye.
Rules of Restoration
Once the decision has been made to restore a piece, the next step is to go over the basic procedure, keeping in mind the following rules:
- Repairs should be made from wood of the same age and type.
- As little of the original stock should be removed as possible.
- Any natural breaks in the design should be utilized as a starting point for a repair.
- Damaged areas on a veneered surface should be repaired with irregularly shaped patches.
- If the design of a piece depends on the feet for proper proportion and the feet are badly worn or missing, it is best to undertake major repair and restore it to the correct proportions.
- No part should be discarded until the restoration is complete, as it may hold a clue to the original structure.
- When a piece is found that has parts missing, the immediate surroundings should be searched before the piece is taken home. Otherwise, the part may be sold to someone else in another lot of merchandise.
Tools to Use in the Restoration Process

PLATE 1–1
From left to right, 14 inch smoothing plane, rabbet plane, block plane, spoke shave, reeding tool.
Occasionally, I obtain a very fine piece of furniture that provides such a unique challenge that I do the restoration using only the tools that were available at the time the piece was constructed. But for the most part I use modern tools in my restoration efforts. I feel comfortable with this because I am sure that the old masters would have used the table saw, band saw, surfacer, and other tools had they been available. If modern tools are used in restoration, care should be taken to remove any modern tool marks from the work. If I use a modern surfacer I never reduce the stock down to the finished thickness, but instead finish the task with a 14-inch smoothing plane (see Plate 1–1). If a rabbet joint is needed, I will cut it to near size on the table saw, and then use a rabbet plane to complete the work. By virtue of the unique structure of the rabbet plane, it can serve many purposes. The blade of the rabbet plane extends the full width of the bed of the plane. This allows the craftsperson to work in close corners. The rabbet plane is also shown in Plate 1–1. To smooth out rough end-grain surfaces, I use a low-angle block plane. The one shown in Plate 1–1 has a blade that is set at about 22 degrees. This low angle allows the blade to encounter the wood at such a low angle that it shaves the wood fibers. This reduces the chance of splintering any edge grain and provides a surface that can be sanded smooth rather easily. All the tools shown in Plate 1–1 were obtained at auction. I bought these at a time when the old wooden planes were the only tools commanding high prices. Consequently, I was able to obtain all the tools shown at a very modest price. The fourth tool from the left in Plate 1–1 is a spoke shave. It is actually a wheelwright’s tool, but it serves wonderfully well as a cabinetmaker’s tool. It can be used to smooth concave curves and plane out other odd contoured edges. The tool on the far right in Plate 1–1 is a beading tool. This is a rather rare tool. It has four small blades that are half-round concave in shape. Some of the blades have four such shapes, while others have two or even just one such concave shape. This tool allows me to reproduce the edge beading and fluting so common on early furniture. It is one of my most prized tools. I am sure that there must be many beading tools in existence, but this is the only one I have ever seen available for sale. Its rarity was recognized by several persons at the auction where I obtained it, and I had to pay a rather handsome price to become its owner.
PLATE 1–2
Example of early molding planes.

Plate 1–2 shows four wooden molding planes. Although I have many such planes, these four seem to be the ones that always end up on the workbench when I am in the process of duplicating a molding. A very fine craftsman, William Edward Arnold of Louisville, Kentucky, presented this complete set of planes to me many years ago. Mr. Arnold was a person very much concerned with keeping the art of furniture making alive.
Plate 1–3 illustrates the type of wood chisel that I use. The ones shown are called socket chisels because of the way the handles are affixed to the chisel. You can see that they are not a matched set. These chisels were bought one at a time at auctions whenever the opportunity presented itself. With these chisels and a wooden mallet, many things can be done. I use the smaller chisels to dig out mortises for mortise-and-tenon joints, while the wider chisels are used to cut mortises to set hinges or trim out stock. I prefer the long chisel, as it gives better leverage.
Some simple rules to follow when using wood chisels are:
- Always keep the chisels sharp.
- Always secure all stock with a clamp when using a chisel.
- Always keep both hands behind the cutting end of the tool.

PLATE 1–3
Group of wood chisels.

PLATE 1–4
MEASURING TOOLS
From left to right, sliding T bevel, 6 inch square, marking guage, 24 inch bench rule.
Plate 1–4 illustrates some measuring devices that are necessary for any cabinetmaker. The sliding T-bevel makes it possible to transfer angles. The 6-inch square is one of the first tools that I bought when I started building my tool chest, and is excellent for small work. I use a large framing square for larger work. The marking gauge is indispensible for laying out for hinge placement and mortise-and-tenon joints. The 24-inch bench rule serves well for furniture work.
These are my most used tools. They are like old friends. No matter what I am working on, by the end of the day the tools I have discussed always seem to end up on the workbench.
My power tools include a lathe, a band saw, a joiner, a table saw, a scroll saw, a radial arm saw, and a surfacer. I use these tools extensively. However, as mentioned earlier, I make sure that all modern tool marks are removed from all surfaces when the piece of furniture is being completely restored. This includes surfaces that are hidden. I hasten to say that I do not remove modern tool marks with the intent to deceive. I remove all modern tool marks to return the work to its original condition. In fact, I sign all my restoration efforts. I believe that in time my signed restored work will have more value than trying to deceive someone in the present.
Caring for Tools
I have found it is best to have power saw blades, joiner knives, and planer knives sharpened by professional...
Table of contents
- DOVER BOOKS ON WOODWORKING AND CARVING
- Title Page
- Copyright Page
- Dedication
- Table of Contents
- Introduction
- 1 - Rules and Tools for Restoration of Antique Furniture
- 2 - Keys to the Treasures
- 3 - Repair Concepts
- 4 - Fixing the Broken
- 5 - Replacing What Has Been Lost
- 6 - Examples of Restored Work
- Index
Frequently asked questions
Yes, you can cancel anytime from the Subscription tab in your account settings on the Perlego website. Your subscription will stay active until the end of your current billing period. Learn how to cancel your subscription
No, books cannot be downloaded as external files, such as PDFs, for use outside of Perlego. However, you can download books within the Perlego app for offline reading on mobile or tablet. Learn how to download books offline
We are an online textbook subscription service, where you can get access to an entire online library for less than the price of a single book per month. With over 1.5 million books across 990+ topics, we’ve got you covered! Learn about our mission
Look out for the read-aloud symbol on your next book to see if you can listen to it. The read-aloud tool reads text aloud for you, highlighting the text as it is being read. You can pause it, speed it up and slow it down. Learn more about Read Aloud
Yes! You can use the Perlego app on both iOS and Android devices to read anytime, anywhere — even offline. Perfect for commutes or when you’re on the go.
Please note we cannot support devices running on iOS 13 and Android 7 or earlier. Learn more about using the app
Please note we cannot support devices running on iOS 13 and Android 7 or earlier. Learn more about using the app
Yes, you can access Restoring Antique Furniture by Richard A. Lyons in PDF and/or ePUB format, as well as other popular books in Technologie et ingénierie & Métiers techniques et manufacturiers. We have over 1.5 million books available in our catalogue for you to explore.