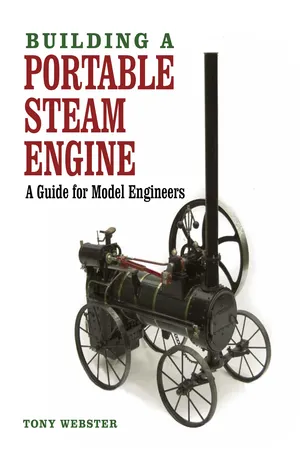
This practical, instructional book describes the construction of a model of the Lampitt portable steam engine, which dates back to 1862, and which provided rotative power to drive threshing machines, circular saws, feed mills and other farm machinery. The construction of every component is described in precise detail and the text is supported by many helpful step-by-step photographs. In addition, useful advice is provided about obtaining materials and about the tools that are required to equip a model-engineering workshop. Accordingly, the information provided in this fascinating book will enable the reader to construct not only the Lampitt engine but also many other engineering models in the future. When the reader has finished building 'the Lampitt' he will, in effect, have completed an engineering apprenticeship, and will have a model engine of which he can be proud and which fully reveals the skills that he has learned. Fully illustrated with 142 step-by-step colour photographs.
- 128 pages
- English
- ePUB (mobile friendly)
- Available on iOS & Android
eBook - ePub
About this book
Trusted by 375,005 students
Access to over 1 million titles for a fair monthly price.
Study more efficiently using our study tools.
Information
Subtopic
Ingegneria meccanica1 The Background History and Development of Portable Engines
Portable engines, the forerunner of the traction engine, were made in large numbers in almost every county in the country from the 1830s right through to the 1930s, extending beyond the eclipse of traction engine manufacture. Most of the well-known manufacturers of traction engines produced examples, but many were made by blacksmiths and foundries that are now obscure and forgotten.
The early portables had horizontal or vertical boilers with a self-contained engine, often mounted on a frame or chassis, and the whole was supported by four wheels. By the 1850s they had developed into using a locomotive type boiler with the engine mounted on the top, indeed using the boiler as part of the structure of the engine. Two large wheels supported the heavy firebox end of the boiler and under the smokebox would be the turntable and two smaller wheels. These would be steered and hauled by a pair of horses in shafts, which would have been necessary to pull the 2 tons of engine over the rough roads of the time. Wrought iron wheels, mounted on a cast iron hub, would have been made in the foundry, or a local wheelwright would have supplied wooden wheels.
A locomotive boiler, as used on railway locomotives, has a large horizontal cylindrical part containing the fire-tubes, with the smokebox and chimney at the front, and a vertical square part containing the firebox at the rear. The steam cylinder was mounted machine, which would have needed another on top of the firebox and the crankshaft over two horses to pull it from farm to farm. Four the cylindrical part at the chimney end. horses might have been needed on wet and
The main use for such engines was to provide ‘rotative power’ for driving a thrashing machine, which would have needed another two horses to pull it from farm to farm. Four horses might have been needed on wet and muddy winter roads. An ‘outfit’ comprising a thrashing (or threshing) machine – known as a mill in Scotland – and an engine was often owned and run by thrashing contractors who travelled from farm to farm all winter, thrashing the farmers’ corn on the way.

Hornsby’s first prize engine of 1848.

A threshing machine, driven by a portable engine, in use in a Northamptonshire village in about 1900. BYFIELD PHOTOGRAPH MUSEUM; COURTESY OF POLLY HARRIS-WATSON

A portable engine driving a circular saw at the village sawmill. BYFIELD PHOTOGRAPH MUSEUM; COURTESY OF KEVIN PERRY
The combine harvester is a modern version of a threshing machine with a cutter-bar on the front and made to be self-moving.
Many sawmills were driven by portable engines that were given a permanent, static home in makeshift sheds made from surplus timber to protect the saw, engine and workers from inclement weather. Sawmill off-cuts provided a readily available supply of fuel for the fire.
By the 1860s some of these portables had been made or converted into self-moving engines by placing a chain around sprockets on the crankshaft and a rear wheel, but a horse was still needed in the shafts to steer the engine. In the 1870s the traction engine, as we now know it, developed from the portable engine by reversing the positions of the cylinder and crankshaft. This made the drive to the rear wheels within the reach of a train of gears. A cross-shaft and chain arrangement to steer the front axle brought the steersman and driver together on the man-stand at the rear. Traction engines changed little in the next fifty years or so. Portable engines, however, continued to be made throughout this period.
THE PROTOTYPE
The word ‘prototype’, in the context of model making, does not mean the first trial assembly of a new design, but the full-size example, which may or may not exist. In our case this is a portable engine, which we are going to replicate in model size.
The original full-size engine is a portable steam engine originally made by Lampitt & Co. of Banbury, Oxfordshire. An example from this period of engine construction has been deliberately chosen for its simplicity of construction, particularly the cylinder, which can be made from a piece of round gunmetal, or cast iron, bar. No castings will be used in its construction, except possibly for the flywheel, which could use an existing casting. However, a fabricated flywheel will also be detailed.
There seems to have been two Lampitts in Banbury: John Lampitt of the Vulcan Foundry, Neithrop (Banbury), millwright, iron founder and engineer; and Charles Lampitt of the Christ Church Works, Banbury, engineers, millwrights, brass founders and tower bell-hangers. It is unclear whether the company moved to larger premises, or whether John and Charles were of different generations.
C. Lampitt, Vulcan Foundry, Banbury, exhibited a horse-drawn seed dribbler at the Great Exhibition of 1851 at the Crystal Palace, London, but there is no mention of steam engines at that time.
John Lampitt made threshing machines in the 1860s (number 555 was made in 1861), but Lampitts built a combined total of only about twelve portable and traction engines.
SCALE
The question of scale needs to be discussed. The makers of model locomotives relate everything to the track width or gauge and the scale is determined by how much the prototype gauge of 4ft 8½ in has to be reduced to model engineering gauges of 3½ in, 5in or 7¼ in. Thus scales of ¾ in to the foot, just over 1in to the foot or 1½ in to the foot are used to scale the sizes down. Narrow gauge locomotives come out much bigger.
Traction engines, portables, stationary and marine engines are scaled at so many inches to the foot. There are some very popular traction engine models in a scale of 1in to the foot and also 1½in to the foot (onetwelfth and one-eighth). These make very good mantelpiece models but are generally not big enough to do much work. Two inch scale (12 [inches in a foot] divided by 2 = 6, therefore one-sixth of full size) makes a more viable engine;3in (¼ full-size) is a good size for rallying. Four inch and 4½ in scale (1/3 and 3/8) and 6in, or half size, make problems in manufacture and transportation because of their bulk and weight. You will now see why every scale is abbreviated to ‘2in’ and so on: ‘to the foot’ is assumed.
We are going to work to a scale of 2in to the foot, which will give us a model of about 18in in length; all dimensions will be in inches. The imperial system is the traditional measuring system for model engineers, mainly because the prototypes were made using this system. It may also be that, having bought our imperial drills and threading equipment, we are reluctant to change. Many school leavers have to learn the imperial system before they can start work in an established factory. However, there are many places where it may sometimes be an advantage to use metric-sized material where it is more readily available. These alternative sizes will be shown in parentheses after the imperial sizes, where appropriate.
Boiler
The usual starting point for the construction of a portable or traction engine is the boiler, which is there to make the steam and provide part of the structure of the whole engine. As you are just starting out in model engineering and do not yet have the tools and resources necessary to make anything in metal, the description of the boiler’s construction will be left until much later when you have gained some metalworking skills. However, the drawing for the boiler is included at an early stage to enable you to obtain a boiler from a professional boilermaker. There is no shame in buying your boiler: many experienced model engineers always obtain their boilers from a professional maker.
2 Workspace, Tools and Materials
The subjects listed in this chapter are in the same order in which they are introduced in the succeeding chapters.
SAFETY
Do not forget that most of the time you will be working alone. There will be no-one to help or switch off a machine if something goes wrong.
Always use a vice or clamp when drilling.
Only measure the workpiece when machinery is stationary.
Do not have any loose clothing, such as ties or cuffs, when using machinery.
Wear safety glasses.
TOOLS
The tools and materials that will be required to make this engine will be discussed below, together with their source of supply and their safe use. They should all appear in the order of their first mention in the text.

Before mounting your vice, check that a vertical bar is clear of the bench front.
WORKSPACE
The place where you carry out your model engineering activities needs careful thought. Will it be the garage, shed, kitchen or bedroom? A bedroom, although warm and dry, would be unsuitable for a machine shop or for hammering, especially if you live in a terrace or a semi-detached house, or anywhere with a hollow wooden floor. The use of the kitchen will have to come second to the needs of domestic life, especially when you are in the middle of something tricky. There is nothing better than a dedicated workspace, be it a garden shed or the end of the garage, where you can leave your tools on the bench and know that they will be there the next time you go in. It is most frustrating to have to set up your workspace every time you want to spend a few hours in the workshop, but many people work in these conditions and make wonderful models. In either case it is necessary to add some heat insulation in the form of fibreglass between the roof joists; a shed will need some more, or expanded polystyrene, in the walls. This will not only keep you warm in winter, but also cool in summer when the sun is beating down and you want to complete the present component.
For heating, use an electric convector or fan heater. Do not use a paraffin or gas-burning heater as the products of combustion include water vapour, which will make all your steel stock and your tools go rusty, and that is to be avoided at all cost. Also you will find that rock wool insulation falls apart when pushed up between the roof joists. Fibreglass holds together much better and stays put while you nail up some sheets of hardboard or even double-wall corrugated cardboard. White emulsion paint will help to brighten the interior and reflect the light from two or three five-foot fluorescent lights strategically placed over the bench and machine areas.
The bench is another area that needs some thought. A folding Workmate-style bench can be useful if you need the garage for the car as well, but some of the later models of bench lack diagonal bracing and therefore rigidity. A welded-angle steel bench, as big as you can accommodate, is ideal. The top should be 1¼in (40mm) thick and a lower shelf loaded with your metal and casting stock will help to keep it in place and aid rigidity. Screwing it to the wall also helps. The bench must stay in place when a file or hacksaw is used energetically.
A vice is essential to hold the workpiece and should be securely bolted to the bench top close to a leg – preferably the right leg if you are right-handed – not in the middle where the bench frame and top will flex and vibrate. An engineer’s vice of 3 or 4in width is ideal, but get one as big ...
Table of contents
- Cover Page
- Title Page
- Copyright Page
- Contents
- Foreword
- Introduction and Acknowledgements
- 1 The Background History and Development of Portable Engines
- 2 Workspace, Tools and Materials
- 3 Wheels
- 4 Axles and Perch Bracket
- 5 Boiler Construction
- 6 Boiler Fittings and Lubrication
- 7 Engine
- 8 Running a Steam Engine
- Suppliers to Model Engineers
- Index
Frequently asked questions
Yes, you can cancel anytime from the Subscription tab in your account settings on the Perlego website. Your subscription will stay active until the end of your current billing period. Learn how to cancel your subscription
No, books cannot be downloaded as external files, such as PDFs, for use outside of Perlego. However, you can download books within the Perlego app for offline reading on mobile or tablet. Learn how to download books offline
Perlego offers two plans: Essential and Complete
- Essential is ideal for learners and professionals who enjoy exploring a wide range of subjects. Access the Essential Library with 800,000+ trusted titles and best-sellers across business, personal growth, and the humanities. Includes unlimited reading time and Standard Read Aloud voice.
- Complete: Perfect for advanced learners and researchers needing full, unrestricted access. Unlock 1.4M+ books across hundreds of subjects, including academic and specialized titles. The Complete Plan also includes advanced features like Premium Read Aloud and Research Assistant.
We are an online textbook subscription service, where you can get access to an entire online library for less than the price of a single book per month. With over 1 million books across 990+ topics, we’ve got you covered! Learn about our mission
Look out for the read-aloud symbol on your next book to see if you can listen to it. The read-aloud tool reads text aloud for you, highlighting the text as it is being read. You can pause it, speed it up and slow it down. Learn more about Read Aloud
Yes! You can use the Perlego app on both iOS and Android devices to read anytime, anywhere — even offline. Perfect for commutes or when you’re on the go.
Please note we cannot support devices running on iOS 13 and Android 7 or earlier. Learn more about using the app
Please note we cannot support devices running on iOS 13 and Android 7 or earlier. Learn more about using the app
Yes, you can access Building a Portable Steam Engine by Tony Webster in PDF and/or ePUB format, as well as other popular books in Tecnologia e ingegneria & Ingegneria meccanica. We have over one million books available in our catalogue for you to explore.