![]()
Chapter 1
What is Magnification?
The answer to this question may seem obvious and not that many years ago, it was even more simple to respond. Sherlock Holmes would have reached in his pocket and retrieved a large magnifying glass and the object would double in size to make it clearer to see. But today with a plethora of digital devices, the explanation has become distorted and more difficult to interpret.
Fig. 1.1
Head of an opossum shrimp, photographed live in seawater with dark field lighting. Common in estuaries and on the shore, the family of mysids to which it belongs are believed to be a primitive group of crustaceans. (×4 magnification, Canon 7D mk2 with 65mm MPE lens at ƒ5.6, composite of 25-image stack.)
WHAT DO WE MEAN BY MAGNIFICATION?
With so much nutritional information needing to be put on food labels these days, manufacturers will typically make the font size small, sometimes so small it is almost impossible to read. As we age, the ability to resolve detail with our eyes can deteriorate, particularly in low light. Perhaps it is a feature of our modern age that legal information at the bottom of documents is in a tiny font, so we ignore it. Few people carry a large magnifying glass but invariably a smartphone will be in the pocket or bag. A quick snapshot of the label or document appears on the screen and with a pinch or two of your fingers, the image is magnified so the text can now be read.
Clearly, this is one way in which we can magnify a subject. With a large enough screen, we can blow up our photos so that an image of our dog is so enlarged we might make out a tick on the side of the body. We could crop the image so that we just have the small part we want and then on the screen, it appears that we have a highly magnified subject. To produce anything vaguely useful, this technique relies on a high number of pixels being present in the original photograph as cropping the photograph possibly removes many millions of pixels.
Fig. 1.2
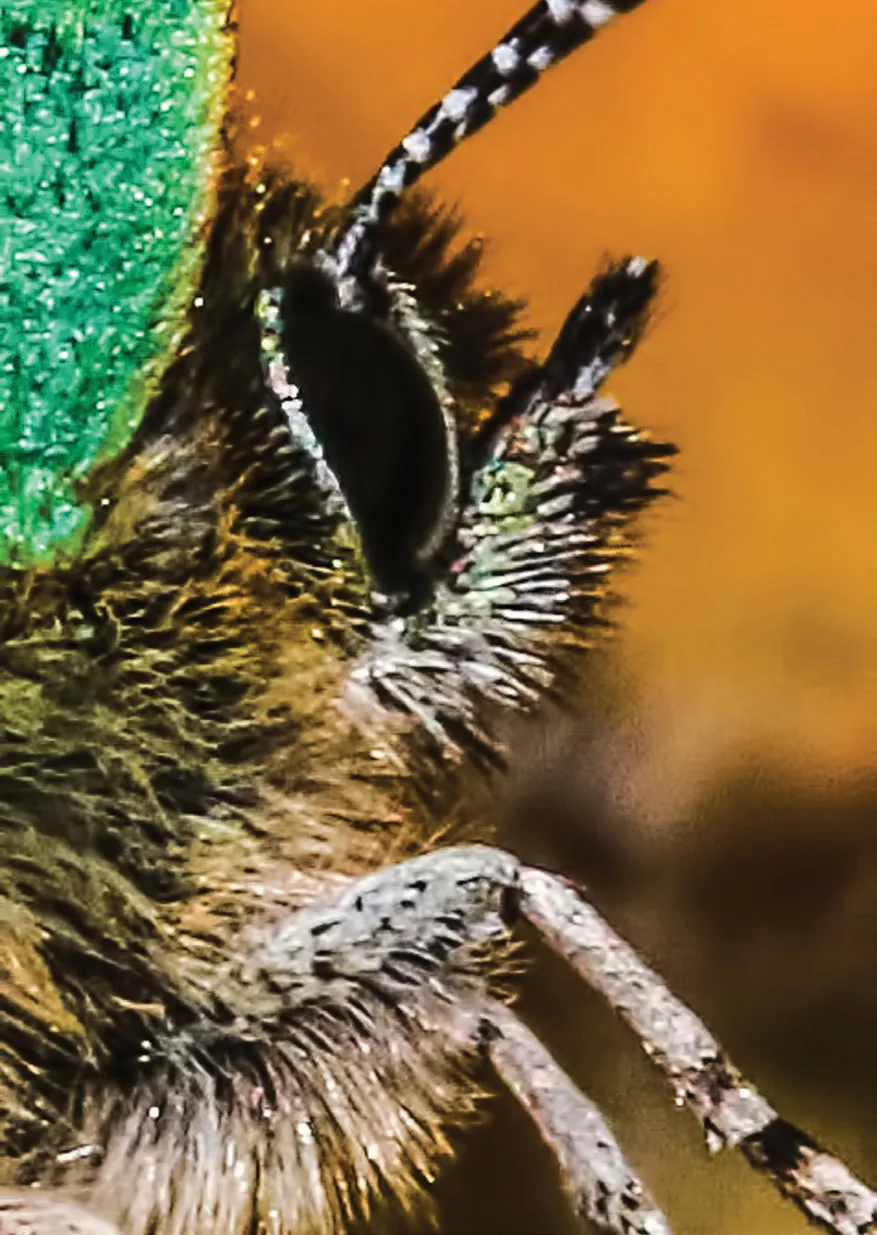
Green hairstreak butterfly photographed on a gorse flower. The photo is true macro 1:1 as the width of the image measures 35mm and in real life, the subject matter was 35mm across.
The green hairstreak butterfly in Fig. 1.2 is an example. The image is an 18-megapixel photo and to enlarge the head, this was cropped with the resulting photo becoming just 709 by 476 pixels, which is 337,484 pixels in total, making a 0.33 megapixel image. With so few pixels in the photo, it would appear very small on a screen and this can be improved by boosting the number, in this case to 2,500 by 1,678, around 4 megapixels. This can be done in any photo editor, followed by further enhancement to reduce any noise and increasing clarity and sharpening. It is printed small on this page to show that despite a reduction in quality, it may be acceptable.
Fig. 1.3
A crop of just the head of the green hairstreak in Fig. 1.2, showing it considerably enlarged but the image is of a significantly lower quality.
The head of the butterfly may be magnified, but by how much? The original photograph covers an area approximately 35mm across and we could print a scale to indicate the size of the butterfly. This is usual in scientific literature but not always appropriate elsewhere. The cropped image is 3.5mm across and so if the images are printed to the same size, the enlarged section has been magnified by ×10. But this is still rather vague and cropping is not the best way to magnify a subject and should be used when no other technique is available. If we wish to give a specific figure to magnification there has to be a better way.
The conventional method harks back to film, in particular 35mm film. The green hairstreak butterfly would be classified as a life-size image or macro photograph. If the photo had been made on film, after processing, the size of the actual butterfly would be identical to the outline of the image on the film. You could lay one on top of the other and they would be the same. The field of view of the original is 35mm across, the same as in film. This true macro is given the ratio of 1:1, referring to the size on the film to the size of the subject in real life. If the photographer of this butterfly could have managed to get closer to the insect and fill the frame so that the back of the wing was touching the left side of the frame and the front leg was on the right frame edge (approximately 18mm across), the butterfly has now doubled in size and the ratio would be 2:1 as the image is now ×2; twice life size. The image could be enlarged on the screen or cropped to create what appears as a higher magnification but for this book, as is generally accepted, we will use the original photograph ratio as a measurement of magnification.
If your photography is hovering around macro using a typical macro or close-up lens then working out the ratio will not be difficult. In fact most of the commonly available lenses will have these marked on the side of the lens barrel, even close-focusing zoom lenses. However, this book aims at significantly higher magnification and for any hope of accuracy in measuring this, you will need to photograph a sharply defined millimetre scale. A standard ruler will not do and unfortunately the desired scale can be quite expensive to buy. What is required is a glass microscope slide, etched with calibration down to 0....


