Underwater photography is a challenging discipline. To capture an underwater world of glorious colours, extraordinary creatures and mysterious depths, you must have confidence in your diving abilities and be very comfortable with your camera. This practical book explains and offers advice to the reader on both the art and the science involved in capturing stunning underwater shots. Contents include: Advice on the equipment you will need to get the most from your underwater photography; Descriptions of underwater habitats and animal behaviour; Guidance on how to be a responsible photographer; Direction and assistance on topics including composition, natural and artificial lighting, exposure and underwater conditions. Superbly illustrated with 206 stunning colour photographs.
- 176 pages
- English
- ePUB (mobile friendly)
- Available on iOS & Android
eBook - ePub
About this book
Trusted by 375,005 students
Access to over 1.5 million titles for a fair monthly price.
Study more efficiently using our study tools.
Information
Topic
ArtSubtopic
PhotographyChapter 1
The Camera
Cameras have been around for a long time. The first cameras were believed to have produced images in 1816, and the principle of these first cameras can be seen in a simple pinhole camera with an opaque screen for the image. As the light passes through the pin hole (aperture) it is inverted and is displayed on the screen.
In the early cameras, the ‘screen’ was a photographic plate: a sheet of paper, or other material, impregnated with silver nitrate. The impregnated chemical reacts to the density of light, and this forms an impression of the image when ‘exposed’ to the light for any length of time. The image is thus ‘burned’ onto the plate as a negative and, when developed, the image can be seen as a print.
In the early part of the twentieth century Kodak took the lead in bringing photography to the people. The box Brownie camera was introduced by Kodak in the United States and Western Europe in the early 1920s and retailed for $1–3. It was capable of capturing some excellent pictures using 120 film with eight shots on a roll. It had up to three aperture settings and the expensive ones even had a limited choice of shutter speeds.
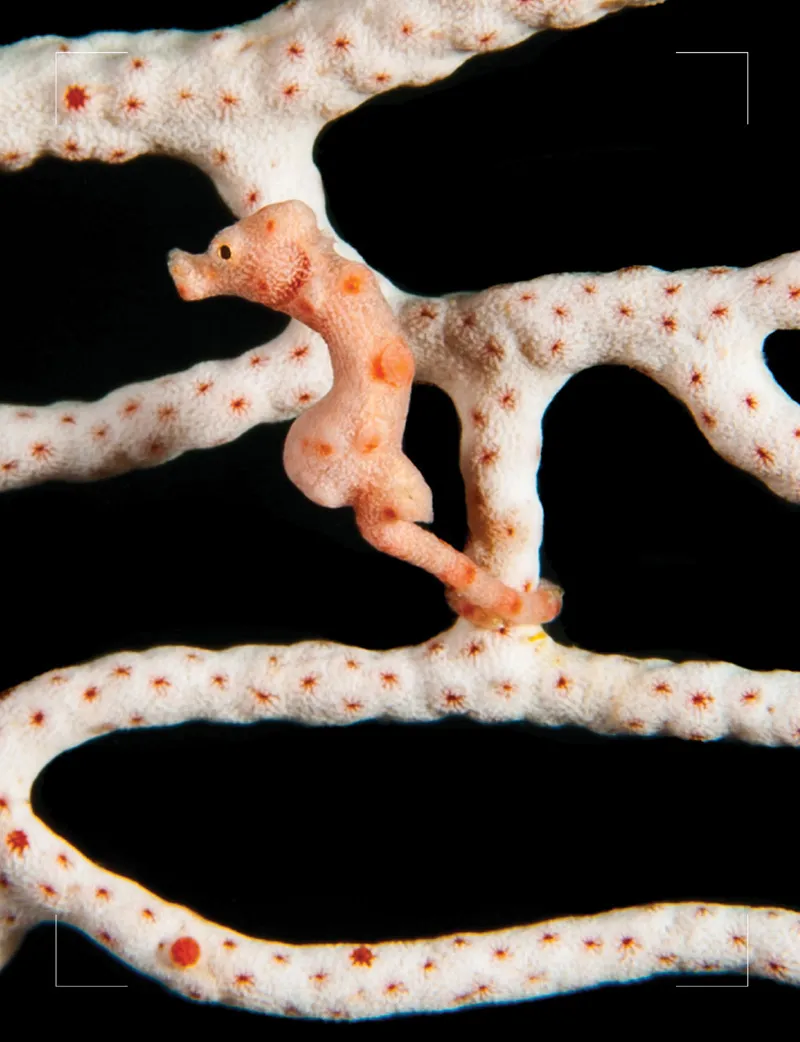
Fig. 1.1
A Denise pygmy seahorse taken in Raja Ampat in Indonesia. This seahorse was taken with a high shutter speed and high f-stop and just given a tiny bit of light from twin strobes to create the black background. This seahorse is very tiny indeed, around 2–3mm long.
1/250; f16; ISO 250. Nikon D700, 60mm
1/250; f16; ISO 250. Nikon D700, 60mm
Digital cameras are not that far removed from these first cameras – in principle at least. The only real change is that the film has been replaced by an electronic device that is sensitive to light; we call this the sensor. The digital sensor is, however, only part of the work flow to convert light/subject into an image. The image is carried through several stages before it appears in a usable form at the memory card. The result can normally be viewed on the screen on the reverse of the camera.
The image passes through the lens, which is in fact a series of lenses, where it is then focussed onto the sensor. The sensor is a sheet of semiconductor containing an array of millions of light-sensitive ‘mini-sensors’. The number of these light-sensitive mini-sensors accounts, in a large part, for the resolution of the picture, and because there are so many of these pixels they are measured in their millions. Many cameras are, not always correctly, judged purely on their megapixel count.
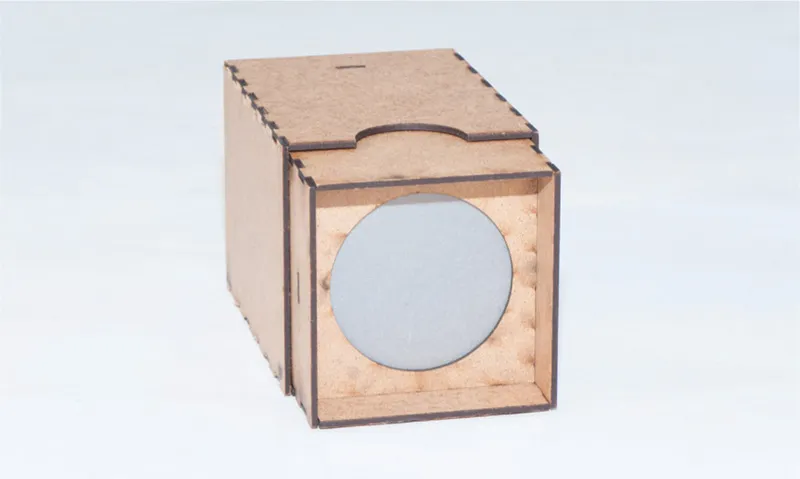
Fig. 1.2
The image of the pinhole camera in this diagram shows the rear of the box. This one is actually a camera obscura and the image would appear inverted on the screen you can see.
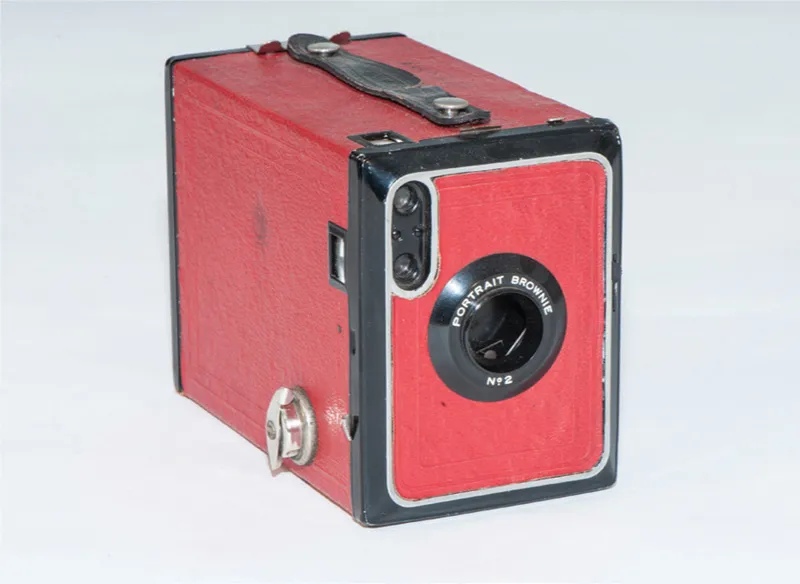
Fig. 1.3
This box Brownie camera dates from some time in the 1930s. This one was a limited run of red colour – most were black.
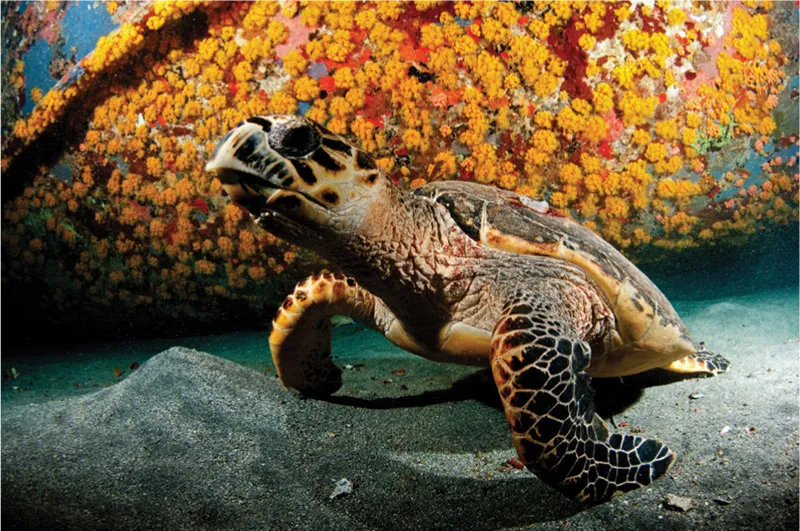
Fig. 1.4
The image shown here is just to give an example of what can be seen on the screen on the back of the camera. I took this hawksbill turtle on a night diving whilst carrying out research on turtle populations on a tiny island in the Caribbean.
1/125; f13; ISO 400; Nikon D700, 16mm.
1/125; f13; ISO 400; Nikon D700, 16mm.
These sensors are photo-sensitive diodes that convert the light into electricity and each one is sensitive to a particular colour: red, green or blue (RGB). The coloured light from the image you are trying to capture is usually a mixture of colours. Where you believe you can see blue light, it may be made up of components of blue, green and red. These individual components of colour are detected at the corresponding sensors. Each of these sensors has a small gap between them and it is the individual sensor plus the gap that actually creates what is termed a ‘pixel’. Most modern digital cameras now have at least 12 million pixels squeezed into a space that is smaller than a postage-stamp on compact cameras. Even on a 36 mega pixel digital SLR, the sensor is approximately the size of a 35mm slide!
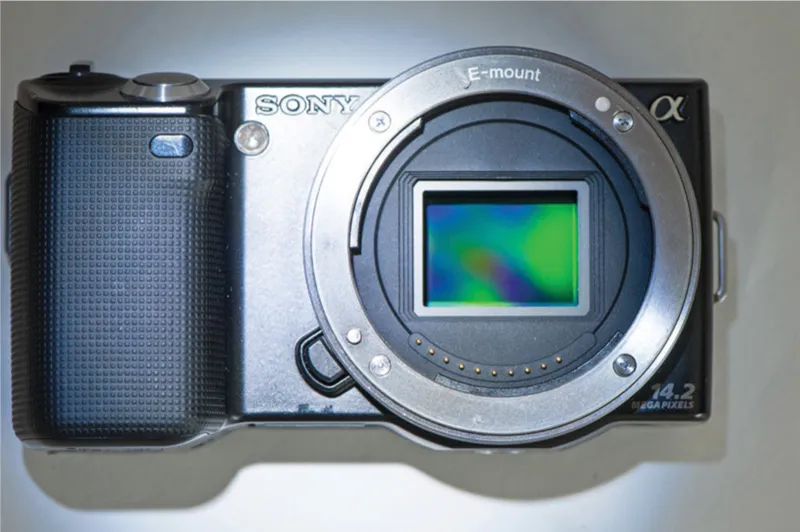
Fig. 1.5
The lens has been removed from this mirrorless style camera and it shows an image of a sensor where the lens should be. You cannot see the actual pixels as the sensor is behind a protective screen that is covering it.
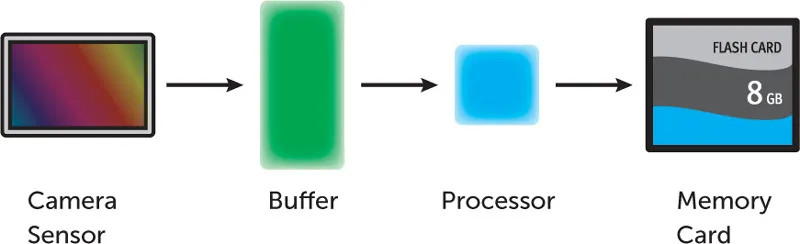
Fig. 1.6
The simple diagram is to show how the image, once captured, passes to the buffer through to the processor, where it is then passed to the memory card.
The signal sent from each individual sensor is proportional to the amount of light and colour. From here it then enters a buffer where it is stored for a fraction of a second before being converted from an analogue signal into a digital one. The really clever stuff takes place in the processor where the binary code from the digital signal is converted into an image. This again passes through a buffer before being written onto the memory card. Similar data is displayed on the camera screen, sometimes with all the metadata. Metadata is information, embedded in the image, about how and when (and sometimes where) it was taken. Many cameras now have a GPS system built into them – not just digital SLRs but most modern compact cameras will now also have it.
CONTROLLING THE LIGHT
What can you do to create the image as you see it or want to present it? Without using artificial light, there are three factors that you, the photographer, can change. As you can see from the exposure triangle (Fig. 1.7), the three factors that affect the light/exposure on the image are aperture, shutter speed and ISO. All three have their own distinct effect upon the outcome of your image, but there are penalties involved with each method of increasing the light. The amount of light that arrives at the sensor is called the exposure value (EV). Change any one of these factors and this value will also change. Change another and you can bring the required EV back to where you wanted it. It is a question of balancing the exposure to get the right value for your situation. It is also how you balance this value that gives you, the photographer, the control of how you want to present your image. (Exposure values are explained and discussed at greater length in Chapter 8.)
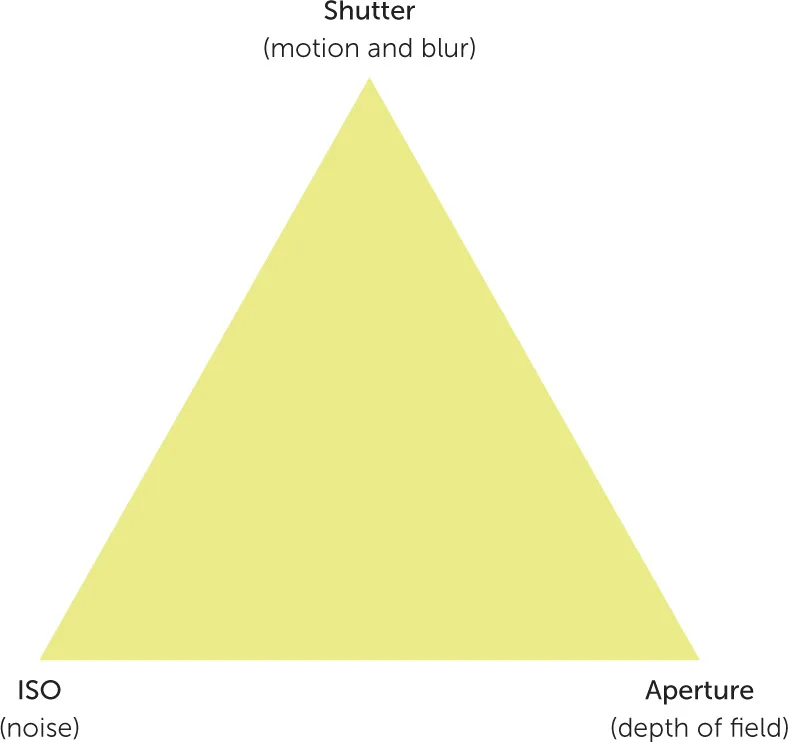
Fig. 1.7
This diagram shows the exposure triangle, which itemizes the three principal components controlling how bright the image is.
Aperture
The aperture is the hole behind the lens through which light enters the camera and can be directly compared to the pupil of the human eye. In bright light, the pupil will close down to a small round opening, restricting the amount of light that falls on the retina. As it gets darker, the pupil dilates to allow more light to enter. The aperture on the camera’s lens can be opened and closed, like the pupil in the eye. The difference in the amount of light that it allows through to the sensor between being fully open and its minimum setting is extensive.
Aperture Setting
The aperture setting is referred to as the f-stop or f-number. The size of the hole is determined by a circle of blades that cause the central aperture to open and close by the overlapping of the blades on each other. This restricts or controls the amount of light hitting the sensor. The size of the aperture is given a number; these numbers are not just random figures but are, in fact, a ratio of the focal length of the lens to the physical size of the aperture. One of the issues that sometimes confuses many budding photographers is that a wider aperture giving more light has a small f-number, while a narrow aperture allowing a low level of light is a high number. Try and give yourself a simple mnemonic, for example – the higher the sun the higher the number aperture.
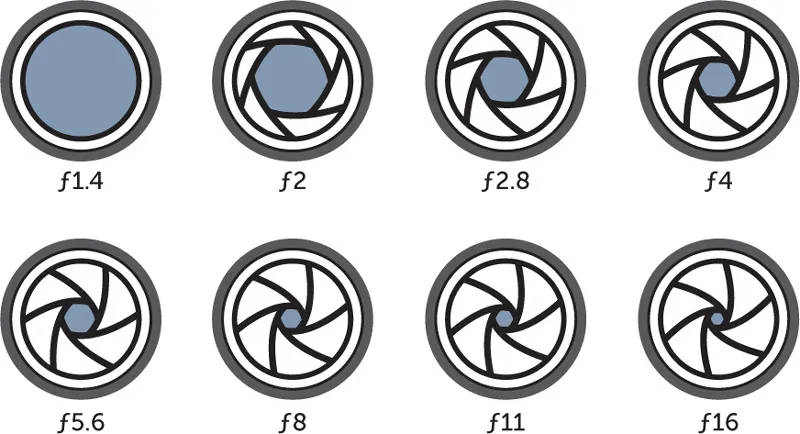
Fig. 1.8
The aperture is completely open at its highest f-stop number, and the amount of light that can enter the aperture is halved at each f-stop number.
All camera lenses are calibrated on the same f-stop scale. The range of the aperture numbers varies from one lens to another but the scale is constant. The f-stop index is shown in the diagram, but a lens which had the whole range of the f-stop options would probably be very expensive. Because the ratio of the aperture size to the focal length of the lens gives us the numbers in the f-stop scale, each increase in f-stop number equates to half the amount of light arriving at the sensor, for example, f5.6–8, f11–16.
Depth of Field
Opening and closing the aperture (decreasing and increasing the f-stop) would appear to be a simple way of changing the light level on the sensor. However, as the aperture is opened (reduced f-number), the depth of field reduces, and this has a very noticeable effect upon the image. So what does this mean? The depth of field (DOF) is defined as the amount of the image which appears to be acceptably in-focus.
You may think it strange that you would deliberately have large areas of your image out of focus, but some of the most impressive underwater images, especially macro, are taken with a very small DOF. The idea is to make sure that the centre-piece of your image is razor sharp and that everything in front and behind moves out of focus. We call this out of focus area ‘bokeh’. This technique is used a lot in underwater photography as you can virtually eliminate a messy background by using a low f-stop number to create a small depth of field – ideal for when your subject will not come out into the open. Nudibranchs are one example of a subject that will look great when taken head-on with a low f-stop.
Lens Choice
Another consideration for varying the depth of field is the choice of lens. For those using a fixed lens compact, this is not possible, although zooming in and out or using housing-mounted wet-lenses and dioptres (discussed in Chapter 2) can achieve a similar result. However, for the SLR and mirrorless camera users, lens choice and depth of field are a dual consideration.
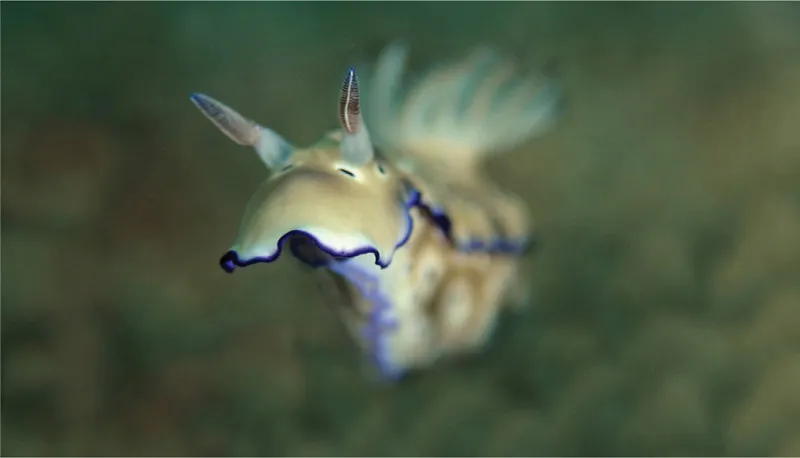
Fig. 1.9
This beautifully coloured purple nudibranch is of the family Chromodorididae and is called Risbecia tryoni. It was taken in the Philippines with the lens only inches from the subject. A +4 dioptre allowed me to get really close to the subject. It was taken close to the surface using natural light.
1/320; f4.5; ISO 200. Nikon D700, 105mm
1/320; f4.5; ISO 200. Nikon D700, 105mm
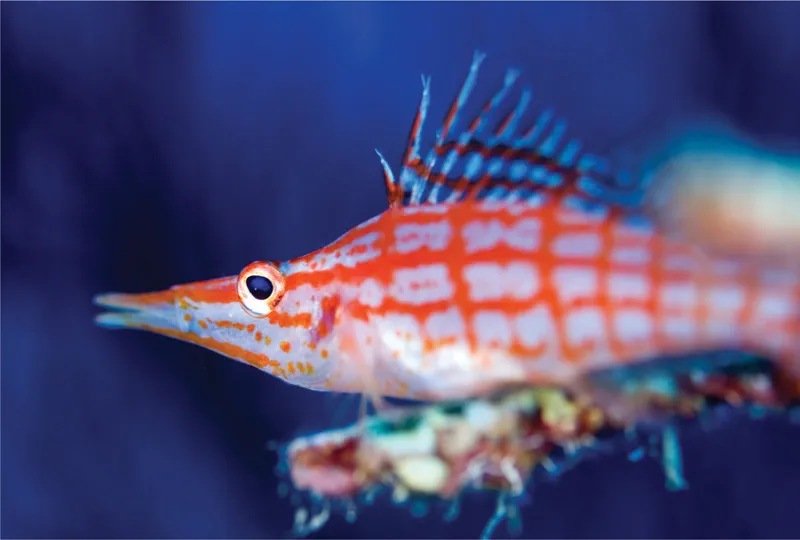
Fig. 1.10
Longnose hawkfish taken on cora...
Table of contents
- Cover Page
- Title Page
- Copyright Page
- Acknowledgements
- Contents
- Foreword
- Introduction
- 1 The Camera
- 2 The Equipment
- 3 Getting Started
- 4 The Underwater Environment
- 5 Natural Lighting
- 6 Artificial Lighting
- 7 Composition
- 8 Exposure Revisited
- 9 Animal Behaviour
- 10 Wreck Photography
- 11 Low Visibility
- 12 Habitats
- 13 Image Manipulation
- 14 The Responsible Photographer
- Glossary
- Index
Frequently asked questions
Yes, you can cancel anytime from the Subscription tab in your account settings on the Perlego website. Your subscription will stay active until the end of your current billing period. Learn how to cancel your subscription
No, books cannot be downloaded as external files, such as PDFs, for use outside of Perlego. However, you can download books within the Perlego app for offline reading on mobile or tablet. Learn how to download books offline
Perlego offers two plans: Essential and Complete
- Essential is ideal for learners and professionals who enjoy exploring a wide range of subjects. Access the Essential Library with 800,000+ trusted titles and best-sellers across business, personal growth, and the humanities. Includes unlimited reading time and Standard Read Aloud voice.
- Complete: Perfect for advanced learners and researchers needing full, unrestricted access. Unlock 1.5M+ books across hundreds of subjects, including academic and specialized titles. The Complete Plan also includes advanced features like Premium Read Aloud and Research Assistant.
We are an online textbook subscription service, where you can get access to an entire online library for less than the price of a single book per month. With over 1.5 million books across 990+ topics, we’ve got you covered! Learn about our mission
Look out for the read-aloud symbol on your next book to see if you can listen to it. The read-aloud tool reads text aloud for you, highlighting the text as it is being read. You can pause it, speed it up and slow it down. Learn more about Read Aloud
Yes! You can use the Perlego app on both iOS and Android devices to read anytime, anywhere — even offline. Perfect for commutes or when you’re on the go.
Please note we cannot support devices running on iOS 13 and Android 7 or earlier. Learn more about using the app
Please note we cannot support devices running on iOS 13 and Android 7 or earlier. Learn more about using the app
Yes, you can access Underwater Photography by Nick Robertson-Brown in PDF and/or ePUB format, as well as other popular books in Art & Photography. We have over 1.5 million books available in our catalogue for you to explore.