The E-Type Jaguar has been described on countless occasions as one of the most beautiful cars in the world. Over the years it has built a reputation amongst Jaguar enthusiasts and classic car collectors for being the ultimate classic to own. If you are lucky enough to own one and are planning to undertake the restoration work by yourself, this manual will take you through the full nut-and-bolt restoration of a very early example, E-Type Jaguar Chassis No 60. Restoration experts from the world's premier Jaguar restoration company, Classic Motor Cars Ltd, have written each chapter, giving you a first-hand account of the process. Contents: Preparing a workspace and dismantling the vehicle; Restoring and painting the body; Engine, electrics and transmission restoration; Assembly of the sub-assemblies, and final assembly; Trimming; Road testing and the first outing. This comprehensive manual for the complete restoration of an E-Type will be of great interest to motoring enthusiasts and motor mechanics, and is superbly illustrated with 700 colour photographs.
- 300 pages
- English
- ePUB (mobile friendly)
- Available on iOS & Android
eBook - ePub
E-Type Jaguar Restoration Manual
About this book
Trusted by 375,005 students
Access to over 1.5 million titles for a fair monthly price.
Study more efficiently using our study tools.
Information
1 |
how to restore an E-Type Jaguar
|
Classic Motor Cars Ltd was set up in 1993 in order to restore classic Jaguars to the highest levels. However, our experience started back in 1982 at the dawn of Jaguar restoration. Over the last thirty-plus years our workforce has grown and developed into one of the most skilled bands of craftsmen in the world. Today we employ some sixty people, including six apprentices. We occupy a state-of-the-art facility covering some 60,000 square feet (5,600sq m), and carry out every aspect of the restoration process in house, except for chrome work.
As with most things in life, there is not a right nor a wrong way to restore a classic motor car, and while we set out our way of restoration, it should not be taken as sacrosanct as there is always more than one way of skinning a cat. The book itself is a guide, littered with helpful hints and tips, but it is not an attempt to create a step-by-step instruction manual.
Organization is the key to a successful restoration, cataloguing everything, making lists, taking photographs and carrying out research. Taking your time is also important. When you are not used to completing a certain task, it can take twice as long as someone who carries out that work on a daily basis. We have spent exactly 2,956 man hours restoring Chassis 60 – the featured car – which means that someone with limited knowledge and experience could spend 6,000 hours and more in order to complete a similar restoration.
My advice is to set some targets, such as completion dates. If you have limited spare time, you must be realistic about what you can achieve at home in your garage. Also be aware of your capabilities. Do not try and do too much. Perhaps when you set out the parameters of the project, put a list together of which parts of the project you can undertake with the skills and tools you possess. Also put together a further list of skills and parts of the project that you would like to attempt. You can then decide whether additional training is required, or indeed whether this task should be entrusted to a specialist company. Once you have an overall plan you can sit down and work out the budgets required.
We live in a world that gives us all free access to almost every piece of information available to mankind, so please do not try and over-analyse it all, as it will lead to paralysis. Keep things simple, and follow the ‘KISS’ rule: you will have an enjoyable journey and end up with a beautiful motor car.
2 |
preparing a workspace and dismantling the vehicle |
For the restoration of any motor car you really need at least the space of a double garage: one half where the car can sit, and one side that can be racked out with shelving to take parts as they are removed, plus another clean section to keep the restored parts. The overall square footage required will be some 360sq ft (33sq m). This could be a single garage, plus a large wooden shed or attic space. But do not fool yourself into believing that the restoration can be completed successfully in a single garage or shed.
Once the workspace is organized ready for the dismantling process, there is one more very important stage to complete prior to getting those spanners out, and that is to photograph the car – and by this we mean photograph every possible part of it: outside, inside, underneath, engine bay, boot and so on. When you think that you have taken all the photographs required, go round the car again: the more photographs, the better. These photographs are imperative for recording the detail and will act as an aid, not just for remembering how the basic vehicle comes apart and goes back together, but also for all the small details, such as where a particular transfer fitted, or which way up a particular split pin was inserted. When you have taken the photographs, load them on to your PC and file them. Be as organized with the photographs as you will be when laying out the nuts, bolts, wishbones and the rest.
You are now ready to open that toolbox. This book is not going to itemize all the tools and equipment required in order to restore a classic Jaguar, so if it is your first restoration, we suggest you start with a much simpler vehicle.
Cleanliness is very important; also, do not use any products that contain silicone, as these will get into the atmosphere and on to the car body, which causes problems when you come to the painting process.
DISMANTLING THE DONOR CAR
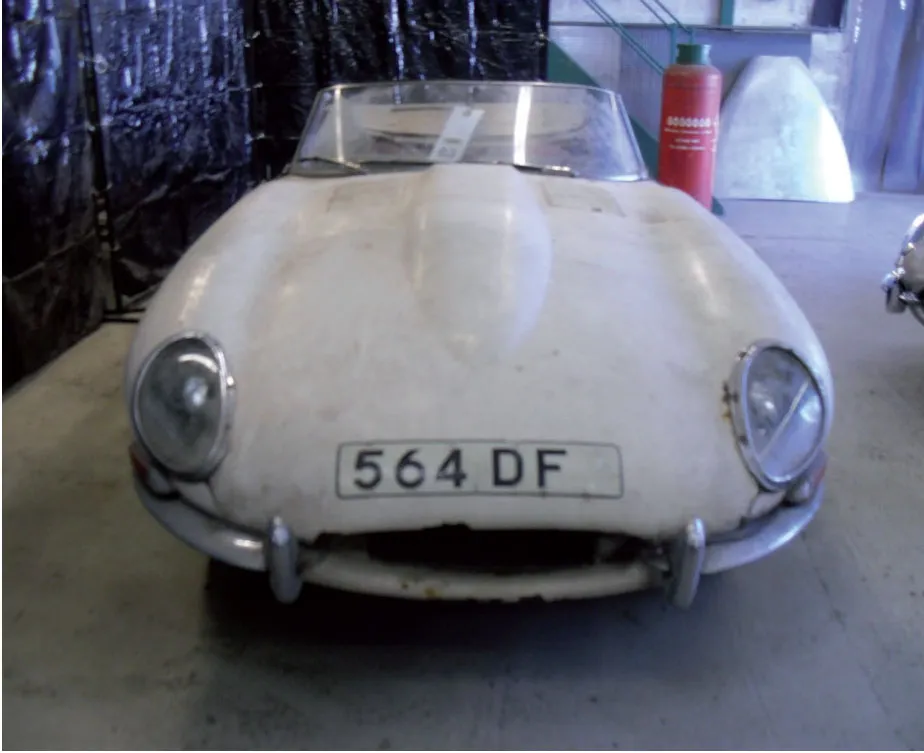
The car prior to dismantling.
Most people regard the dismantling or stripping of the donor car as simple, and a process that can be carried out quickly and without a great deal of care. This is a myth. The dismantling of the donor car must be carried out with as much care and dedication as you would put into its assembly or refitting. A huge amount of damage can be caused if rusted and corroded bolts are not removed carefully.

Different types of bolt markings. The first bolt is standard ‘R’, rated at 45–55 tons per square inch. The centre bolt is ‘S’, rated at 55–60 tons per square inch, and the bolt on the right is ‘T’, rated at 55–65 tons per square inch.
The intention of any well planned and detailed restoration is to save as much of the original vehicle as possible, even down to items such as hose clips, nuts and bolts. Different types of bolt are used throughout a motor car, from cheap standard bolts to the high shear bolts used for securing the propshaft. The designation of the different bolts can be found on the heads.
The first step is to jet wash the whole vehicle, or at least the outside and underneath, in order to remove as much dirt and debris as possible. Take more photographs: remember that you can never take enough. Also purchase a full Jaguar parts manual for the car, along with a Jaguar service manual. These will be very useful companions.
Then make the car safe. Remove the battery, and then jack the car up and place it on suitable stands. Jack up the rear of the car and remove the rear radius arms: this will reveal a cup where the axle stand can be placed. Jack up the front of the car by placing the jack under the picture frame, and then place an axle stand at the corner of the picture frame. The ideal height from the floor is about 24in (60cm).
To carry on making the car safe you need to drain all the fluids: engine oil, gearbox oil, differential oil, fuel tank, water/antifreeze plus brake and clutch fluids. Please remember that all these fluids must be disposed of safely. Your local council will provide the means of disposal free of charge if you t...
Table of contents
- Cover Page
- Title Page
- Copyright Page
- Contents
- Preface
- Prologue
- 1 How to Restore an E-Type Jaguar
- 2 Preparing a Workspace and Dismantling the vehicle
- 3 Dismantling the Sub-Assemblies
- 4 Restoring the Body
- 5 Preparing and Painting the Body
- 6 Flatting and Polishing
- 7 Differential Rebuild
- 8 Gearbox Rebuild
- 9 Engine Restoration
- 10 Restoration of the Carburettors
- 11 Electrical Restoration
- 12 Assembly of the Sub-Assemblies
- 13 Final Assembly
- 14 Trimming
- 15 Road Testing
- 16 First Outing
- Contributors
- Index
Frequently asked questions
Yes, you can cancel anytime from the Subscription tab in your account settings on the Perlego website. Your subscription will stay active until the end of your current billing period. Learn how to cancel your subscription
No, books cannot be downloaded as external files, such as PDFs, for use outside of Perlego. However, you can download books within the Perlego app for offline reading on mobile or tablet. Learn how to download books offline
Perlego offers two plans: Essential and Complete
- Essential is ideal for learners and professionals who enjoy exploring a wide range of subjects. Access the Essential Library with 800,000+ trusted titles and best-sellers across business, personal growth, and the humanities. Includes unlimited reading time and Standard Read Aloud voice.
- Complete: Perfect for advanced learners and researchers needing full, unrestricted access. Unlock 1.5M+ books across hundreds of subjects, including academic and specialized titles. The Complete Plan also includes advanced features like Premium Read Aloud and Research Assistant.
We are an online textbook subscription service, where you can get access to an entire online library for less than the price of a single book per month. With over 1.5 million books across 990+ topics, we’ve got you covered! Learn about our mission
Look out for the read-aloud symbol on your next book to see if you can listen to it. The read-aloud tool reads text aloud for you, highlighting the text as it is being read. You can pause it, speed it up and slow it down. Learn more about Read Aloud
Yes! You can use the Perlego app on both iOS and Android devices to read anytime, anywhere — even offline. Perfect for commutes or when you’re on the go.
Please note we cannot support devices running on iOS 13 and Android 7 or earlier. Learn more about using the app
Please note we cannot support devices running on iOS 13 and Android 7 or earlier. Learn more about using the app
Yes, you can access E-Type Jaguar Restoration Manual by Classic Motor Cars in PDF and/or ePUB format, as well as other popular books in Technologie et ingénierie & Transport et ingénierie de l'automobile. We have over 1.5 million books available in our catalogue for you to explore.