Wax carving is like sculpture for jewellery and allows enormous creativity, as so many different forms can be made. This practical guide introduces the techniques to this age-old method through a series of guided exercises and projects, and demonstrates how exciting it can be. Drawing on the experience of two master wax-carvers, it also gives invaluable advice on the finish of your cast pieces and how to reproduce them. With over 400 colour photos, it give advice on setting up for wax carving, tools, tool-making and materials. There are exercises that introduce the beginner to using wax and then build ideas and confidence to try more complex designs. Included are advanced techniques that show how to use stones in a carving and how to add texture and surface detail. Finally, finished examples demonstrate the potential, excitement and versality of the method.
- 128 pages
- English
- ePUB (mobile friendly)
- Available on iOS & Android
eBook - ePub
Wax Carving for Jewellers
About this book
Trusted by 375,005 students
Access to over 1.5 million titles for a fair monthly price.
Study more efficiently using our study tools.
Information
Print ISBN
9781785008344
CHAPTER 1
What is Wax Carving?
This book is an introduction to the ancient art of wax carving. It is based on a programme of teaching developed and refined by the writers over a period of twenty-five years. The following chapters will guide readers through both their beginner and intermediate courses.
Wax carving is like sculpture for jewellery or sculpture in miniature. As you are reading this book, you have probably already decided that this is perhaps the direction for you or at least one you’d like to investigate. It is especially good for the creation of figurative forms, whether these be realistic (think Antonio Canova) or stylized (think Henry Moore).

‘Life Goes On’ ring by Russell Lownsbrough.
Most jewellery is very obviously made from sheet, wire and tube; however, there are forms that can really only be achieved by being sculpted in wax. Wax carving was historically a very important skill. Baroque, rococo and art nouveau jewellery relied very heavily on this technique, as did the silversmithing work of masters like Cellini (sixteenth century) and Paul de Lamerie (eighteenth century). The technique, however, is much older than this, and has been in continuous use for approximately 6,000 years on three continents.
When computer-aided design (CAD) appeared in the 1990s, many people mistakenly thought that it was the end for wax carving. However, it appears that reports of its death were exaggerated: courses in wax carving proliferate and numerous vibrant international wax carving groups exist on social media. It’s a living, breathing, thriving art. CAD these days is mainly a threat to traditional mount-making, the type of jewellery made from sheet, wire and tube.
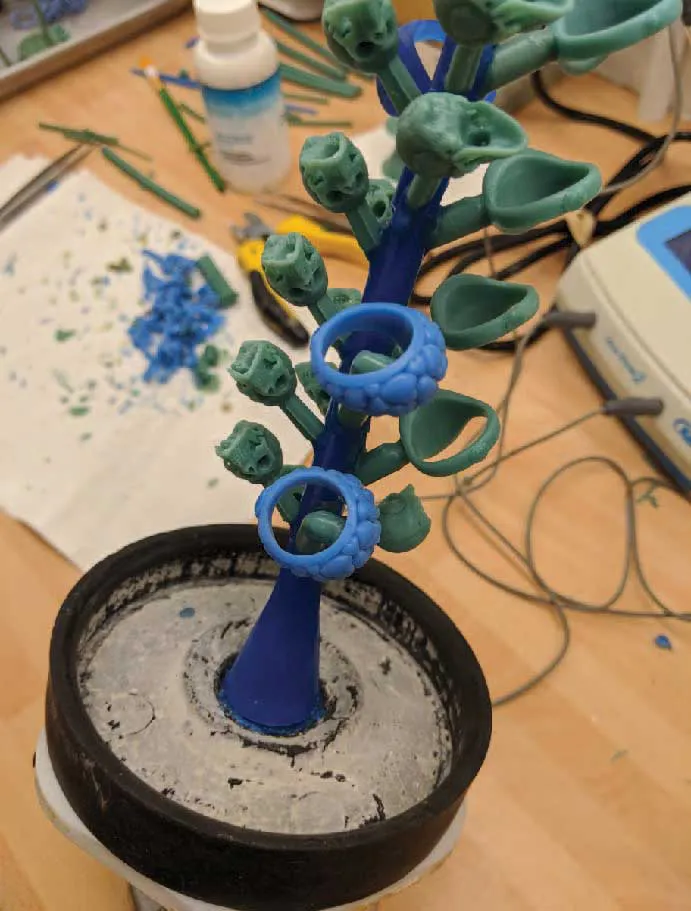
A ‘tree’.
The lost wax casting technique
Carvings are mostly transmuted into metal by the lost wax casting technique, also known as investment casting or cire perdue. In this process, wax models have a sprue attached and are encased in plaster. The sprue is the avenue through which metal flows to form the casting. Once the plaster is solid, the wax is burnt out and molten metal is poured into the cavity formed by the vacated wax. Different metals require different investment plasters. After casting, the plaster is broken off the metal and the piece is cut off the sprue.
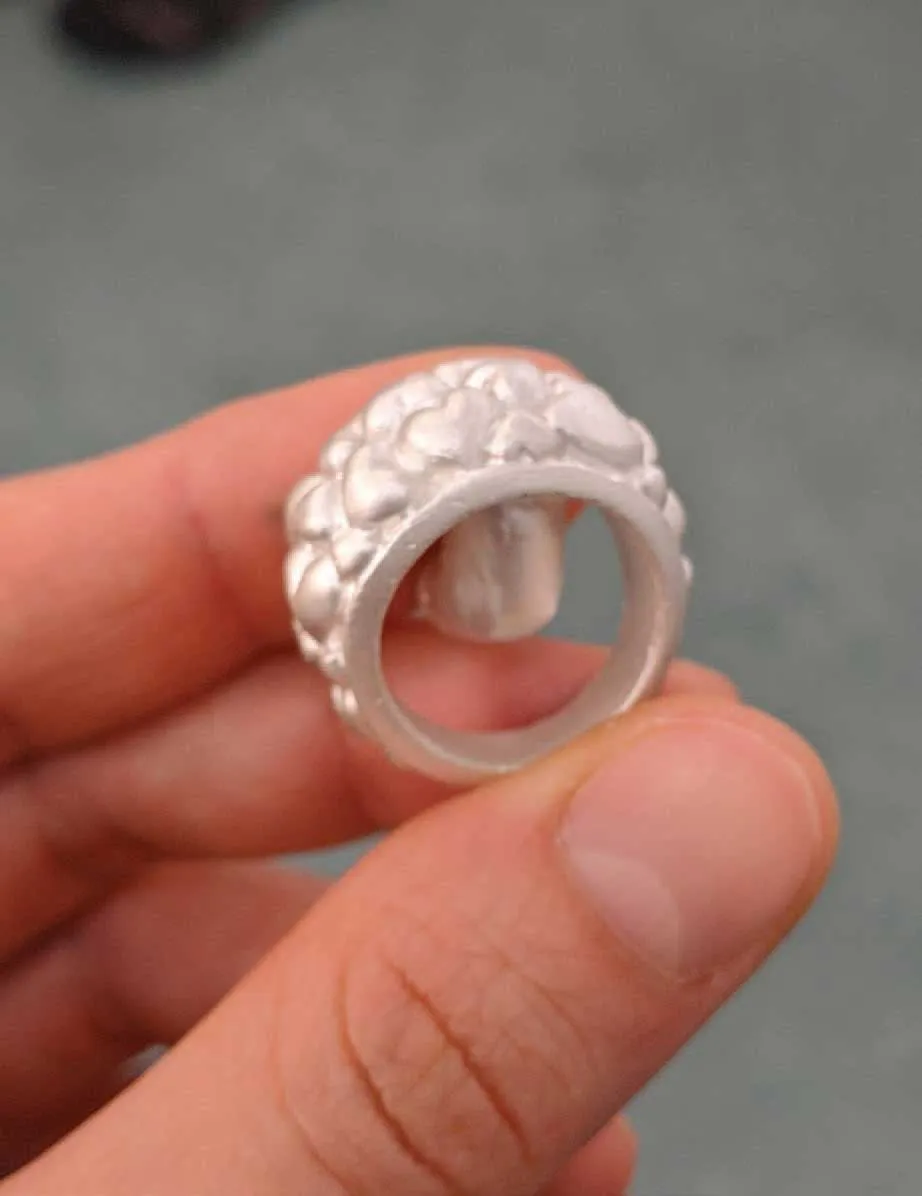
A silver casting.
Waxes are usually cast on a ‘tree’ – a thick rod of wax with many sprues attached to it, each with a wax model. The majority of casting is done commercially by vacuum casting, which has replaced centrifugal.
There are other types of casting, such as ceramic shell casting, sand casting, Delft clay and cuttlefish casting. These techniques are for the DIY enthusiast. For consistently good results a professional casting company is the best route. This book is concerned with carving and will not be delving into the arena of casting techniques. Suggested books on the subject will be in the Further Information section at the end of the book.
INSPIRATION AND DESIGN
Inspiration can come from any source. The first thing you need to decide is what appeals to you personally. It is useful to think in terms of sculpture when approaching any design to be carved, and studying sculpture closely is a good way to help you understand form.

Design sheet example, showing dimensions to be considered.
Before beginning any carving, it’s essential to spend time working out what exactly you are going to carve. Prepare drawings of your design from as many angles as you can. This will help to define the form in your mind, which will yield far better results. Of course a design on paper is essential to communicate your ideas to a potential client as well as for transferring a design to a piece of wax. The example pictured below is for the first project in Chapter 6.
It’s important to do as much visual research as possible when preparing a design for something figurative; fortunately the internet has made it extremely easy to find pictures. That said, however, internet pictures can’t always replace a good reference book on your subject. For any figurative work, get a book on the appropriate anatomy as it’s important to understand the muscle and bone structure beneath the skin when carving humans or animals.
The three stages of carving
Most carvings go through three stages:
STAGE 1: ‘This is going ok.’ At this stage you’re shaping and defining volumes, profiles etc., guided by the marking-out from when you transferred the design.
STAGE 2: ‘This is a disaster, but maybe I can salvage something…’ The second phase requires a leap of faith. You begin to abandon the initial markings and start to really sculpt. It’s very common to lose faith in your abilities at this stage. Don’t give up.
STAGE 3: ‘OK, it’s not that bad. Actually, that’s pretty good.’ Perseverance pays off as the design is realized and at last you have the joy of making those final little refinements to your design.
There are a lot of good books on drawing plants and animals that are extremely useful at breaking structures down into basic forms. A few keywords on Amazon will produce a plethora of possibilities; read the reviews before selecting. The Goodreads website is also a useful resource; you can ask for recommendations on there as well as read reviews.
If gemstones are to be incorporated, it’s important to produce accurate designs to ensure enough space is left to accommodate them. Similarly when designing a ring you should produce a design to scale to ensure that the finger size can accommodate all design elements.
The design process should proceed as follows:
• Find your idea, collect your visual research, make a mood board. This will also come in handy as a reference when you begin carving.
• Produce a design on paper. You could also make a mock-up in paper, card or Plasticine. This can help you visualize the design in three dimensions. The more time you spend at the design stage, the more successful your finished item is likely to be, especially for a beginner.
• Transfer the design to the wax.
• Carve.
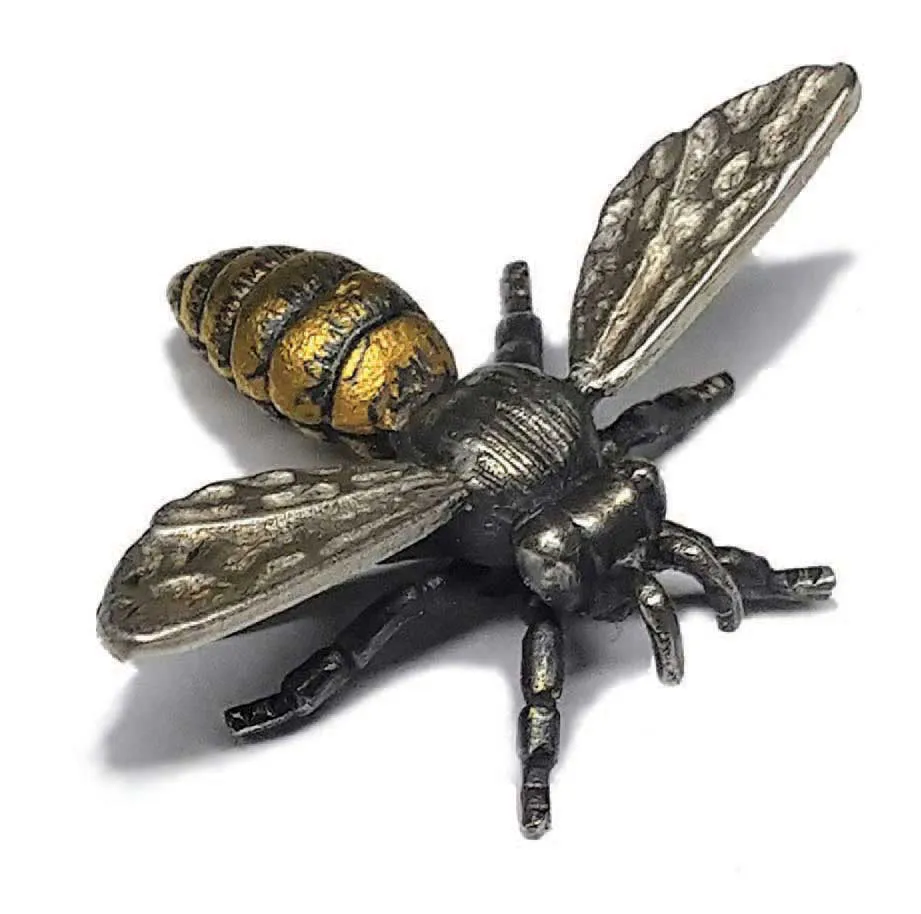
‘Honey Bee’ by Russell Lownsbrough.
Not all designs have to be completed entirely in wax. For the Honey Bee pin pictured below, only the body was carved. The legs were made in metal from wire and the wings from sheet. The antennae were soldered to the body after casting.
TRANSFERRING DESIGNS
There are several ways to transfer a design to wax. Some are more suitable to certain designs than others. The projects in this book will introduce you to these techniques with relevant projects. Marking-out is very important to successfully realizing your design.
Pricking through
This is the most common technique for transferring a design. Trace your design onto a piece of tracing paper and fix the tracing to the wax with double-sided tape or glue. Prick through the traced lines with a scriber or similar tool, remove the tracing paper and join the dots with the same tool.
Direct drawing
A design can be drawn directly onto wax with a scriber or a marker pen. This requires a greater degree of skill. When using a marker pen, the colour of the wax may make the marks difficult to see, but black shows up fairly well on all types. CD or permanent markers are best for this job; water-based pens don’t stay on wax. Go over the marker pen with a scriber to make the design more permanent as marker pen may rub off with handling. The marker can be very useful for colour coding areas to help you keep track of which areas you have worked on in a complex design. Dividers are useful to help transfer dimensions from the design sheet to the wax.
Spray and draw
Spray the wax with a primer paint and sketch onto the wax with a marker or a pencil. A soft lead is advisable when using a pencil so as not to break the skin of primer on the wax. Alternatively the design can be painted onto the primer with a brush.
Shrinkage
Wax will usually shrink by around 3 per cent, but can shrink by up to 5 per cent, depending on the methods used by your caster. Always check with your caster what the anticipated...
Table of contents
- Cover
- Halftitle
- Title
- Copyright
- Contents
- Chapter 1: What is Wax Carving?
- Chapter 2: Tools and Materials
- Chapter 3: Starter Exercises
- Chapter 4: Hollowing, Repairing and Recycling
- Chapter 5: Rings
- Chapter 6: Beginner Projects
- Chapter 7: Intermediate Projects
- Chapter 8: Settings
- Chapter 9: Textures
- Chapter 10: After the Cast
- Further Information
- Index