The classic look of film noir portraits was iconic to the 1930s and 1940s - the use of light, shadows and styling created a timeless look that is as popular today as ever. This practical book explains how to take photos and use lights to create powerful portraits typical of this time. With over 100 photographs, it covers the equipment needed; explores the types of images that are classed as film noir; shares tips and tricks to improve your images; guides you through the lighting set-ups in detail; recreates some classic film noir images and ideas, and finally, explains how to shoot film noir images inside and outside on location. It will be of great interest to photographers particularly with film interest; 1930s and 1940s enthusiasts; Hollywood interest and movie goers. Neil Freeman is a professional photographer, tutor and writes for various photography magazines and it is beautifully illustrated with 114 colour photographs.
- 160 pages
- English
- ePUB (mobile friendly)
- Available on iOS & Android
eBook - ePub
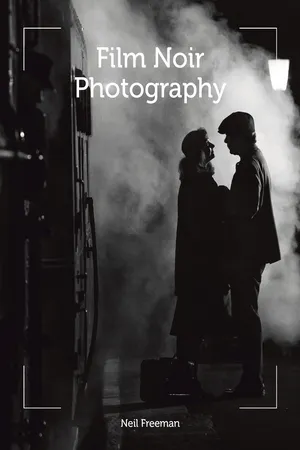
Film Noir Photography
About this book
Trusted by 375,005 students
Access to over 1.5 million titles for a fair monthly price.
Study more efficiently using our study tools.
Information
Topic
ArtSubtopic
PhotographyChapter 1
History, Lighting and Inspiration
WHAT IS A ‘FILM NOIR’ IMAGE?
To me, film noir defines itself through high-contrast visuals. It is predominantly shot in black and white, with the image showing a strong contrast between the light and dark parts of the image. The photography is very much about the character, with props tending to add context but not be the main part of the image. For portraits this ‘less is more’ character-driven approach allows for very striking images to be created.


In this image two speedlights are used to create the light in the scene. Nikon Df, 24–70mm ƒ2.8 G, 1/400th, ƒ4, ISO 100, 2 × SB-910 Speedlight, SU-800 infrared remote trigger, Lastolite Hotrod strip softbox.
Most of the catalogue of film noir or Hollywood ‘noir’-style portraits is referenced from films of the 1940s. At the time, the standard convention for film and studio lighting was a set-up that involved ‘three-point lighting’ to ensure all the subjects and characters were completely lit and therefore visible. Film noir lighting turned this around; the style involved deliberately casting shadows and pushing characters and subjects into darkness, sometimes hiding parts of their faces or body. Lighting with film noir is all about creating dramatic shadows to build a mysterious environment.
Probably the most recognizable film noir image is one where the blinds on a window cast horizontal lines of shadow upon a subject’s face. Also very common was the use of silhouetting for a character. This could be used in a studio or urban portrait, or in an image involving multiple people that tells a story. Film noir may instantly bring to mind cinematic scenarios of detectives and dames that are on the run from something or someone. For me, the aim is to create an image that is dramatic and moody.
When you light a film noir scene you are doing a lot more than just adding light. The shadows that fall into the scene also make a key part of the image and are used to convey a feeling of menace or a sense that danger is lurking just out of sight. Lighting is the most important factor as it will make or break your photograph, hence I will be spending a lot of time covering how to set it up.
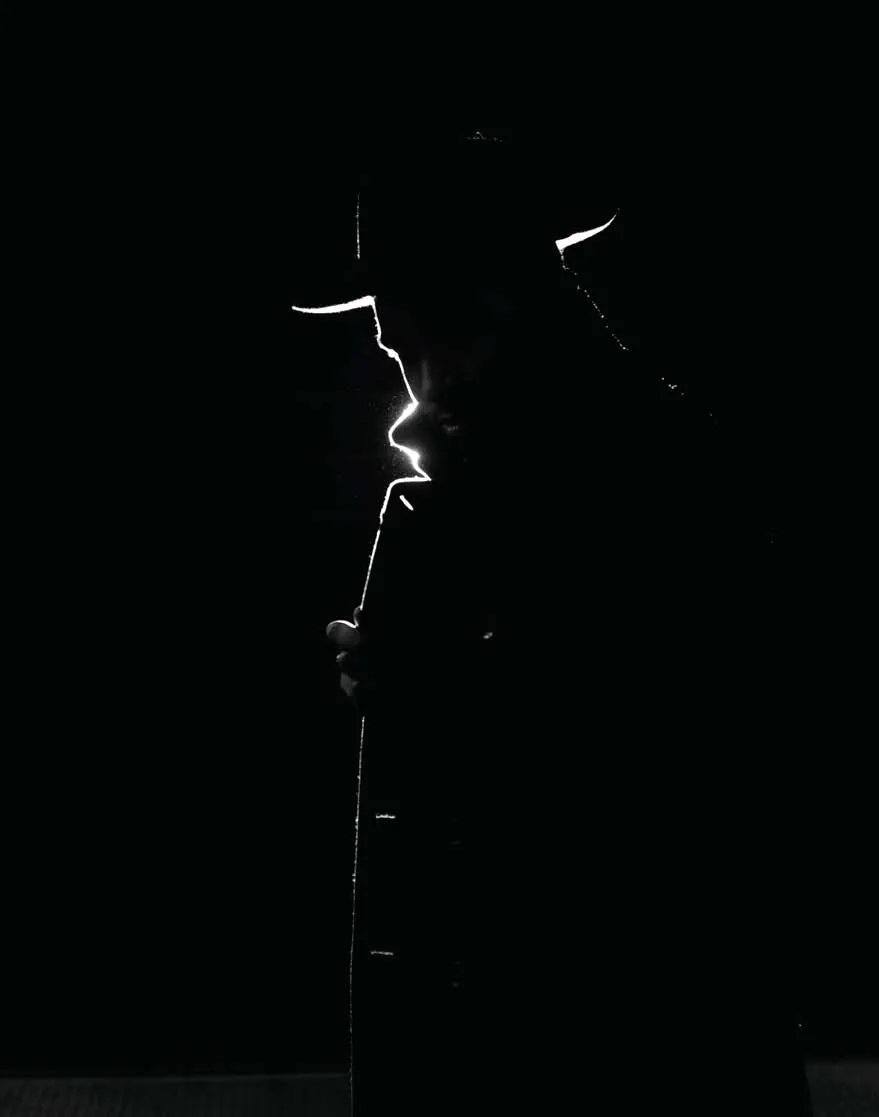
This atmospheric shot of the ‘detective’ used a single bare speedlight placed directly behind the subject. Nikon Df, 24–70mm ƒ2.8 E, 1/800th, ƒ4, ISO 100, SB-910 Speedlight, SU-800 infrared remote trigger.
FILM NOIR PORTRAITS VS. BLACK AND WHITE PORTRAITS
There are clear distinctions between a film noir or Hollywood portrait and a standard black and white one. The lighting and the subsequent strong contrast that is created is what really sets a film noir image apart. When you then start to add in models or characters styled appropriately to the era, your image really comes to life.
The lighting you choose should add depth and dimension to your shot and this is achieved by using side and backlighting. You will rarely want to light a film noir image from the front as this will make your subject easy to see and possibly too bright. Overly bright images with no shadows are not consistent with film noir as they do not give strong enough contrast.
The light also needs to controlled and shaped in a way that varies the intensity hitting an object or person. This control of the light will add to the depth and dimension of your image, making subjects either stand out or disappear into shadow. This extra depth now sets your image apart from a standard black and white portrait.
You can now add even more depth to your image if you start to think about actually lighting the background or individual props with indirect light sources as well. It is worth pointing out that when I talk about side lighting it doesn’t literally mean to the left or right of the frame; the light could be at a diagonal to the camera, or it could be a high or low light crossing the camera angle. Sometimes the look of your image or location will actually dictate the lighting and you may find some exceptions to the side or backlight guidelines.
Here a simple one-light set-up can recreate the look of a classic Hollywood image in film noir style. Nikon Df, 24–70mm ƒ2.8 E, 1/200th, ƒ4, ISO 100, SB-910 Speedlight, SU-800 infrared remote trigger, Lastolite softbox with honeycomb grid.
UNDERSTANDING LIGHT
Whether you are using natural or artificial light, it is important to understand that light has four main characteristics. You may already have an understanding of some of these. If we have a clear sunny day with no clouds in the sky, this is harsh or hard light, which makes for deep, defined shadows. Conversely, on cloudy days, the cloud bank acts as a huge diffuser or softbox, which makes the light source (the sun) bigger as the light passes through the clouds, thereby creating soft light with minimal to no shadows at all. Each of the characteristics of light will play a significant role in the outcome of your image, so consideration should be given to each of them before you press the shutter release on your camera.
The four characteristics of light are: quantity, quality, direction and colour. As we are shooting film noir portraits that will predominantly be black and white, we do not have to pay that much attention to colour. However, as our black and white images will be created from colour originals, it is important to get the colour tones correct to ensure that the tonality of our final black and white image is good.
There are really only two types of light in photography, the light that is already in the scene, often called available, ambient or natural light, and the light that you as the photographer choose to add. You can create great images with available light, by adding light or by using a mix of both. The trick to adding light into a scene is to make sure what you add complements the scene both in power and colour; more often than not, added light, especially light from artificial sources, can have a tendency to overpower all other light, resulting in a disappointing image.
I speak with a lot of photographers who will only work with natural or ambient light. It is easy to look at the light in a room or on location and just start shooting. This does not make you a photographer. Simply using the light in a room to get an exposure is not ‘working with ambient or natural light’, that is just shooting the light that happens to be there. To work with the light you first have to stand back and analyze where the light is falling, whether it is harsh or soft light, and how much of it is there. Ask yourself: where will the shadows be? How is the colour of the light going to affect my final image? Is anything reflecting the light back around the room? What will be illuminated? Where is the best light in the room for the image I want to take?
Approaching your shoots like this can save you a lot of time as sometimes there is just not the right amount of light to take the shot you want. It is very easy to look at all the classic film noir portraits and forget how much work actually went in to lighting those images. For each of the images, every light that was used would have been thought about in terms of the quantity of light it was giving, the quality of light it was providing, the direction it was travelling and the colour or tonality it would produce. Each of these was visualized and considered carefully before the shutter release was pressed.
Getting proficient with lighting means taking all of these factors into consideration with every light you use or photo you take. You have to think about it for both the ambient light and for any additional lighting you will be adding to the image. Being able to see, evaluate and use light is much more important than having lots of expensive camera equipment and lighting kit. Having a good understanding of the various forms of lighting and the considerations that influence how the quality of light will play out in your images is essential. As photographers, we have to pay careful attention to the quality of light, how much of it is around, its direction and the colour, as all have a big impact on our images. As a quick exercise, stop and consider the light you are working in at the moment. Ask yourself the following questions: what is the quality of light? What is the quantity of light? What is the main direction of light? Where are the shadows being cast? Where is the light falling off? Your answers should start to give you an idea about how you could use the light currently around you to take an interesting image.
Here we have soft light falling on to the model. Soft light creates few or no shadows and is very flattering for skin tones. Nikon D810, 85mm ƒ1.4 G, 1/200th, ƒ2, ISO 100, SB-910 Speedlight, SU-800 infrared remote trigger, Lastolite Hotrod strip softbox.
QUALITY (OF LIGHT)
This to me is the most important consideration when looking at light. Unfortunately there is no way to really measure the quality of light in a scene or falling on a subject, so you have to have an idea upfront about the light you want in your image to enable you to choose the correct source and modifier in order to achieve this. The quality of light is defined as being ‘hard’ (sometimes also called ‘harsh’) or ‘soft’ light. When discussing this we are actually talking about the shadows that are created by the light. If you go outside at midday, on a bright sunny day, look at the sh...
Table of contents
- Cover
- Halftitle
- Title
- Copyright
- Contents
- Introduction
- 1 History, Lighting and Inspiration
- 2 Kit: Cameras and Lenses
- 3 Kit: Lights and Modifiers
- 4 Settings: Cameras and Lights
- 5 Composition, Props and Directing Shoots
- 6 Interior Shoot Ideas
- 7 On Location Shoot Ideas
- 8 Digital Darkroom Techniques
- Glossary
- Index
Frequently asked questions
Yes, you can cancel anytime from the Subscription tab in your account settings on the Perlego website. Your subscription will stay active until the end of your current billing period. Learn how to cancel your subscription
No, books cannot be downloaded as external files, such as PDFs, for use outside of Perlego. However, you can download books within the Perlego app for offline reading on mobile or tablet. Learn how to download books offline
Perlego offers two plans: Essential and Complete
- Essential is ideal for learners and professionals who enjoy exploring a wide range of subjects. Access the Essential Library with 800,000+ trusted titles and best-sellers across business, personal growth, and the humanities. Includes unlimited reading time and Standard Read Aloud voice.
- Complete: Perfect for advanced learners and researchers needing full, unrestricted access. Unlock 1.5M+ books across hundreds of subjects, including academic and specialized titles. The Complete Plan also includes advanced features like Premium Read Aloud and Research Assistant.
We are an online textbook subscription service, where you can get access to an entire online library for less than the price of a single book per month. With over 1.5 million books across 990+ topics, we’ve got you covered! Learn about our mission
Look out for the read-aloud symbol on your next book to see if you can listen to it. The read-aloud tool reads text aloud for you, highlighting the text as it is being read. You can pause it, speed it up and slow it down. Learn more about Read Aloud
Yes! You can use the Perlego app on both iOS and Android devices to read anytime, anywhere — even offline. Perfect for commutes or when you’re on the go.
Please note we cannot support devices running on iOS 13 and Android 7 or earlier. Learn more about using the app
Please note we cannot support devices running on iOS 13 and Android 7 or earlier. Learn more about using the app
Yes, you can access Film Noir Photography by Neil Freeman in PDF and/or ePUB format, as well as other popular books in Art & Photography. We have over 1.5 million books available in our catalogue for you to explore.