Bird photography is one of the most challenging genres of photography, and can test even modern high-specification cameras to their limits. This practical book guides you through both how to understand your camera and how to develop your own style and approach. With technical, practical and creative insights throughout, it also emphasizes the importance of fieldcraft and understanding your subject. The book advises on cameras and equipment, explains the importance of light and composition, encourages experimentation and a creative approach, suggests project ideas and locations and demonstrates post-capture processing. This practical book helps you master the challenges of photographing birds and to capture their beauty, flight and behaviour and will be of great interest to bird photographers, bird enthusiasts, artists and ornithologists. Beautifully illustrated with 160 stunning colour images.
- 160 pages
- English
- ePUB (mobile friendly)
- Available on iOS & Android
eBook - ePub
Photographing Birds
About this book
Trusted by 375,005 students
Access to over 1 million titles for a fair monthly price.
Study more efficiently using our study tools.
Information
Topic
ArteSubtopic
FotografiaChapter 1
Equipment
CHOOSING A DIGITAL SLR
If this book had been written even just ten years ago the decision-making process when it comes to camera selection would have been far more complicated than it is today. Digital cameras in their various guises were relatively new on the market and in terms of final image quality simply didn’t match up to a well-taken slide or transparency.
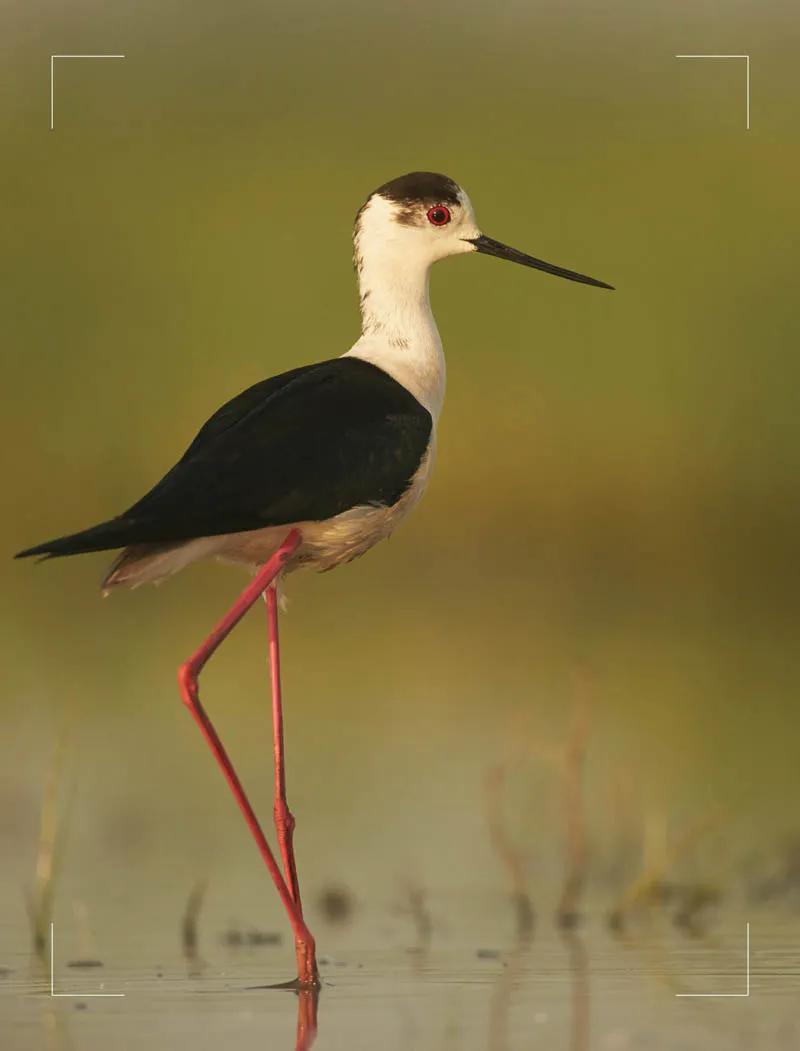
Fig. 1.1
Black-winged Stilt Himantopus himantopus in the wetland area of Hortobagy National Park, Hungary. Canon 1Dx, 500mm +1.4× converter, f5.6, 1/2000sec, ISO 1600.
Today it’s almost impossible to find anyone working seriously in the field of wildlife photography who doesn’t rely exclusively on a digital camera and this will almost definitely be an SLR (single lens reflex) camera – a system which allows interchangeable lenses to be added to a camera body, the viewfinder of which provides a view which looks directly through the lens thanks to a mechanical mirror and pentaprism inside. When the shutter is pressed to take an image the mirror swings out of the way, allowing the lens to project light through the aperture onto a digital sensor at the rear of the camera, a process that generally takes a fraction of a second. Although the zoom (or magnification) capabilities of many so-called bridge cameras are indeed quite significant, and there are even now mirrorless interchangeable lens camera systems, these styles of cameras do have limitations in terms of the amount and degree of control you can really have over them. They also very often have a significant delay between pressing the shutter and taking the image that will soon have you wishing you had spent that bit more on an SLR in the first place.
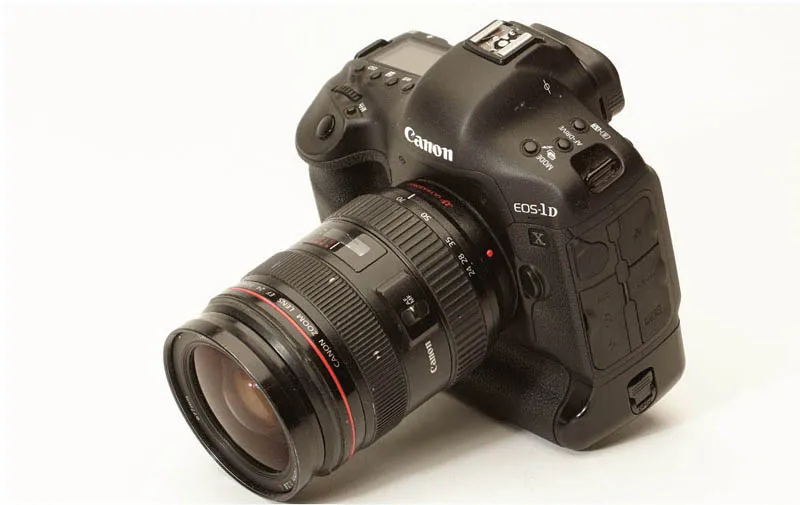
Fig. 1.2
A modern, professional-specification digital SLR.
It is not the author’s place to advise on a specific brand or model of SLR, but in making that choice for yourself it makes sense to be guided by a number of pointers, such as the breadth of camera bodies and lenses that the manufacturer has to offer – a good indication of their range and a quick bit of researching on what kit the photographers you might aspire to image-wise are using can be a good starting point. It generally comes down to a couple of choices, either of which will see you right. Beyond making a decision as to whether a full-frame or crop-sensor body is your best bet (see box), it is then a question of budget. Camera bodies are a bit like new cars: there is an array of price-points, all of which depreciate almost immediately as new models are constantly being brought out. The best advice is to aspire to one at the top end of your budget, work it hard for a number of years, and you will know when you have out-grown it and can justify (as well as afford) trading up. You will also know by then which features have proved to be a touch more frustrating than ideal and can research them specifically at that next stage, too.
 | FULL-FRAME VERSUS CROP SENSOR Full-frame digital SLRs have had their sensors (the area where the image data is recorded) sized to match the old 35mm film format – namely 36mm × 24mm. These large sensors are generally more expensive than crop- (or APS-C) sized sensors and are therefore more likely to be found in high specification models. There are, though, advantages and disadvantages when it comes to bird photography. On the plus side they have large photosites (the light-sensitive points on the chip), which means they are able to capture more light with less noise, resulting in a less grainy and smoother image; this also means they are generally able to work better in low light conditions. A fast shutter speed is often important in bird photography so this can be a major help towards this. Crop sensor SLRs (most consumer-level models fall into this bracket) have an APS-C size chip. Depending on the manufacturer, this means a sensor ranging from 20.7mm × 13.8mm to 28.7mm × 19.1mm. The main impact of this is the apparent multiplication of the focal length of the lens attached to the camera – hence why these are often referred to as 1.3× or 1.6× crop. This makes a 300mm lens the equivalent of a 390mm or 480mm lens respectively. Using these bodies the equivalent focal length of longer (and more expensive) lenses can be achieved more economically, and subjects that won’t tolerate being approached too closely can still be photographed from a greater distance. |  |
 |  |
Read plenty of reviews and look particularly at the camera’s speed and accuracy of focusing and frames-per-second capabilities (a minimum of five per second is necessary). These are the capabilities that will be most tested by bird photography as a genre. It is also important to try the camera out ergonomically – there can be quite a bit of variety in terms of size and it needs to fit comfortably in your hands.
CHOOSING LENSES
The reality of bird photography is that if you really want to take it seriously you are going to need a reasonably long telephoto lens and these do come with a high price tag. Our view of the world using our eyes is roughly the equivalent to looking through a 50mm lens on a full-frame sensor camera. Anything greater than 50mm is moving into telephoto territory. For most bird photography the simple fact of the matter is that you will have to be working at a reasonable distance from your subject, and as many bird species are small in size a long telephoto lens is essential. 300mm is probably the absolute minimum and the norm that you will see most professionals using is a 500mm.
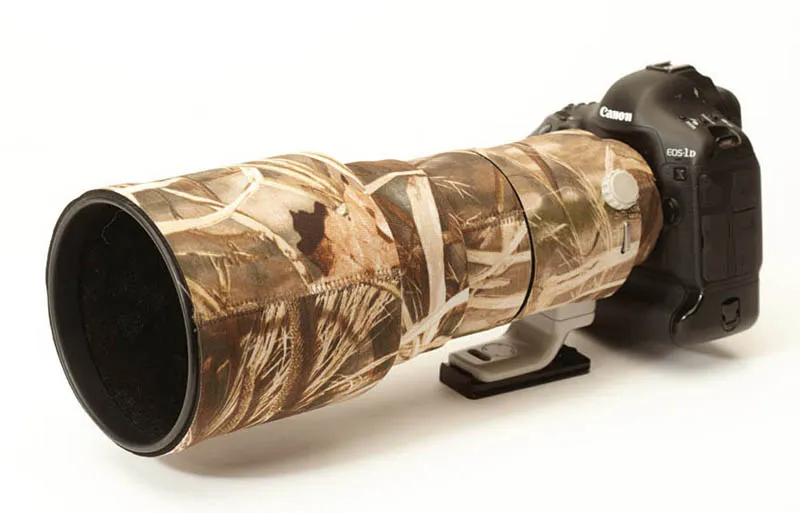
Fig. 1.3
A 300mm lens (shown here with a protective neoprene coating) is very much the minimum focal length required for professional and high-end bird photography.
Budgets will always be a factor here, but as with your selection of camera body my advice is to spend at the top end of your budget. A good lens will last through several changes of camera body, and in this field the simple rule that you pay for what you get applies – higher quality glass simply does give cleaner and sharper images. Although they don’t appear very often, looking on internet auction sites for secondhand lenses can prove fruitful and is an additional reassurance that you should have little problem recouping much, if not all, of your outlay should your circumstances change.
Another factor to bear in mind other than the quality/budget equation is the weight of the lens and camera combination. Although most of the time you will be using a tripod (see ‘Supporting your Camera’, below) or some other form of support, you still have to be able to comfortably lift and manoeuvre your kit, as well as carry it to photographic locations away from home. Before investing in this area make sure you get to feel the weight of your potential purchase by visiting a retail outlet or an exhibition where the equipment may be on display.
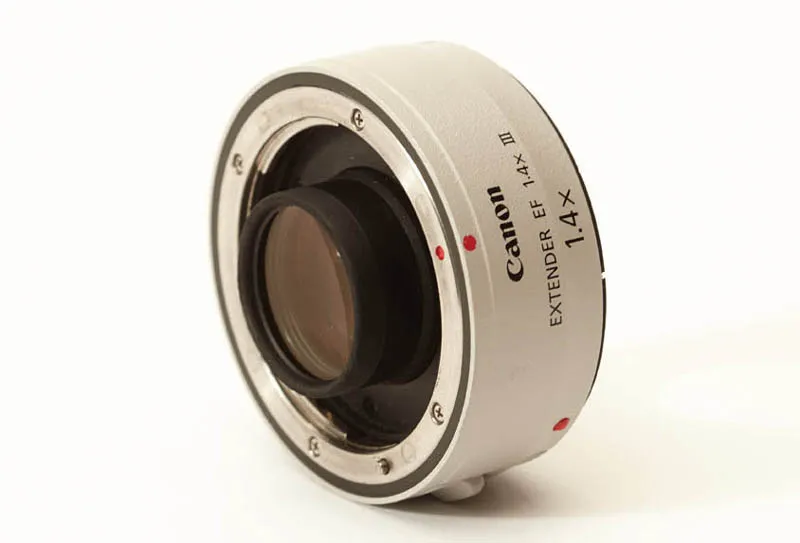
Fig. 1.4
A 1.4× tele-converter adds an additional 40 per cent magnification to your lens, turning a 500mm lens into 700mm: you do lose a stop of light, though.
Working with these long lenses does mean that fast shutter speeds are preferable in order to avoid the dreaded ‘camera shake’ in your images. Many manufacturers have additional image stabilization or vibration reduction technologies built into their lenses, and although they add to the cost they are extremely beneficial and another factor to consider in your decision-making.
Alongside your long lens, a wide-angle lens (24–70mm for example) will prove a useful addition. This style of lens will significantly exaggerate the perspective of your images – put simply, objects close to the camera will appear larger than they are and those in the distance seem further away. Although this lens type is the bread-and-butter for landscape photographers, it has a role in creating images that emphasize the context of the habitat your subject may be in. This may require the use of remote shutter release, as relatively few wild subjects will come that close.

Fig. 1.5
A 24–70mm is an ideal wide-angle lens (shown here with lens hood).
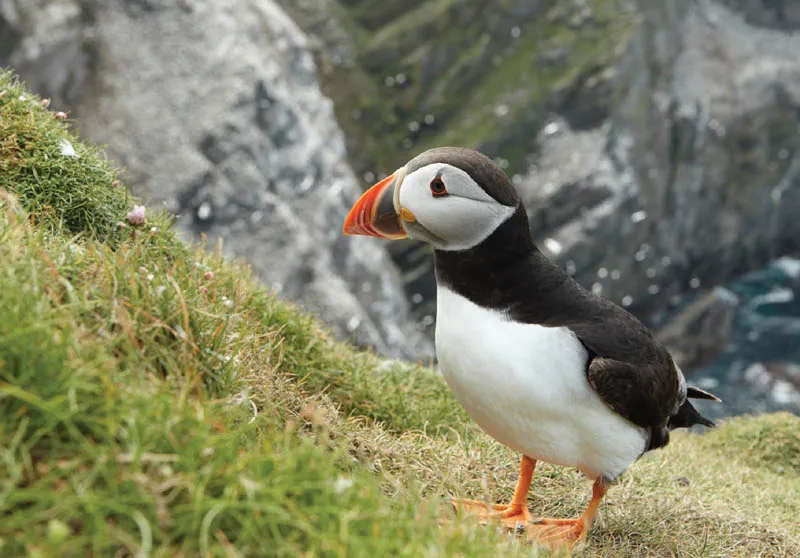
Fig. 1.6
This confiding Atlantic Puffin Fratercula arctica, photographed in the dramatic setting of the cliffs at Hermaness in Shetland at a focal length of 50mm, shows just how the context of the bird’s habitat can add to the drama of an image.
| PRIME LENS VERSUS ZOOM Lenses come in essentially two different types. Prime lenses are those of a fixed focal length (for example, 300mm) and this cannot be chan... |
Table of contents
- Cover Page
- Title Page
- Copyright Page
- Contents
- Introduction
- 1 Equipment
- 2 Understanding Your SLR Camera
- 3 The Importance of Light
- 4 Clues to Composition
- 5 Getting Started: Some Project Ideas and Finding Locations
- 6 Developing Your Portfolio
- 7 Some Creative Approaches
- 8 The Importance of Fieldcraft
- 9 Some Thoughts on Post-Capture Processing and Organization
- Appendix
- Useful Websites
- Index
Frequently asked questions
Yes, you can cancel anytime from the Subscription tab in your account settings on the Perlego website. Your subscription will stay active until the end of your current billing period. Learn how to cancel your subscription
No, books cannot be downloaded as external files, such as PDFs, for use outside of Perlego. However, you can download books within the Perlego app for offline reading on mobile or tablet. Learn how to download books offline
Perlego offers two plans: Essential and Complete
- Essential is ideal for learners and professionals who enjoy exploring a wide range of subjects. Access the Essential Library with 800,000+ trusted titles and best-sellers across business, personal growth, and the humanities. Includes unlimited reading time and Standard Read Aloud voice.
- Complete: Perfect for advanced learners and researchers needing full, unrestricted access. Unlock 1.4M+ books across hundreds of subjects, including academic and specialized titles. The Complete Plan also includes advanced features like Premium Read Aloud and Research Assistant.
We are an online textbook subscription service, where you can get access to an entire online library for less than the price of a single book per month. With over 1 million books across 990+ topics, we’ve got you covered! Learn about our mission
Look out for the read-aloud symbol on your next book to see if you can listen to it. The read-aloud tool reads text aloud for you, highlighting the text as it is being read. You can pause it, speed it up and slow it down. Learn more about Read Aloud
Yes! You can use the Perlego app on both iOS and Android devices to read anytime, anywhere — even offline. Perfect for commutes or when you’re on the go.
Please note we cannot support devices running on iOS 13 and Android 7 or earlier. Learn more about using the app
Please note we cannot support devices running on iOS 13 and Android 7 or earlier. Learn more about using the app
Yes, you can access Photographing Birds by Mark Sisson in PDF and/or ePUB format, as well as other popular books in Arte & Fotografia. We have over one million books available in our catalogue for you to explore.