![]()
CHAPTER 1
Getting Started
Carving Materials
Knives & Sharpening
Carving Overview
From Drawing to Sanding
Painting Basics
Painting Techniques
CARVING MATERIALS
The main type of wood I use for carving is American basswood (also known as American linden). Basswood is used for all the carving projects in this book because it is fairly soft and lightweight, so it is relatively easy to carve. However, there are many other types of suitable wood available and, as you progress with your carving, you may want to try some alternatives. Let’s take a closer look at some of them.
AMERICAN BASSWOOD
Basswood has a straight grain, is dense, and generally has no knots or irregularities. The wood is not scarce or threatened. It’s classified as a hardwood because it is deciduous, but if it is dried correctly, it is actually soft and easy to carve. It can be bought from sawyers, carving supply stores, or specialty wood suppliers. Don’t confuse basswood with balsa wood, which is often used for model building and is generally too light and too soft for carving.
BOXWOOD
The other primary carving wood is boxwood, which also has a straight grain and no knots. It’s important for the grain to be predictable if you’re working on small details. Boxwood commonly grows as a shrub, and the large shrub branches are fine for carving, but in some places it also grows as a tree. It’s slow growing, which is why the grain is tight, and this means it holds detail well in smaller pieces. It’s harder to carve, so practice with basswood first.
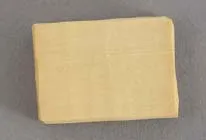
HOLLY
Holly is harder than basswood, but it is not as hard as boxwood. It’s very strong—comparable to birch or maple—but is not so easily available. It’s a white wood, but sometimes it also has grayish streaks, which can make it very attractive. It’s more difficult to carve than basswood, but it holds details well.
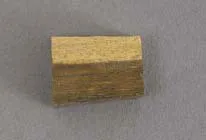
YELLOW CEDAR
Cedar, pine, and firs are not ideal for carving unless they are slow grown—the slower the growth, the tighter the grain—and even then, the grain can be wavy. Old or slow-grown yellow cedar is harder to find, but it’s a very pretty wood with a pleasant smell.
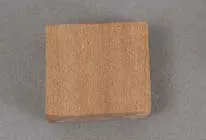
SWISS PEAR
Nut and fruitwoods such as walnut, pecan, apple, and Swiss pear are hardwoods; they are comparable to boxwood, but they tend to have a lot of knots. You can still use them, however, if you avoid the knotty areas. Swiss pear has a particularly attractive color, close to cherry (which can also be used for carving).
LIGNUM VITAE
Lignum vitae is a very slow-growing tree. The darker parts of the wood have an unusual green color, and the white parts are yellow with green flecks. It’s very hard to carve because the grain is woven—you feel like you’re fighting the grain whichever way you cut. Its density allows it to withstand extreme conditions.
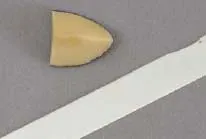
IVORY & TAGUA NUT
Real ivory can still legally be used if it is reclaimed. Old ivory piano keys can be obtained cheaply, and ivory seized from poachers is occasionally sold off by the relevant authorities; most of it goes to China and Japan for traditional carving. Tagua nut has similar properties and is known as “vegan ivory”—it is also plentiful and inexpensive. Both are very difficult to carve and brittle, but they can be effective for small details.
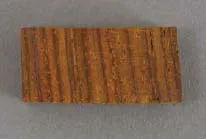
COCOBOLO
This wood should be used only for its color and beauty—it should definitely not be painted. There are natural pores in the wood, and the grain varies between hard and soft, which makes it unpredictable to carve. When working the wood, the orange dust it produces can be toxic or allergenic; always wear a breathing apparatus when using this wood, especially when sanding (the same is true of ebony wood).
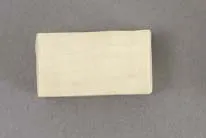
SOAP & VEGETABLES
We’ll use soap and vegetables in the next chapter of the book. They’re great for practicing on when you first start out, but they’re not particularly attractive or durable—although they do have their own charm! For the best results with soap, look for a waxy type, not a flaky one.
TIP
Our practice projects use carrots and turnips, but you can experiment with other root vegetables—potatoes, yams, sweet potatoes, large radishes, and parsnips will all work.
KNIVES & SHARPENING
At first, you probably won’t want to spend a lot of money on equipment, but the good news is that you don’t have to. Hobby knives, while not ideal, are certainly good enough for your first few carving projects. Once you’ve got the taste for it, you can move on to more expensive knives, which will give you more control and add an extra degree of finesse to your work. Whichever type of knife you use, always remember that the less sharp the blade, the more pressure you need to exert, and, therefore, the less control you have and the more dangerous the project becomes. Generally speaking, there are three types of blades: wedge-shaped, straight, or curved. I use mostly straight and curved blades, but try them out and see what works for you.
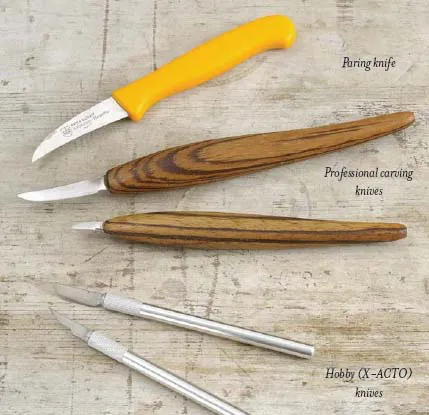
KNIVES
HOBBY (X-ACTO) KNIVES
These are a great place to start. Hobby knives are inexpensive and easily available from craft stores or hardware outlets. On the one hand, you don’t need any sharpening equipment—just use them and throw the blades away (they have interchangeable blades). On the other hand, hobby knives are not as sharp as professional ones, the handles are not very ergonomic for sustained use, and the blades are thin and break more easily.
PROFESSIONAL CARVING KNIVES
Professional knives are designed to be held in the hand for longer periods of time, are easier to use, and the blades are made of hard machined steel. A common example is the Murphy knife (the 1½-inch/38-mm model), which is an inexpensive, commercially available professional knife that’s good for beginners or intermediate-level carvers. These start from around twenty dollars.
I use artisan knives, which are of similar quality but can be works of art in themselves. There’s a wide variety available, starting from around thirty dollars. For most purposes, I use only two sizes: a 1½-inch (38-mm) knife and the smaller 3/4-inch (18-mm) model (which is used for all the woodcarving projects in this book).
PARING KNIFE
This is used for the soap and vegetable carving projects. A kitchen knife that you use for cutting fruit or vegetables is fine, as long as the blade is straight or curved upward, but not serrated.
SHARPENING
When I started carving, I ended up wrecking some blades prematurely because I didn’t know how to sharpen them properly. Know the difference between sharpening (also known as honing) and stropping: sharpen only when the blade is chipped; strop at regular intervals—after every three hours of use, on average. You can tell a blade is chipped if it makes a small line in the wood when you cut—the...