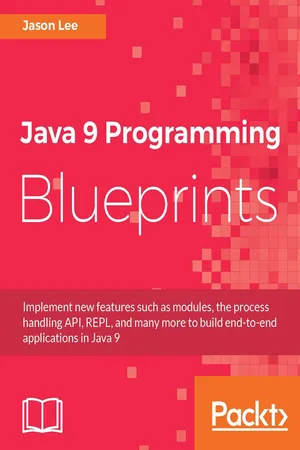
Build a variety of real-world applications by taking advantage of the newest features of Java 9About This Book• See some of the new features of Java 9 and be introduced to parts of the Java SDK• This book provides a set of diverse, interesting projects that range in complexity from fairly simple to advanced and cover HTTP 2.0• Take advantage of Java's new modularity features to write real-world applications that solve a variety of problemsWho This Book Is ForThis book is for Java developers who are already familiar with the language. Familiarity with more advanced topics, such as network programming and threads, would be helpful, but is not assumed.What You Will Learn• Learn how to package Java applications as modules by using the Java Platform Module System• Implement process management in Java by using the all-new process handling API• Integrate your applications with third-party services in the cloud• Interact with mail servers using JavaMail to build an application that filters spam messages• Learn to use JavaFX to build rich GUI based applications, which are an essential element of application development• Write microservices in Java using platform libraries and third-party frameworks• Integrate a Java application with MongoDB to build a cloud-based note taking applicationIn DetailJava is a powerful language that has applications in a wide variety of fields. From playing games on your computer to performing banking transactions, Java is at the heart of everything.The book starts by unveiling the new features of Java 9 and quickly walks you through the building blocks that form the basis of writing applications. There are 10 comprehensive projects in the book that will showcase the various features of Java 9. You will learn to build an email filter that separates spam messages from all your inboxes, a social media aggregator app that will help you efficiently track various feeds, and a microservice for a client/server note application, to name a few. The book covers various libraries and frameworks in these projects, and also introduces a few more frameworks that complement and extend the Java SDK.Through the course of building applications, this book will not only help you get to grips with the various features of Java 9, but will also teach you how to design and prototype professional-grade applications with performance and security considerations.Style and approachThis is a learn-as-you-build practical guide to building full-fledged applications using Java 9. With a project-based approach, we'll improve your Java skills. You will experience a variety of solutions to problems with Java.
- 466 pages
- English
- ePUB (mobile friendly)
- Available on iOS & Android
eBook - ePub
Java 9 Programming Blueprints
About this book
Trusted by 375,005 students
Access to over 1.5 million titles for a fair monthly price.
Study more efficiently using our study tools.
Information
Sunago - A Social Media Aggregator
For our next project, we'll try something a bit more ambitious; we'll build a desktop application that aggregates data from various social media networks and displays it in one seamless interaction. We're also going to try something new, and we're going to give this project a name, something that might be a bit more appealing than the dry, albeit accurate, description-turned-name that we've used to date. This application, then, we'll call Sunago, which is the phonetic spelling of the (Koine) Greek word συνάγω, which means I gather together, collect, assemble.
Building the app will cover several different topics, some familiar, some new. That list includes the following:
- JavaFX
- Internationalization and localization
- Service Provider Interfaces (SPI)
- REST API consumption
- ClassLoader manipulation
- Lambdas, lambdas, and more lambdas
As usual, those are the just the highlights with a number of interesting items sprinkled throughout.
Getting started
As with every application, before we get started, we need to think about what we want the application to do. That is, what are the functional requirements? At a high level, the description tells us what we want to achieve in broad terms, but, more specifically, we want the user to be able to do the following:
- Connect to several different social media networks
- Determine, on a network-by-network basis, which group of data (users, lists, and more) to retrieve
- See list of items from each network in a consolidated display
- Be able to determine from which network an item came
- Click on an item and have it loaded in the user's default browser
In addition to this list of things the application should do, the things it shouldn't do include the following:
- Respond/reply to items
- Comment on items
- Manage friends/following lists
These features would be great additions to the application, but they don't offer much that would be architecturally interesting beyond the basic application detailed previously, so, to keep things simple--and moving along--we'll limit the scope to the given basic set of requirements.
So where to start on the application? As in the previous chapters, we're going to make this a desktop application, so let's start there, with a JavaFX application. I'm going to tip my hand a little bit here to make things easier later on: this will be a multi-module project, so we first need to create the parent project. In NetBeans, click on File | New Project..., and select the Maven category, as seen in the following screenshot:

Click on the Next button, and fill in the project details, as shown next:

When you click on Finish, you will be presented with an empty project. Once we add modules to this project, differentiating them might become difficult, so something I do as a matter of practice is to give each module a distinct, "namespaced" name. That is to say, each module has its own name, of course, but I prefix that with the name of the project. For example, since this is the base POM of the project, I call it Master. To reflect that, I modify the generated POM to look something like this:
<?xml version="1.0" encoding="UTF-8"?> <project xmlns="http://maven.apache.org/POM/4.0.0" xmlns:xsi="http://www.w3.org/2001/XMLSchema-instance" xsi:schemaLocation="http://maven.apache.org/POM/4.0.0 http://maven.apache.org/xsd/maven-4.0.0.xsd"> <modelVersion>4.0.0</modelVersion> <groupId>com.steeplesoft.sunago</groupId> <artifactId>master</artifactId> <version>1.0-SNAPSHOT</version> <name>Sunago - Master</name> <packaging>pom</packaging> </project>
There's really not much to this yet. The advantage that a parent POM like this gives us is that we can build all the projects with one command if we so desire, and we can move any shared configuration to this shared parent POM to reduce duplication. What we need to add now, though, is a module, which NetBeans helps us do, as seen in this screenshot:

After clicking on Create New Module..., you will be presented with the familiar New Project window, from which you'll want to select Maven | JavaFX Application, and click on Next. In the New Java Application screen, enter app for the project name, and click on Finish (all of the other defaults are acceptable as-is).
Again, we want to give this module a meaningful name, so let's modify the generated pom.xml as follows:
<?xml version="1.0" encoding="UTF-8"?> <project xmlns="http://maven.apache.org/POM/4.0.0" xmlns:xsi="http://www.w3.org/2001/XMLSchema-instance" xsi:schemaLocation="http://maven.apache.org/POM/4.0.0 http://maven.apache.org/xsd/maven-4.0.0.xsd"> <modelVersion>4.0.0</modelVersion> <parent> <groupId>com.steeplesoft.sunago</groupId> <artifactId>master</artifactId> <version>1.0-SNAPSHOT</version> </parent> <artifactId>sunago</artifactId> <name>Sunago - App</name> <packaging>jar</packaging> </project>
When NetBeans creates the project, it will generate several artifacts for us--two classes, FXMLController and MainApp, as well as the resources, fxml/Scene.xml and styles/Styles.css. While this may be stating the obvious, artifacts should have names that clearly communicate their purpose, so let's rename these.
The class FxmlContoller should be renamed to SunagoController. Perhaps the quickest and easiest way to do this is to open the class by double-clicking on it in Project View, then, in the source editor, click on the name of the class in the class declaration, and press Ctrl + R. The Rename Class dialog should appear, in which you need to enter the new name, and press Enter. This will rename the class and the file for you. Now repeat that process for MainApp, renaming it to Sunago.
We also want to rename the generated FXML file, Scene.xml, to sunago.fxml. To do that, right-click on the file in Project View and select Rename... from the context menu. Enter the new name (without the extension) in the Rename dialog, and press Enter. While we're at it, let's also rename Styles.css to styles.css so that the case is consistent. It's a minor thing, but consistency in the code can help produce confidence in you in whoever might take over your code in the future.
Unfortunately, renaming these files doesn't adjust the references to them in the Java sources, so we need to edit Sunago.java to point to these new names, which is done as follows:
 @Override
 public void start(Stage stage) throws Exception {
 Parent root = fxmlLoader.load(
 getClass().getResource("/fxml/sunago.fxml"));

 Scene scene = new Scene(root);
 scene.getStylesheets().add("/styles/styles.css");

 stage.setTitle("Sunago, your social media aggregator");
 stage.setScene(scene);
 stage.show();
 }
Note also that we changed the title to something more appropriate.
Setting up the user interface
If we wanted to, we could now run our application. It would be very boring, but it would run. Let's try to fix the boring part.
The default FXML created is just an AnchorPane with two children, a Button and a Label. We don't need any of those, so let's get rid of them. Our main user interface will be pretty simple--basically, just a vertical stack of components--so we can use a VBox as our root component. Perhaps, the easiest way to change the root component from the AnchorPane that's there to a VBox is to use Scene Builder to wrap that component in a VBox, and then delete the AnchorPane:

To do that, open the FXML file in Scene Builder by double-clicking on the file (assuming you've configured NetBeans correctly so that it knows where to find Scene Builder. If not, refer back to Chapter 1, Introduction). In Scene Builder, right-click on AnchorPane in the Document section of the accordion on the left, select Wrap in, and then VBox, as shown in the preceding screenshot. Scene Builder will then modify the FXML file, making AnchorPane a child of VBox as expected. Once that's done, you can right-click on AnchorPane, and click on Delete to remove it and its children. This leaves us with an empty user interface that's more boring than it was when we began. We can fix that now by adding a couple of controls--a MenuBar and a ListView. We do that by clicking on each component in the Controls section of the accordion and dragging them to VBox. If you drop the components on VBox, they will be appended to its list of children. Make sure that MenuBar comes before ListView, or you'll have a very strange user interface.
Let's configure these components a bit now before we return to the code. Selecting VBox from the Document section on the left, we then need to select the Layout section in the accordion on the right. For Min Width and Min Height, enter 640 and 480 respectively. This will make the window's default size larger and more user-friendly.
For MenuBar, we need to expand its entry under Document, then expand each of its Menu children, which should reveal one MenuItem per Menu. Click on the first Menu, then, on the right, set Text to _File, and check Mnemonic Parsing. This will allow the user to press Alt + F to activate (or show) this menu. Next, click on its MenuItem child, setting Text to _Exit, and check Mnemonic Parsing. (If the text for a Menu, MenuItem, Button, and more has an underscore in it, make sure that Mnemonic Parsing is checked. For brevity's sake, I won't flag this explicitly again.) Open the Code section, and set the On Action value to closeApplication.
The second Menu should have its Text value set to _Edit. Its MenuItem should be labeled _Settings, and have an On Action value of showPreferences. Finally, the third Menu should be labeled _Help, and its MenuItem labeled About with an On Action of showAbout.
Next, we want to give ListView an ID, so select that on the left, make sure the Code section is expanded on the right, and enter entriesListView for fx:id.
The last edit we need to make is to set the controller. We do that in the accordion on the left, in the Controller section at the very bottom. Expand that, and make sure that the Controller class value matches the Java class and package we just created in NetBeans, then save the file.
Setting up the controller
Back in NetBeans, we need to fix up our controller to reflect the changes we just made in our FXML. In SunagoController, we need to add the entriesListView property as follows:
@FXML private ListView<SocialMediaItem> entriesListView;
Notice that the parameterized type is SocialMediaItem. That's a custom model we'll create in just a few moments. Before we tackle that, though, we need to finish wiring together our user interface. We defined three onAction handlers in the FXML. The corresponding code is as follows:
@FXML public void closeApplication(ActionEvent event) { Platform.exit(); } Closing the application is as simple as calling the exit method on the Platform class. Showing the "about" box is also fairly simple, as we see in the showAbout method:
@FXML public void showAbout(ActionEvent event) { Alert alert = ne...Table of contents
- Title Page
- Copyright
- Credits
- About the Author
- About the Reviewer
- www.PacktPub.com
- Customer Feedback
- Preface
- Introduction
- Managing Processes in Java
- Duplicate File Finder
- Date Calculator
- Sunago - A Social Media Aggregator
- Sunago - An Android Port
- Email and Spam Management with MailFilter
- Photo Management with PhotoBeans
- Taking Notes with Monumentum
- Serverless Java
- DeskDroid - A Desktop Client for Your Android Phone
- What is Next?
Frequently asked questions
Yes, you can cancel anytime from the Subscription tab in your account settings on the Perlego website. Your subscription will stay active until the end of your current billing period. Learn how to cancel your subscription
No, books cannot be downloaded as external files, such as PDFs, for use outside of Perlego. However, you can download books within the Perlego app for offline reading on mobile or tablet. Learn how to download books offline
Perlego offers two plans: Essential and Complete
- Essential is ideal for learners and professionals who enjoy exploring a wide range of subjects. Access the Essential Library with 800,000+ trusted titles and best-sellers across business, personal growth, and the humanities. Includes unlimited reading time and Standard Read Aloud voice.
- Complete: Perfect for advanced learners and researchers needing full, unrestricted access. Unlock 1.5M+ books across hundreds of subjects, including academic and specialized titles. The Complete Plan also includes advanced features like Premium Read Aloud and Research Assistant.
We are an online textbook subscription service, where you can get access to an entire online library for less than the price of a single book per month. With over 1.5 million books across 990+ topics, we’ve got you covered! Learn about our mission
Look out for the read-aloud symbol on your next book to see if you can listen to it. The read-aloud tool reads text aloud for you, highlighting the text as it is being read. You can pause it, speed it up and slow it down. Learn more about Read Aloud
Yes! You can use the Perlego app on both iOS and Android devices to read anytime, anywhere — even offline. Perfect for commutes or when you’re on the go.
Please note we cannot support devices running on iOS 13 and Android 7 or earlier. Learn more about using the app
Please note we cannot support devices running on iOS 13 and Android 7 or earlier. Learn more about using the app
Yes, you can access Java 9 Programming Blueprints by Jason Lee in PDF and/or ePUB format, as well as other popular books in Computer Science & Programming. We have over 1.5 million books available in our catalogue for you to explore.