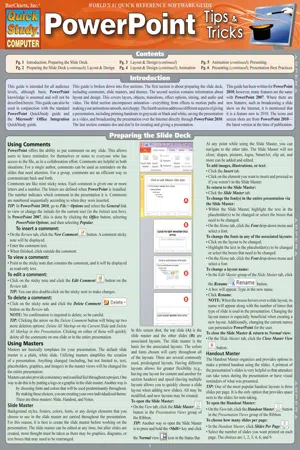
A handy resource for beginning, intermediate, or advanced PowerPoint users, this three-panel guide features helpful time-saving hints so that you can get the most out of Microsoft's dynamic presentation software. Written to follow PowerPoint 2010 (and compatible with PowerPoint 2007), this guide includes helpful screen captures and icons, as well as clear and concise instructions.
- 44 pages
- English
- ePUB (mobile friendly)
- Available on iOS & Android
eBook - ePub
Powerpoint Tips & Tricks
About this book
Trusted by 375,005 students
Access to over 1.5 million titles for a fair monthly price.
Study more efficiently using our study tools.
Information

Layout & Design
Using Layers
Every object on a slide will have its own layer. To better understand layers, imagine that every object is on a transparency the size of the slide and you can see through all areas that do not have objects. What you would see on the slide is the same as if you stacked all the transparencies together and looked down on them from above. With layers, objects can hide behind others or be moved to the front or anywhere in between. Utilizing layers effectively will allow you to manipulate what is seen and what is hidden, making for cleaner, sharper images and slides.
To view the layers:
- On the Home tab, click Arrange . This will bring up a drop-down list.

- Click Selection Pane . The Selection and Visibility pane will appear. This tool has three primary functions: showing visibility, renaming objects, and reordering objects on the slide.

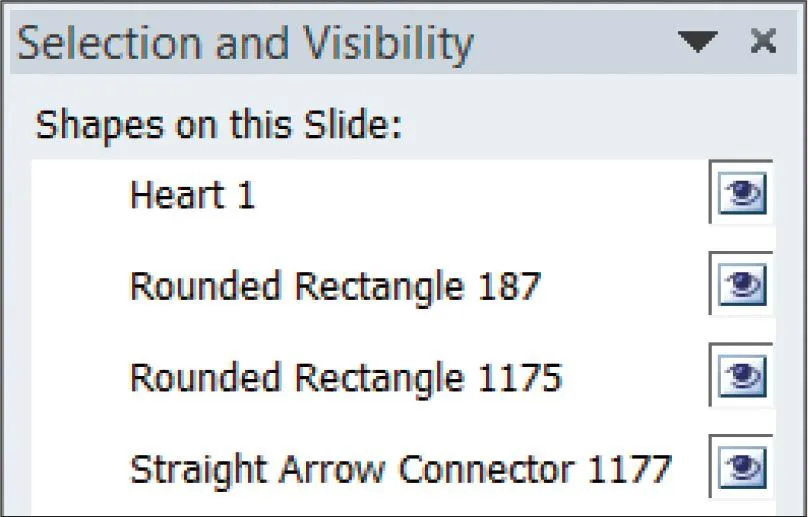
Notice how much information is presented in this screen shot. The eye represents visibility. Observe the names for the heart, rectangles, and arrow—these are typical names that you would see when working with layers or animations. For the rectangles, only the numbers are different. When there are many similar shapes, this can be confusing. This is where changing the names of the objects in the Selection and Visibility pane will be of great benefit (see To rename an object).
Changing Visibility
An object is visible by default. As mentioned previously, objects can be layered. This is especially true if you are using animations where some objects disappear or reappear. Other objects may be in the same place on the slide and thus may be over or under other objects. If you want to change a property (e.g., the size or color) of an object but it is under another positioned object that you don’t want to move, you can hide the object above it so that you can work on the one underneath.
To hide an object:
- Make sure the Selection and Visibility pane is open (see To view the layers).
- Click the eye of the object to hide. To unhide an object:

- Click the empty rectangular box of the object to unhide. The eye will reappear, as will the object on the slide.

Renaming Layers
The more objects that are on the slide, the more confusing it can be to arrange the layers. The Selection and Visibility pane allows for renaming of objects, which will assist in layering as well as animating.
To rename an object:
- In the Selection and Visibility pane, click any object. The object will be selected on the slide and in the pane.
- Click the object again and type in the new name for the object. To save the name, press <Enter> or click anywhere in the presentation.
Reordering Layers
It is important to know how to reorder the layers so that the slide will appear as you wish. This can be done with or without the Selection and Visibility pane, although with it, you will know where the layer fits in with all of the other layers.
To reorder layers through the Selection and Visibility pane:
- On the Home tab, click Arrange . This will bring up a drop-down list.

- Click Selection Pane .

- Click the name of the layer or the object on the slide.
- Click the up or down
 arrow at the bottom of the pane. You can see the objects on the slide change as they are being rearranged.
To reorder layers without using the Selection and Visibility pane:
- Click on an object.
- On the Home tab, click Arrange . This will bring up a drop-down menu.

- Click any of the following: Bring to Front, Send to Back, Bring Forward, or Send Backward. NOTE: Bring Forward and Send Backward will move the object either forward or backward one layer for each click.
Grouping Objects
There may be times when yo...
Table of contents
- Introduction
- Preparing the Slide Deck
- Layout & Design
- Animation
- Presenting
- Presentation Best Practices
Frequently asked questions
Yes, you can cancel anytime from the Subscription tab in your account settings on the Perlego website. Your subscription will stay active until the end of your current billing period. Learn how to cancel your subscription
No, books cannot be downloaded as external files, such as PDFs, for use outside of Perlego. However, you can download books within the Perlego app for offline reading on mobile or tablet. Learn how to download books offline
Perlego offers two plans: Essential and Complete
- Essential is ideal for learners and professionals who enjoy exploring a wide range of subjects. Access the Essential Library with 800,000+ trusted titles and best-sellers across business, personal growth, and the humanities. Includes unlimited reading time and Standard Read Aloud voice.
- Complete: Perfect for advanced learners and researchers needing full, unrestricted access. Unlock 1.5M+ books across hundreds of subjects, including academic and specialized titles. The Complete Plan also includes advanced features like Premium Read Aloud and Research Assistant.
We are an online textbook subscription service, where you can get access to an entire online library for less than the price of a single book per month. With over 1.5 million books across 990+ topics, we’ve got you covered! Learn about our mission
Look out for the read-aloud symbol on your next book to see if you can listen to it. The read-aloud tool reads text aloud for you, highlighting the text as it is being read. You can pause it, speed it up and slow it down. Learn more about Read Aloud
Yes! You can use the Perlego app on both iOS and Android devices to read anytime, anywhere — even offline. Perfect for commutes or when you’re on the go.
Please note we cannot support devices running on iOS 13 and Android 7 or earlier. Learn more about using the app
Please note we cannot support devices running on iOS 13 and Android 7 or earlier. Learn more about using the app
Yes, you can access Powerpoint Tips & Tricks by John Hales in PDF and/or ePUB format, as well as other popular books in Computer Science & Computer Science General. We have over 1.5 million books available in our catalogue for you to explore.