In any military operation throughout history, few 24-hour periods have been as crucial as that of 6th June 1944. With the aid of specially commissioned maps, D-Day: The First 24 Hours series gives the dramatic history of the first 24 hours of the Normandy landings, and explains in detail the events that occurred in each landing zone. In this second volume of the series, the book describes the airborne landings by paratroopers and glider troops that secured the flanks of the Allied beachheads, including such famous encounters as Pegasus Bridge and Ste Mère Eglise, as well as the more secret operations carried out by the SAS, SOE and Maquis. With colour and black & white photographs and specially commissioned maps, the book is a guide to key events in the first 24 hours of the D-Day landings that saw the Allies successfully achieve a foothold in Northern Europe.
- English
- ePUB (mobile friendly)
- Available on iOS & Android
eBook - ePub
D-Day: Airborne Assault
About this book
Trusted by 375,005 students
Access to over 1.5 million titles for a fair monthly price.
Study more efficiently using our study tools.
Information
Subtopic
World War IIIndex
History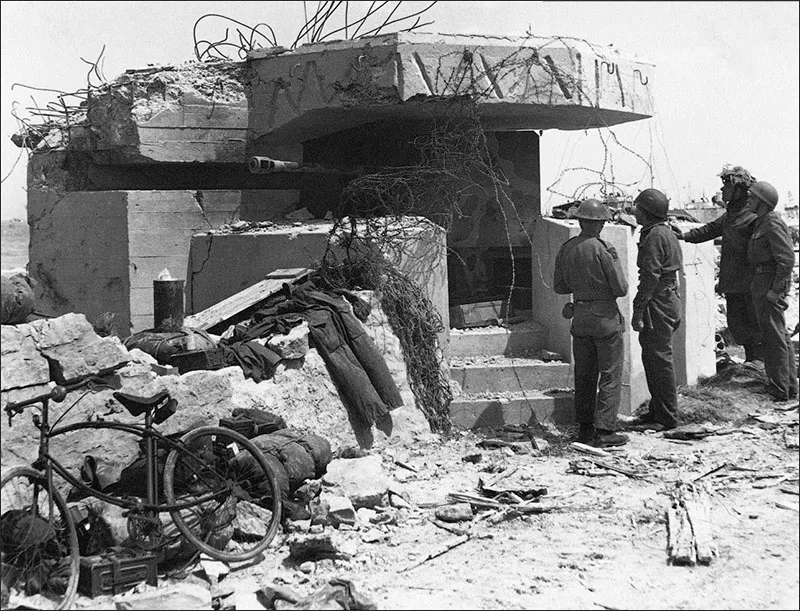
British infantry and airborne troops examine a German anti-tank gun position after the landings. Though it has been hit by shell fire, the gun itself is intact and there is a slot in the concrete casemate so that it can fire along the sea front to enfilade any attackers.
CHAPTER ONE
SPECIAL
OPERATIONS
Though the bulk of Operation Overlord would be a huge amphibious attack supported by large scale airborne landings, there were some targets like coastal batteries and bridges that would require attacks by specialist troops. Though the gun sites could also be bombarded by warships, these direct assaults were a way of guaranteeing that enemy guns would not disrupt the landings. Each attack would become a separate epic action within the larger-scale attacks in Normandy.
ALTHOUGH 73 IDENTIFIED coastal gun positions around Normandy had been pounded from the air, Allied planners could not be certain that the guns inside the massive concrete emplacements had been destroyed. If they were even still partially effective they could cause casualties and slow down and disrupt the Allied landings by shelling ships and landing craft.
Two positions were identified as critical to the landings. At the Pointe du Hoc, which a typing error in Allied plans labelled as the Pointe du Hoe, the Germans had concrete casemates which were believed to house 155mm (6.1in) guns with a range of 23km (15.5 miles). These guns could engage shipping running in to Utah beach as well as some around Omaha.
At the eastern edge of the beaches, on Sword beach, the Germans had constructed another battery position of four two-metre (6.5ft) thick casemates on high ground about 2.5km (1 mile) inland, at Merville. The observation post (OP) for the battery was at the edge of Sallenelles bay and was linked to the guns by a buried telephone cable. The battery was believed to house 150mm (5.9in) guns which, like those at the Pointe du Hoc, would be lethal to Allied shipping. At Merville, these guns were feared to have a range of over 12km (7 miles).
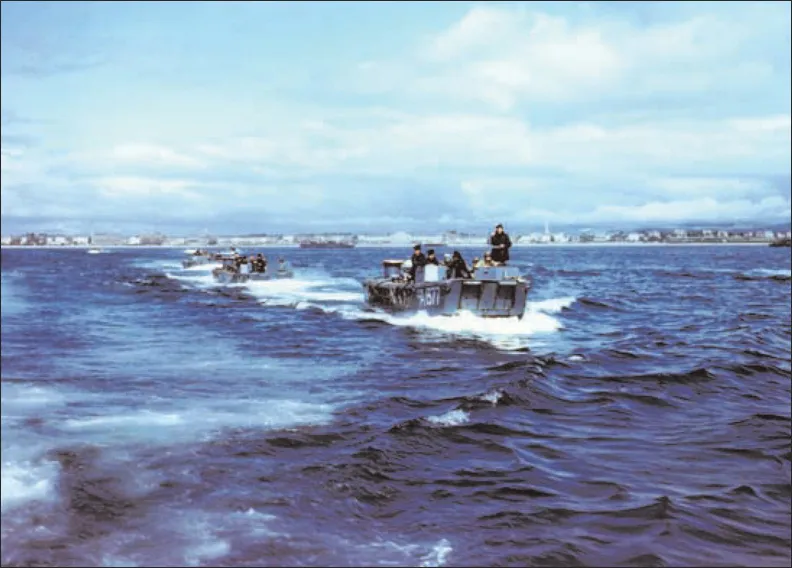
A flotilla of LCAs carrying US Rangers moves out from harbour into the Channel. Landing craft crews worked hard to learn how to run into the beach on a shelving shore, off load their cargo of men or vehicles and then, with engines full astern, pull back off the beach.
Allied planners also identified the Caen Canal and river Orne, running from Caen to the sea at Ouistreham, as a key feature. If the bridges across these wide water obstacles were demolished by the Germans, it would prevent the Allies breaking out eastwards and would help the Germans contain the beach head. Worse still, if the Germans held the bridges they could cross them to attack the Sword beaches near Ouistreham.
The only way in which the Pointe du Hoc could be neutralized with complete certainty was by an assault from the sea, but at this point, the cliffs were 30m (130ft) high. The men tasked with the mission of destroying the battery, the US 2nd Ranger Battalion, looked at the problem and came up with some novel solutions. At the foot of the cliffs was a narrow rocky beach. DUKWs fitted with 30m (100ft) firemens’ ladders, on loan from the London Fire Brigade, would land and deploy the troops. In addition, small assault ladders and rocket propelled grapnels and ropes would be used. The Rangers practised cliff assaults on the chalk cliffs on the Isle of Wight, and Swanage in Dorset. Their plan could work, as long as the German garrison had been stunned by the air and sea bombardment that would include broadsides from the battleship USS Texas.
FORECASTING D-DAY
The three key Allied weather forecasting teams were the British Central Forecasting Office at Dunstable on the Bedfordshire Downs, the US Army Air Force facility at Widewing near Teddington in the Thames Valley and the Admiralty in London. The USAAF at Widewing favoured launching Operation Overlord on 5 and 6 June because they were convinced that the Atlantic low front ‘L5’, that had brought bad weather, would be followed by ‘L6’ but this would north along the coast of Greenland, not towards Norway. Dunstable and the Admiralty demurred, convinced it would go east rather than north. It was left to James Stagg to examine the data and give his advice.
At the bridges over the Caen Canal and river Orne near Benouville there would be no air attacks or naval gunfire support. The men of the ‘D’ Company, the 2nd Battalion Oxfordshire and Buckinghamshire Light Infantry under Major John Howard would land in gliders almost directly on the bridges and use the shock of their midnight airborne assault to take the positions. However, if the Germans were alert to the danger, the British soldiers would die before they were out their seats in the glider – surprise was critical.
ACTION AT MERVILLE
At the Merville battery, 9th Battalion the Parachute Regiment under Colonel Terence Otway would parachute into a Dropping Zone (DZ) at Varville 3km (2 miles) south-east of the position. The men would be faced with formidable defences that included minefields, an anti-tank ditch, thick barbed wire, eight machine guns and a 2cm (0.78in) anti-aircraft gun.
Like parts in a complex jigsaw, each of these three dawn assaults had to work if the larger pieces of the D-Day operation were to fit together. All of these plans were daring and the men very well trained, but like all special operations, they needed a large element of luck.
By D-Day, the Special Air Service (SAS) that had begun as a small special forces unit in North Africa had expanded to a full brigade within the British 1st Airborne Corps under command of Brigadier Roderick McLeod.
It was composed of 1 SAS, under Lieutenant Colonel ‘Paddy’ Mayne, 2 SAS under Lt Col William Stirling, brother of the SAS founder David Stirling, two Free French parachute battalions (3 and 4 SAS) and an independent company of Belgian paratroopers (5 SAS).
The SAS were now very proud of their identity and resented being part of 1st Airborne. As part of the Corps, the men were ordered to wear their SAS cap badge on a maroon Parachute Regiment beret, but many ignored the order. It produced the odd effect of some men like Mayne in the original sand beige berets and others wearing maroon. The same dilemma had faced the Ox and Bucks Light Infantry, their solution had been to wear their bugle horn cap badge with a Light Infantry green backing on the maroon beret.
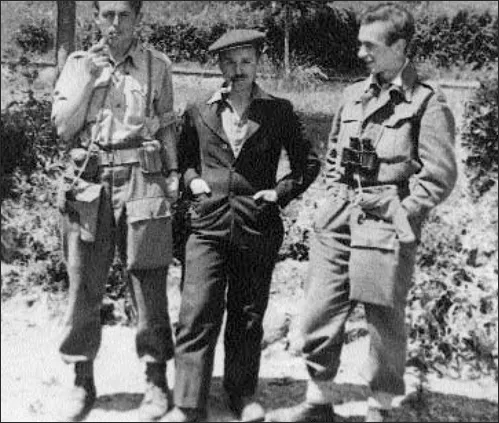
Lieutenant Twm Stephens of the SAS dressed in civilian clothes, with two officers. Riding a bicycle accompanied by a railway worker and another member of the Resistance he conducted the close target reconnaissance of railway fuel tankers. They were hit by an air attack.
However, there were other tensions within the SAS, brigade. While British veterans of the First and Eighth Armies might not speak to one another, ‘the two French battalions... were prepared to fight each other on sight’, recalled one veteran. The task of keeping these highly motivated but unconventional young men in hand and trained to the highest standards fell to Brigadier McLeod. He was one of the few British regulars to take an informed interest in clandestine war, and was almost the only professional British officer in the brigade he commanded. Before the war, he had been an instructor at the Staff College, Camberley, and would be a post-war Deputy Chief of the Defence Staff.
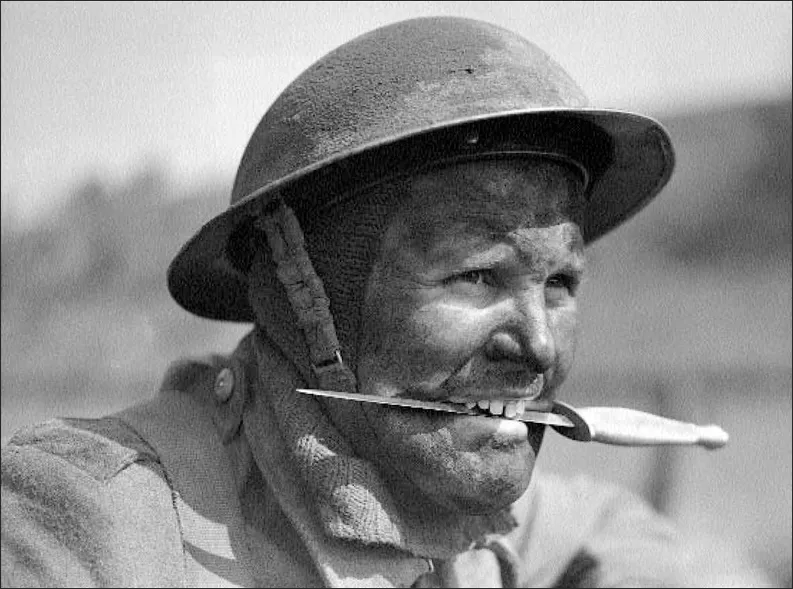
A Commando in training holds a Fairbairn-Sykes Fighting Knife in his teeth. This was not done for effect - it left both hands free for climbing or crawling. Helmets were discarded by the Commandos in favour of woollen caps or later their distinctive green berets.
In training in Britain, the SAS had been taught ‘with indifferent success’ simple phrases in French and German which led the Germans to believe that all members of the SAS were linguists. They also studied where best to place charges on generators (by practising at Kilmarnock power station), how to derail trains (at the local railway station) and how to locate underground telephone cables and junction boxes.
The Army planners saw the role of the SAS as similar to that of the conventional airborne forces who were dropped to secure the flanks of the D-Day beaches. Before he resigned in protest, William Stirling managed to ensure that the SAS were not squandered in this role.
SAS operations in France, like many of those in Italy beforehand, were aimed at cutting or disrupting German supply lines leading north to the Normandy battlefields and later slowing their withdrawal following the Allied breakout.
SAS operations in France followed a proven procedure. First an advance party with a Phantom signals section or one or two SAS officers were parachuted into the area to establish contact with the Resistance. Phantom, or ‘F’ Squadron GHQ Liaison Regiment, was the signals squadron for the SAS Brigade. It consisted of a headquarters and four patrols commanded by Major JJ Astor. Two patrols were attached to 1 SAS and two to 2 SAS. Phantom operators relayed a constant stream of information back to England from SAS bases in France after D-Day. Once a Phantom signals section was in place and operating and a good DZ had been located, the main party arrived.
Squadron-sized bases were established in remote wooded areas and through the summer of 1944, parachute drops of arms, including mortars and anti-tank guns, Jeeps, ammunition, explosives and supplies were delivered to the SAS and local Resistance groups. The only drawback to operations in the summer months of 1944 was that the nights were very short, which limited the cover of darkness. The alternative approach was a ‘blind’ drop into an unprepared DZ. Though this sounds hazardous the location was usually reasonably close to an existing SAS base.
According to SOE agents, who worked with the SAS in France, the SAS behaved with some carelessness in the thick of enemy territory. They were sent in knowing little of France or of the Resistance war, and, according to Col Barry of SOE, regimental pride made them reluctant to accept guidance from the SOE headquarters in Baker Street, London.
ENTER THE JEDS
In the United States, the Office of Strategic Services (OSS) had decided to develop a role in France. This produced the ‘Jedburgh’ teams or ‘Jeds’. The name was derived from the town near the training base in Scotland. Eighty-six teams, consisting of a French officer with an American or British officer or NCO, were parachuted into France and were responsible for organizing and supplying the Resistance as well as launching attacks on the Germans before D-Day. They had a strong political function, ensuring that the US secret services had some control over covert operations in France.
The RAF and USAAF used both bombers and transport aircraft to deliver the agents and soldiers for these operations. The advantage of bombers like the Armstrong Whitworth Whitley, Albermarle, Handley Page Halifax and Short Stirling Mark IV, was that containers could be stowed in the bomb bay and released quickly and accurately over the DZ. Dedicated transport aircraft like the DC-3 were more versatile and could be used to deliver paratroopers and cargo or evacuate casualties.
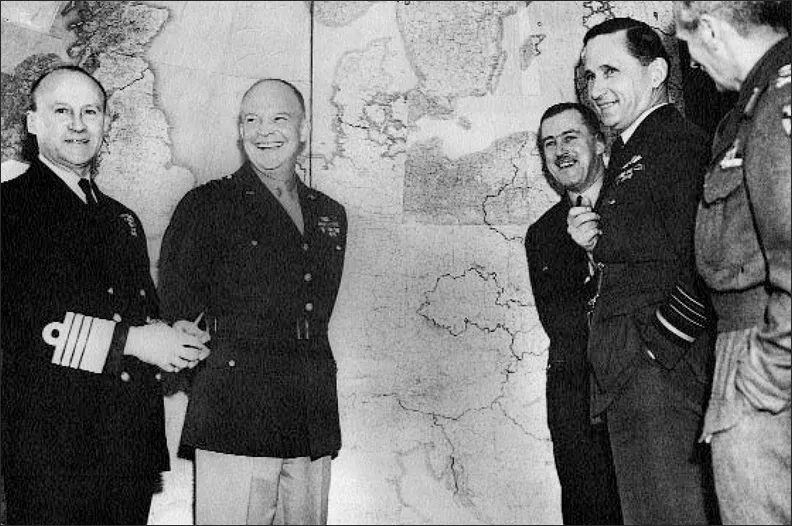
The D-Day team, Allied Naval Commander Bertram Ramsay, Supreme Allied Commander (SAC) Dwight Eisenhower, commander Allied Expeditionary Air Force Trafford Leigh-Mallory, Deputy SAC Arthur Tedder, Commander 21st Army Group Bernard Montgomery.
Prior to D-Day, all transport aircraft were allocated to the British and American airborne divisions, but after 6 June, the SAS operations were delivered...
Table of contents
- Contents
- Chapter 1: Special Operations
- Chapter 2: H–Hour
- D-Day Chronology and Order of Battle
Frequently asked questions
Yes, you can cancel anytime from the Subscription tab in your account settings on the Perlego website. Your subscription will stay active until the end of your current billing period. Learn how to cancel your subscription
No, books cannot be downloaded as external files, such as PDFs, for use outside of Perlego. However, you can download books within the Perlego app for offline reading on mobile or tablet. Learn how to download books offline
We are an online textbook subscription service, where you can get access to an entire online library for less than the price of a single book per month. With over 1.5 million books across 990+ topics, we’ve got you covered! Learn about our mission
Look out for the read-aloud symbol on your next book to see if you can listen to it. The read-aloud tool reads text aloud for you, highlighting the text as it is being read. You can pause it, speed it up and slow it down. Learn more about Read Aloud
Yes! You can use the Perlego app on both iOS and Android devices to read anytime, anywhere — even offline. Perfect for commutes or when you’re on the go.
Please note we cannot support devices running on iOS 13 and Android 7 or earlier. Learn more about using the app
Please note we cannot support devices running on iOS 13 and Android 7 or earlier. Learn more about using the app
Yes, you can access D-Day: Airborne Assault by Will Fowler in PDF and/or ePUB format, as well as other popular books in History & World War II. We have over 1.5 million books available in our catalogue for you to explore.