Brimming with expert advice and easy-to-follow instructions, Swift For Dummies shows new and existing programmers how to quickly port existing Objective-C applications into Swift and get into the swing of the new language like a pro. Designed from the ground up to be a simpler programming language, it's never been easier to get started creating apps for the iPhone or iPad, or applications for Mac OS X.
Inside the book, you'll find out how to set up Xcode for a new Swift application, use operators, objects, and data types, and control program flow with conditional statements. You'll also get the scoop on creating new functions, statements, and declarations, learn useful patterns in an object-oriented environment, and take advantage of frameworks to speed your coding along. Plus, you'll find out how Swift does away with pointer variables and how to reference and dereference variables instead.
- Set up a playground development environment for Mac, iPhone, iPad, and wearable computers
- Move an existing Objective-C program to Swift
- Take advantage of framework components and subcomponents
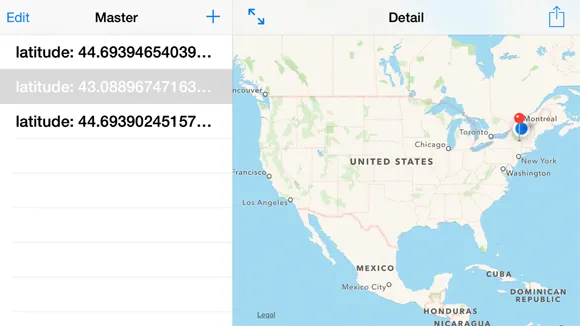
- Create an app that uses location, mapping, and social media
Whether you're an existing Objective-C programmer looking to port your code to Swift or you've never programmed for Apple in the past, this fun and friendly guide gets you up to speed swiftly.