![]()
Painting techniques
Fading colour
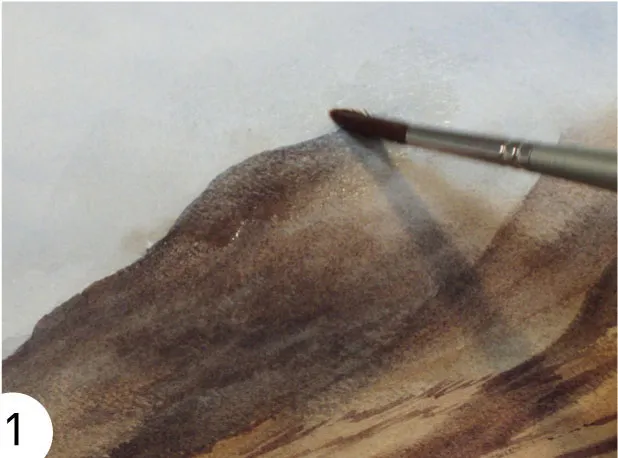
The idea here is to fade the distant hills, keeping the clearly defined shape but softening its appearance and at the same time slightly reducing the strength of the colour. The sky and hills must be completely dry before you start. Lightly brush over the top of the hill with clean water before dabbing with a clean tissue (see below). This one attempt may well be enough, but if you wish to fade it further, repeat the exercise. If you brush too vigorously, you are in danger of removing some of the sky as well, which would be very difficult to paint back in.
This effect is much easier to achieve on a good quality cotton-based paper, as it is harder to remove colour once it has dried. Generally on cheaper, wood pulp-based papers, where the colour sits on top, it is all too easy to remove too much, wiping out the hill and sky in one go.
Mist and low cloud on hills
Trying to achieve what artists call the ‘lost and found’ effect of the mist-shrouded hills and shoreline can be tricky, but it is also quite exciting if you get it right. You need to paint the sky first and ensure it is completely dry, before commencing this stage. The key to this method is to keep brushing in clean water as you paint the hills, giving the impression that you are glimpsing the hills through the moving veil of mist and low cloud. In other words, you don’t so much paint the mist and cloud as use the clear water to reveal the cloudy sky that is already there on your paper from the previous stage. Practise on a smaller scale first, perhaps with a few thumbnails before applying it to your painting. In the example shown here, you can see that I used the same mixtures of grey and blue that I had used in the sky to render the hills, so that they became part of the background.
Do try not to overwork this effect, or you will lose the feeling of light, and dabbing into drying paint can cause ‘cauliflowers’ or runbacks.
Applying masking fluid to a wet background
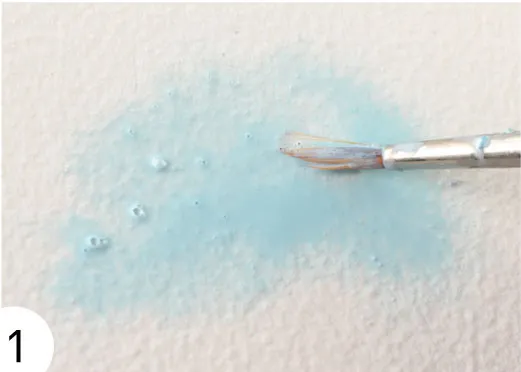
This is an effect I often use when I want to create a soft shape with the masking fluid rather than a hard-edged shape. It is particularly useful when you wish to mask out an area like a bush or tree or even an area of weeds, wild flowers or grasses.
1 Wet the paper, then float in the masking fluid to create a soft-edged shape for a bush. Allow it to dry.
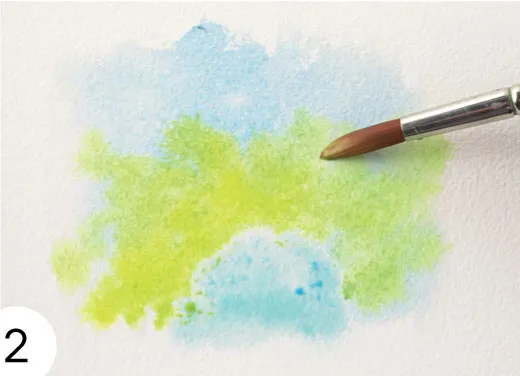
2 Wet the background again and float in cobalt blue for the sky, then aureolin and cobalt blue around the masked bush.
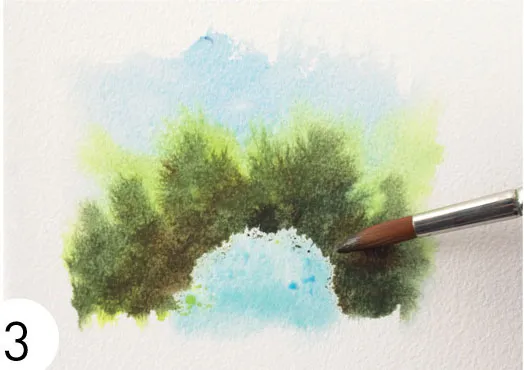
3 Drop in a mix of ultramarine, aureolin and burnt sienna to create a dark contrast with the bush. Allow to dry.
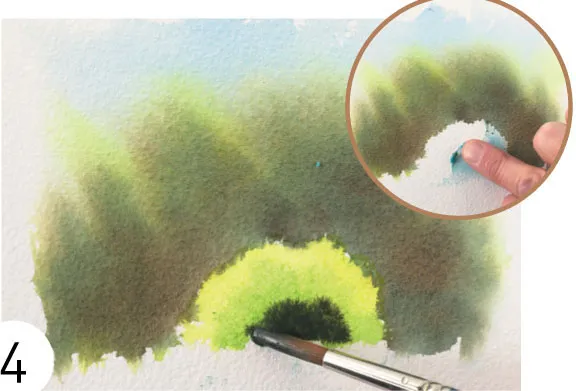
4 Rub off the masking fluid. Drop in lemon yellow, then aureolin and cobalt blue, then aureolin, ultramarine and burnt sienna.
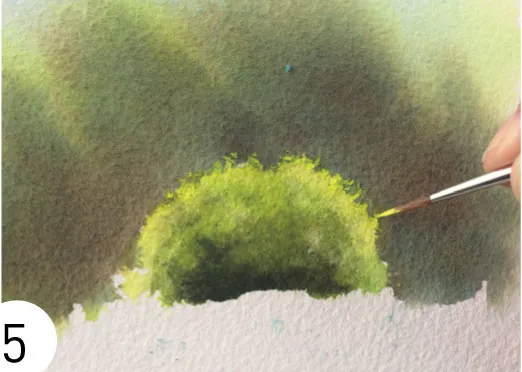
5 Pick out a few leaf shapes using neat lemon yellow and a fine brush.
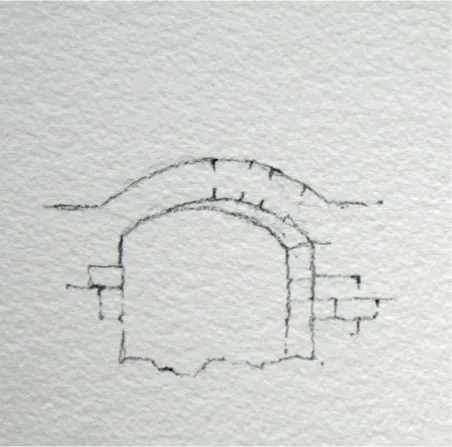
A view through an opening
In a situation like this it is important that the view through the opening appears to be part of the background. In order to achieve this, it is important to paint what you see through the opening at the same time as you paint the background; but how do you avoid getting paint on the stonework?
You can see in this example, taken from the Ruined Mill painting (page 46), that once I had drawn the stone arch and surround, I masked out the shape with masking fluid; taking care to apply it generously so that no stray green paint landed on the stonework. After the masking fluid had dried, I painted into the wet background, and once the background had dried, I removed the masking fluid, leaving a crisp, white image in the shape of the stonework.
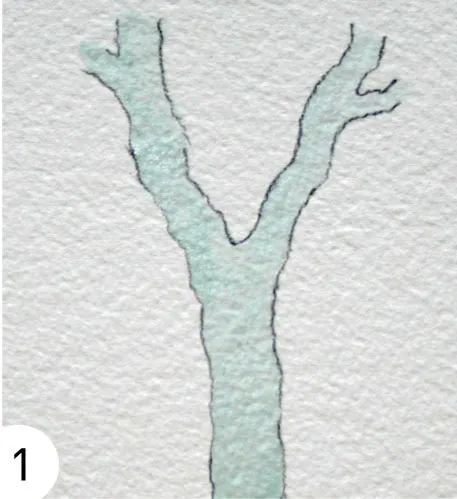
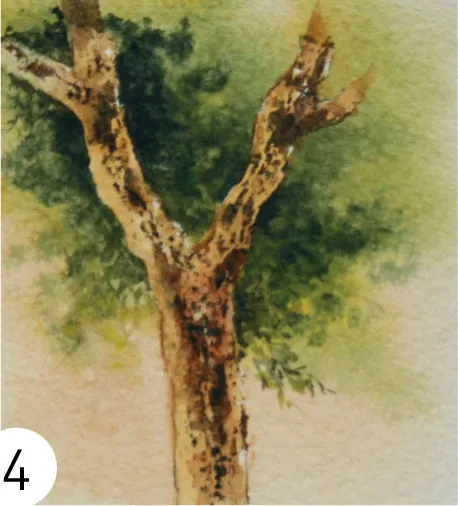
Textured, blotchy bark
This method can also be used for silver birch trees and various other textured surfaces. It can be a bit hit and miss, so practice should pay dividends. It was used for the plane tree in the Mediterranean Street Café painting on pages 76–79.
1 Draw the tree trunk in pencil, and then mask it completely with masking fluid.
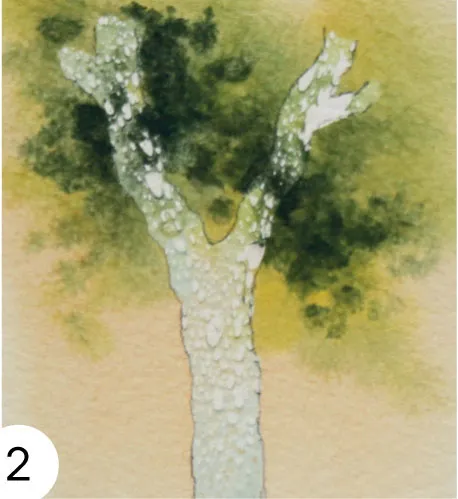
2 Paint in the background with a thin wash of raw sienna, followed by a light and dark green to represent the foliage. Once this has dried, rub the masking fluid with the tip of your finger, taking care to only partially remove it.
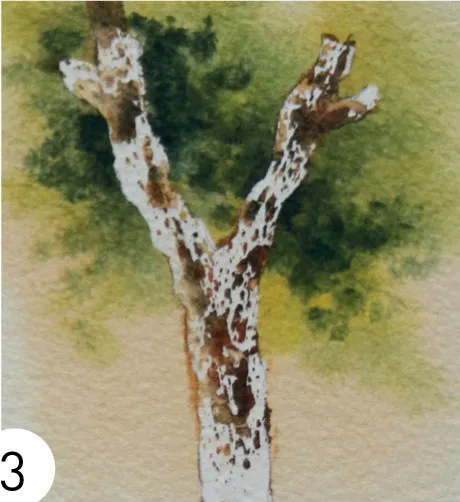
3 Paint some raw sienna and dark brown on to the now partially masked tree trunk, giving the blotchy, uneven effect. This can then be repeated by removing a bit more masking fluid and brushing in a bit more colour.
4 When you have finally removed all the remaining masking fluid, add a touch more raw sienna to take the whiteness off.
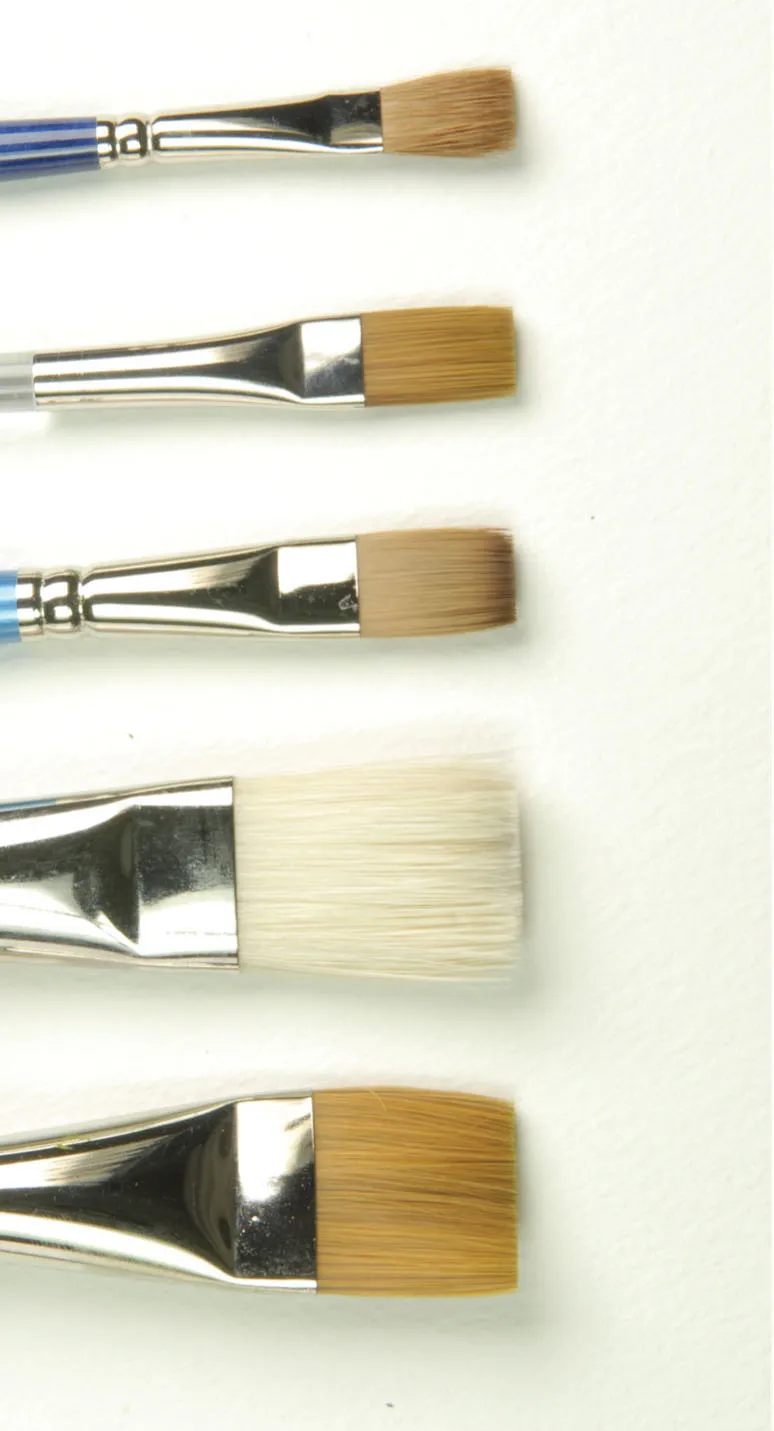
Using flat brushes
A simple way to do windows, especially when there are a lot of them, is to use a small flat brush, sometimes referred to as ‘one-stroke’ brush. I have in my collection several of these brushes: no. 2, 4, 6, and 10, to give me a variety of widths to choose from, depending on the size of the painting and building. This not only speeds up the process, it also helps to make all the windows consistent in shape and size. It also makes it easier to avoid the rounded corners you can sometimes get with a round brush.
You can see from the picture that before painting the shapes, I put in a pencil grid to keep the windows roughly in line. Even in an old, weathered building, the windows line up, but this is particularly important in formal buildings like Chatsworth House, shown on page 67, or apartment blocks as in the painting of Vernazza on page 55. It is important to put in these pencil guidelines after you have painted the background colours, as it is then easy to rub them out after the window shapes have been painted. It is always worth remembering that once you paint over pencil lines, even w...