- 208 pages
- English
- ePUB (mobile friendly)
- Available on iOS & Android
eBook - ePub
Trusted by 375,005 students
Access to over 1.5 million titles for a fair monthly price.
Study more efficiently using our study tools.
Information
Topic
ArtSubtopic
Culinary Arts
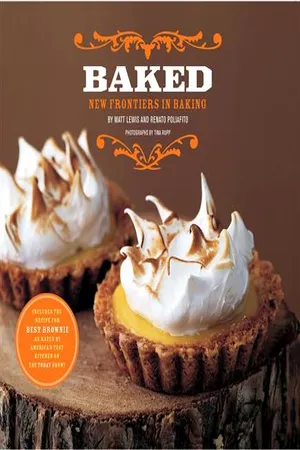
The varied recipes in this book run the gamut from our customers’ favorite biscuits to our award-winning cakes to our favorite boozy after-dinner drinks. In writing each recipe, it was our goal to make baking fun and approachable for everyone. We distilled our many years of dessert experience into each recipe, and we look forward to sharing them with you.
This chapter expands on some of the baking tools, terms, techniques, and tips we mention in the recipes in the following chapters.
TOOLS AND EQUIPMENT
You need only a few basic tools to produce every baked good in this book (and most baked goods in general). Here they are:
BAKING SHEETS: We recommend using heavy-duty, inexpensive, light-colored, rimmed baking sheets. We almost always bake on heavy aluminum half sheet pans (18 by 13 inches) at home, and you can pick these up at a restaurant supply retailer. Do not waste your money on the supposedly scientifically calibrated insulated cookie sheets or those with the nonstick coatings. They are worthless. Make sure you have a roll of parchment paper in your baking supplies to line your baking sheets.
BLENDER: A blender is a handy, though not necessary, tool to have around the kitchen. We use a blender to mix smoothies, shakes, and ice cream bases. Though not always an ideal substitution, a food processor can handle most of these tasks just as well.
BROWNIE AND BAR PANS: Most of the bar cookie recipes in this book are designed for a standard 9-by-13-inch light metal or glass baking pan. Why such a big pan? It’s party-sized, providing almost twenty-four servings. And if you’re not throwing a party, give the extras to neighbors or coworkers, or stash them in the freezer for later. Avoid dark-colored pans, as they will create unsavory, well-done crisp edges.
BUNDT PAN: Every baker should have at least one bundt pan in his baking collection. We use the basic 10- and 12-cup versions made by Nordic Ware. They’re heavy, easy to use, and should last forever. There are also many decorative bundt pans on the market (rosettes, castles), and you can absolutely use them for our bundt recipes. Just make sure to grease all the nooks and crannies of the specialty pans so the cake comes out cleanly.
CAKE PANS: Keep it simple, straightforward, and economical. We suggest using professional aluminum cake pans, available from almost any kitchen supply store. Stay away from dark pans to prevent crisp cake edges.
CAKE TURNTABLE: It is much easier to decorate a cake (or sugar cookies or brownies) on a cake turntable. Just set the cake on the stand and turn as you frost and decorate. Cake turntables can be found at almost any kitchen supply store.
CANDY AND CHOCOLATE THERMOMETERS: For the beginning candy maker, we recommend an old-school and inexpensive clip-on candy thermometer. It should have gradations of 2 to 5 degrees and have a range of 100 to 400 degrees F. Also, many basic candy thermometers mark all the stages of candy making (hard ball, soft ball, and so on), making life even easier. This type of thermometer should cost no more than $15.
Chocolate thermometers are completely different. They all have 1-degree gradations (for accurate tempering) and they do not read above 130 degrees F. There is only one recipe in this book that requires tempering, though you might want to purchase a cheap chocolate thermometer (about $15) for other uses.
COOLING RACKS: One Christmas, Matt’s mother gave him a cooling rack that was large enough to hold a small car. With no place in the kitchen to store it, he exchanged it for three small racks. With cooling racks, smaller is better. Look for ones that will fit perfectly over a half sheet pan so you can use one to easily coat an item in ganache.
DOUBLE BOILER: A double boiler is a great way to melt chocolate or chocolate and butter together or to warm egg whites. To concoct a double boiler, you need one medium-sized saucepan filled with water and one (preferably metal) bowl that sits partway inside the pan without touching the water.
FOOD PROCESSOR: We promise you will not regret owning a large food processor. We know they are oversized, heavy, not exactly beautiful, and often viewed as difficult to clean. However, once you’ve owned a food processor, you will never give it up. It chops nuts and graham crackers with ease. It makes batters, icing, and pie dough with the flick of a switch. It’s like an assistant, only better. Go get one. It has many uses in the savory kitchen as well.
ICE CREAM MAKER: Ice cream makers are fun to have around and experiment with. We both own the same $50 Cuisinart ice cream machine and it works just fine (as long as you freeze the bowl ahead of time). For the more serious ice cream maker, there are more serious machines with larger capacities and built-in compressors that eliminate the whole frozen-bowl business.
ICE CREAM SCOOP: We use several different-sized ice cream scoops with a release mechanism to measure cookie doughs and portion cake batters (not to mention scooping ice cream).
MEASURING CUPS AND SPOONS: For liquid measurements we recommend Pyrex (glass) 2-cup and 4-cup measures. They also come in very handy for melting butter in a microwave oven.
For dry measurements, we recommend a basic set of metal measuring cups from ¼ cup to 2 cups.
We measure dry ingredients by scooping into the cup from another larger cup, then leveling to the top of the cup. All light and dark brown sugars should be packed tightly, leveled to the top of the cup.
For measuring spoons, just use the most basic set of metal spoons you can find. They usually come locked together by a metal ring and start with ¼ teaspoon and go up to 1 tablespoon. Measure all ingredients level with the rim of the spoon.
MICROPLANE: The term microplane has become synonymous with the long and thin graters found in commercial and home kitchens. At home, we use one grater strictly for spices and one grater strictly for zesting fruit. At one time, Matt owned both a Microplane and a ridiculous tool specifically for zesting. He donated the zester to a friend and has never needed it since.
MICROWAVE OVEN: If you have a microwave, great. One short burst of low power, and butter and chocolate are melted. If you don’t have a microwave, no worries: You can melt butter and chocolate using the double boiler method.
MIXING BOWLS: You should own one set of melamine mixing bowls, and they should nest, and they should have a small spout for easy pouring. Melamine bowls are lightweight, super cheap, and easy to clean. We forgive you for insisting on using your favorite heavy ceramic bowls. (For reasons unknown, Renato has still not given up on using the Fire King jadite mixing bowl he found on eBay.) We know they are beautiful and perhaps antique or family heirlooms, but they are just not as easy to maneuver as the lightweight melamine.
OFFSET SPATULA: We use a small, metal offset spatula for small, detail-oriented jobs like smoothing cake batters while in the pan, loosening cakes from the sides of pans, removing the first brownie, and swirling or marbling batters.
PARCHMENT PAPER: We use parchment a lot to line cookie sheets, cake pans, and the like. Parchment keeps items from sticking to the pan, and it is much less messy than greasing the pans or spraying them with cooking spray. You can’t use parchment for everything (not than we didn’t try), but it’s the best option most of the time. By the by, when baking cookies in batches, you can use the same parchment multiple times.
PIE PLATE OR TIN: You can bake a pie in almost any pie plate or tin. We like ceramic plates, aluminum tins, and, for some occasions, a Pyrex (glass) plate. They all work equally well, though we love the look of a pie baked in a unique ceramic plate.
PIE WEIGHTS: When prebaking the shell for a single-crust pie, weights serve to help the dough keep its shape. You can buy specialty pie weights from most kitchen stores or make your own.
STAND MIXER: Every home baker or baking enthusiast should have a standing mixer with at least three basic attachments: a whisk, a paddle, and a dough hook. Though big and a bit expensive, a standing mixer is an essential item. Matt has had his Kitchen Aid stand mixer for eleven years, and it still works as well as the first day he plugged it in.
SPATULA: You will use a spatula in almost every recipe in this book. Our advice is to buy an assortment of three or four silicone spatulas in different sizes, and use them for scraping down bowls, mixing light batters, and folding in egg whites or flour.
SPRINGFORM PAN: We use a basic light-colored 9-inch springform pan for the Upstate Cheesecake and the Flourless Chocolate Cake. Unless you have dreams of starting a cheesecake business out of your home, we think you only need one of these pans in your home equipment collection.
TART PANS: We have an assortment of large and small tart pans floating around the bakery and at home. We use both a 9-inch removable-bottom tart pan (which makes it easier to dislodge the tart) and a 4-inch minitart pan in this book. When storing minitart pans, we suggest layering them between sheets of paper towels or parchment paper to make sure they do not become stuck when nesting.
WHISK: Home bakers should not worry about owning the many varied types of whisks on the market. We use a very basic wire whisk with a sturdy wooden handle (medium to large will do) for every recipe that calls for a whisk in this book. Whisks are great tools for combining dry ingredients (whisking flour, baking soda, and salt together, for instance), but do not use your whisk as an everyday stirring device (a silicone spatula works better), as you can whisk too much air into your batters accidentally.
TERMS, TECHNIQUES, AND TIPS
CHOCOLATE: It is imperative when making a chocolate dessert to use the best possible chocolate. Luckily, many great brands are available at the local supermarket. We tested the recipes in this book using Callebaut and Scharffen Berger, and we highly recommend both.
CHOCOLATE PERCENTAGES: The percentage label on a bar of chocolate is confusing. For instance, one brand’s 64% chocolate bar is often completely different from another brand’s 64% chocolate bar. The percentage refers to the cocoa mass in the bar itself. While we could write an entire chapter on this subject, we recommend the following bars for this book’s recipes:
If a recipe calls for a dark chocolate with 60 to 72% cocoa content, use any of the following:
Scharffen Berger’s Home Baking Bar 62% (found in most supermarkets)
Scharffen Berger’s Home Baking Bar 70% (found in most supermarkets)
Callebaut Chocolate Block 60% (found in specialty markets—often chopped and repackaged by the specialty market)
Callebaut Chocolate Block 70% (found in specialty markets—often chopped and repackaged by the specialty market)
If a recipe calls for a milk chocolate, use either of the following:
Jacques Torres Milk Chocolate Bar (found in specialty markets and online)
Scharffen Berger Milk Chocolate Bar 41% (found in most supermarkets)
Of course, there are many other wonderful brands of chocolate you can use, and as you get more familiar with the different brands, you will start to align yourself with a few favorites. See Sources for a list of where to buy fine baking chocolates.
COCOA POWDER: We made every recipe in this book with Valrhona unsweetened cocoa powder. It is deep, dark, and delicious. Don’t get too caught up in the Dutched (cocoa powder treated with alkali) versus natural cocoa debate. Instead, pay more attention to the color and smell of the cocoa powder you are using. Some mass-produced cocoas are almost gray in color. Avoid them. If you can’t find Valrhona, look for a dark-colored cocoa. We never use sweetened cocoa in this book (or, for that matter, at all).
CRUMB COAT: Essentially, a crumb coat is a very thin layer of frosting applied to the cake to keep the light crumbs suspended so they won’t appear in the final layer of frosting. It’s like the first coat of paint; it lays the foundation for the next and final coat. A crumb-coated cake should be refrigerated for at least 15 minutes prior to applying the next frosting layer.
FOLDING: Folding is the act of gently (no fast stirring, no whisking) putting two parts of a batter together. The best way to fold something together is to use a rubber or silicone spatula and fold the bottom part of the batter (often the heavier part) into the top part of the batter (often the lighter part): Cut down through the two layers in the center of the bowl, then sweep the spatula along the bottom of the bowl toward you and lift the spatula up and over again to the center; turn the bowl 90 degrees and repeat until the batter is just combined.
GELATIN SHEETS: We use gelatin sheets to make the most light and fluffy marshmallows. Gelatin sheets are readily available at most specialty stores and online. See Sources.
INSTANT ESPRESSO POWDER: Instant espresso powder is not interchangeable with ground espresso. Instant espresso powder easily dissolves and is great for most baking applications. The addition of instant espresso powder is sometimes used to cut sweetness, accentuate the chocolate flavor, and heighten the “coffeelike” taste of pastries. Regular ground espresso will not dissolve and can give baked goods a grainy texture. We use the Medaglia d’Oro brand in our recipes.
MALT POWDER: Malted milk powder, primarily still used to make soda fountain drinks, is one of our favorite ingredients. We use the tangy, nutty flavor of malt powder to enhance both vanilla- and chocolate-based desserts. Carnation malted milk powder is ubiquitous in grocery stores, but we also use Ovaltine chocolate malt drink mix as well.
MATCHA POWDER: At its most basic, matcha powder is essentially green tea leaves ground into a fine powder; however, choosing the type and grade of matcha is often a complex process. For the...
Table of contents
- Cover Page
- Title Page
- Contents
- Acknowledgments
- Introduction
- 1: A Field Guide to Baking
- 2: Breakfast
- 3: Cakes & Cupcakes
- 4: Pies & Tarts
- 5: Brownies & Bars
- 6: Cookies
- 7: Chocolates, Candies & Confections
- 8: Drinks
- Appendix
- Sources
- Conversion Chart
- Index
- About the Authors
- Copyright Page
Frequently asked questions
Yes, you can cancel anytime from the Subscription tab in your account settings on the Perlego website. Your subscription will stay active until the end of your current billing period. Learn how to cancel your subscription
No, books cannot be downloaded as external files, such as PDFs, for use outside of Perlego. However, you can download books within the Perlego app for offline reading on mobile or tablet. Learn how to download books offline
Perlego offers two plans: Essential and Complete
- Essential is ideal for learners and professionals who enjoy exploring a wide range of subjects. Access the Essential Library with 800,000+ trusted titles and best-sellers across business, personal growth, and the humanities. Includes unlimited reading time and Standard Read Aloud voice.
- Complete: Perfect for advanced learners and researchers needing full, unrestricted access. Unlock 1.5M+ books across hundreds of subjects, including academic and specialized titles. The Complete Plan also includes advanced features like Premium Read Aloud and Research Assistant.
We are an online textbook subscription service, where you can get access to an entire online library for less than the price of a single book per month. With over 1.5 million books across 990+ topics, we’ve got you covered! Learn about our mission
Look out for the read-aloud symbol on your next book to see if you can listen to it. The read-aloud tool reads text aloud for you, highlighting the text as it is being read. You can pause it, speed it up and slow it down. Learn more about Read Aloud
Yes! You can use the Perlego app on both iOS and Android devices to read anytime, anywhere — even offline. Perfect for commutes or when you’re on the go.
Please note we cannot support devices running on iOS 13 and Android 7 or earlier. Learn more about using the app
Please note we cannot support devices running on iOS 13 and Android 7 or earlier. Learn more about using the app
Yes, you can access Baked by in PDF and/or ePUB format, as well as other popular books in Art & Culinary Arts. We have over 1.5 million books available in our catalogue for you to explore.