![]()
Rendering
3D to 2D
rendering the viewport
interactive render region
picture viewer
render settings
anti-aliasing
options
ambient occlusion
caustics
cel rendering
depth of field
highlights
vector motion blur
global illumination
multi-pass rendering
physical render engine
physical camera
sketch and toon
team render
Make sure you have copied the Lesson_06_Asset folder from the downloads section for this book. Make note of where it is; it contains the sources you need to execute this lesson.
It’s time to get our 3D scene out to video, up to the cloud, or down on the page. We’ve focused on creating 3D scenes in virtual environments and now it’s time to get those out to images or movies that can be viewed by the masses. Depending on the intent and style of the piece, scenes can be rendered in photo-realistic fashion or in very stylized surrealistic and even hyper-realistic ways. Rendering is an art form in and of itself and requires time and diligent study to truly become fluent in the methodologies and practices that define successful render artists. With all of the variables that come into play with regards to the 3D production pipeline, getting the most out of the look of your scene and in a timeframe that meets your deadline is paramount. CINEMA 4D comes loaded with an extremely efficient internal render engines. The Broadcast, Visualization, and Studio versions of the program have the additional and equally impressive Physical Renderer. In this lesson we will focus on the key settings that make the biggest impact on the quality of renders and look at when to choose one render engine over another.
Rendering the Viewport
If you’ve worked through many of the exercises in the previous lessons you’ve probably grown accustomed to rendering the Viewport to see how active scenes are looking throughout the creation process. This is extremely important throughout every stage of development. Let’s
take this a step further and look at some of the fine controls that are at our disposal as we begin to develop best practices for rendering previews of our scenes. The shortcut that you probably have already become familiar with is to press
to render the scene right inside the Viewport.
Render Region
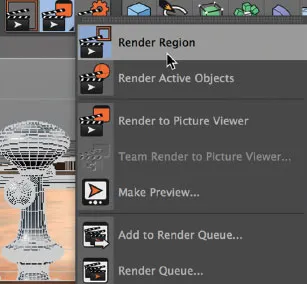
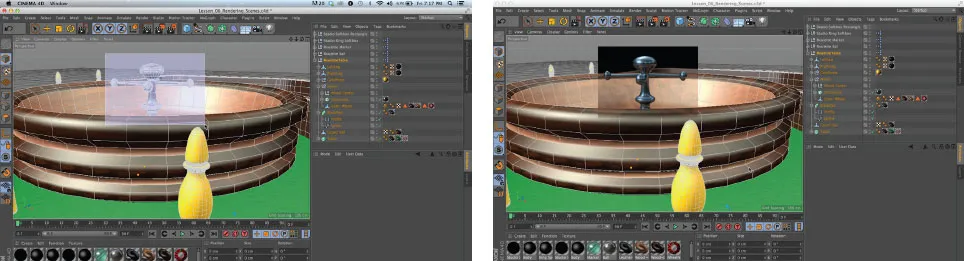
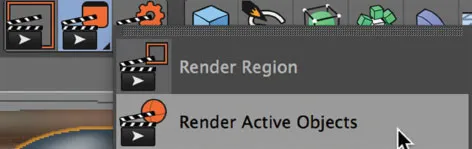
Besides rendering the entire Viewport, we have a couple of other options as well. The first of these options is the Render Region. The Render Region allows you to create a selection that will be rendered. This is helpful if there is one particular focus area that you are wanting dialed in. It will not hold or refresh the render like the next option we’ll look at but you can always quickly pull the tool back up from the recently used tool dropdown. To use the Render Region tool, choose it from the Render Settings dropdown. Now drag the rectangular render area over the desired space within the scene..
Interactive Render Region (IRR)
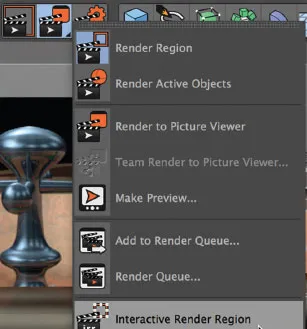
Another incredible Viewport rendering option is the Interactive Render Region, or IRR for short. The IRR is similar to the Render Region with a few extras. First of all, it will constantly refresh based on any changes we make to the scene. Secondly, it stays open and rendering while you work and does not have to be constantly recalled if we want an update to render area. Lastly, the IRR tool is equipped with an interactive control over the quality of the render within the IRR area. The shortcut to call up the Interactive Render Region is
. We can also access the IRR tool from the Render Settings menu. As in the case of the Render Region, we can drag an area of the Viewport that we want to render. It will then rerender every time we make a change to the scene or alter the view in any way. This is an incredible handy tool that is a standard for many if not most C4D artists.
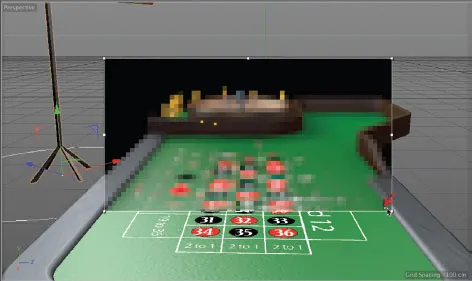
As we did with the Render Region, we can just drag the IRR area in our Viewport and begin getting the real-time rendering feedback. The most important feature here, besides the size, is the quality. The quality slider is an arrow on the right that can be pulled higher and lower to set the render quality.
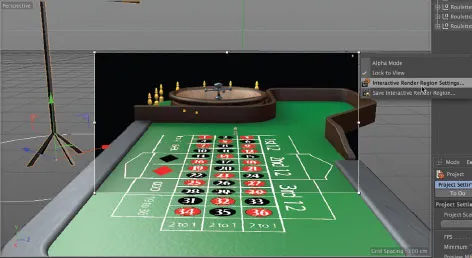
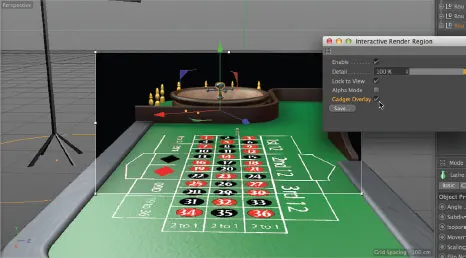
Right-clicking on the upper right-hand corner of the Interactive Render Region brings up a contextual menu of controls. Included in this menu are the following options: set to Alpha Mode, Lock to View, Settings, and Save. As we’ll see in a moment, Alpha mode will not render empty areas. With Lock to View enabled, the IRR will not transfer if the view is changed. For example, if we changed to a top view, the IRR will go away. The save option will allow us to save the selected area out to an image format specified in the save panel. If we select the Interactive Render Region Settings we can pull up even more options.
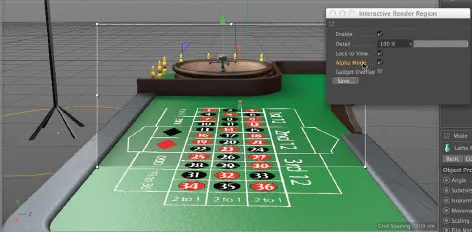
Once inside the Interactive Render Region settings, we’ll see several parameters that can be adjusted. The topmost parameter is the enable check box. Unchecking this parameter would do the same as our shortcut and disable the IRR altogether. The Detail parameter is the equivalent of our slider and allows us to control the quality of the IRR. The Lock to View is the same as the parameter earlier and is included here as well. The Alpha Mode is the same as well and, as depicted in the image on the left, removes the empty areas from the render instead of rendering black.
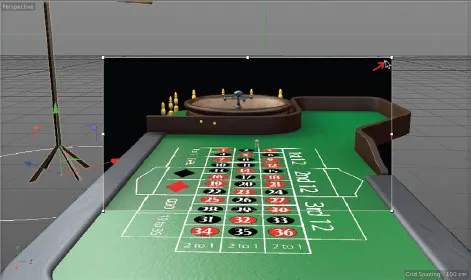
The arrow located on the right of the IRR controls the quality of the render. Dragging the arrow down results in a quick but low quality render. The image at the top right depicts the same scene with the quality slider set to an extremely high value resulting in a better but slower render refresh.
Interactive Render Region Settings can be accessed by right-clicking in the upper right-hand corner of the specified region.
The last option included in this contextual menu is the Gadget Overlay. With this parameter enabled, we see the axis handles and other selection and transformation markers. We still get the renders but retain the selection and have the ability to easily manipulate our objects while the area encompassed by the Interactive Render Region is constantly refreshing.
The Interactive Render Region can be summoned by using the keyboard shortcut
.
Render Active Objects is a great option for isolating renders in complex scenes to test key objects without having to wait for the entire scene to be rendered.
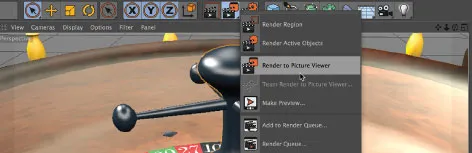
The Picture Viewer can be called by going to the Render Settings or by pressing the
on the keyboard.
Render Active Objects
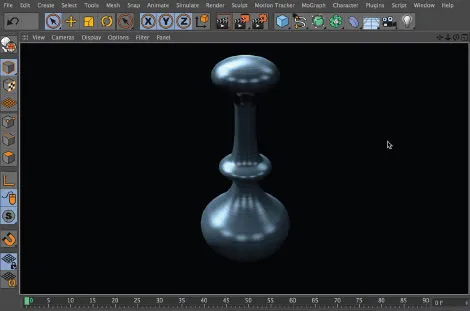
Another option included for rendering within the Viewport is the Render Active Objects command. This will, as it states, only render selected objects. This is an excellent option for dialing in the look of a particular object.
Picture Viewer
MAXON describes the Picture Viewer as CINEMA 4D’s output window. In most cases, this is where you will go to render your final stills and animation as well as high quality tests. The Picture Viewer is a powerful image viewer and viewer for current and previously rendered material. As you may have discovered already, calling up the Picture Viewer can be done instantly by pressing
.
Once inside the Picture Viewer, there are many options for viewing, comparing, and even editing renders. There are some important tools, navigational panels and informative listings we want to get familiar with right from the start. The actual render window on the left shows a render in progress. Note that each bucket (rendering square) represents a processor at work. CINEMA 4D’s internal renderer has long been one of the most efficient in using the multi threading of current processors to speed through renders. By default, the image will be rendered to fit within the window and the zoom percentage will be displayed at the bottom left. A dropdown is available here to navigate through different levels of zoom. The History panel is ...