![]()
Setting Up
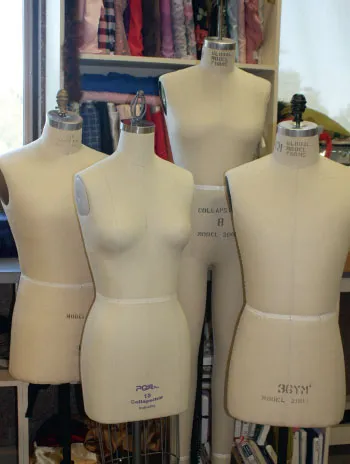
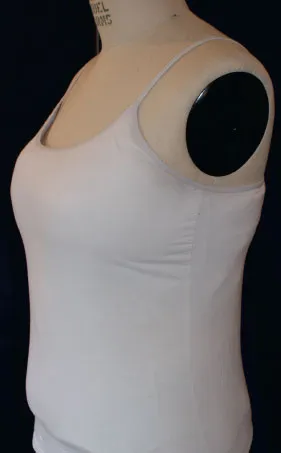
The Proper Dress Form
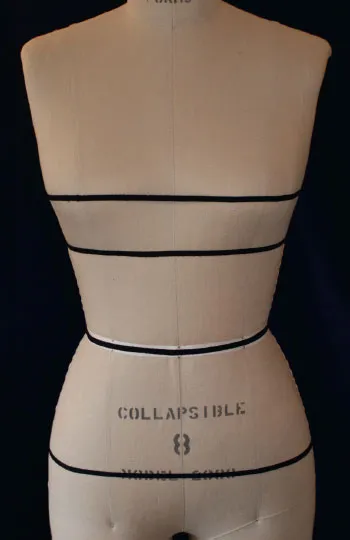
Before beginning the draping process, certain preliminaries need to be addressed. A well-equipped costume shop should have several dress forms in a variety of sizes and shapes. You will need to be certain that the dress form to be used is the proper size and shape for the wearer of the costume you are draping. To do that, you first need to take accurate measurements of the wearer. Below are the measurements you will need. Note that there are several differences in the measurements you will be taking for men and women, based on their dissimilar anatomies.
Measurements
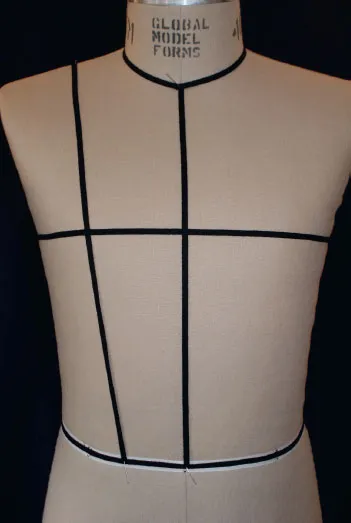
Shoulders across front
Halfway down armscye across front (sometimes called “front width”)
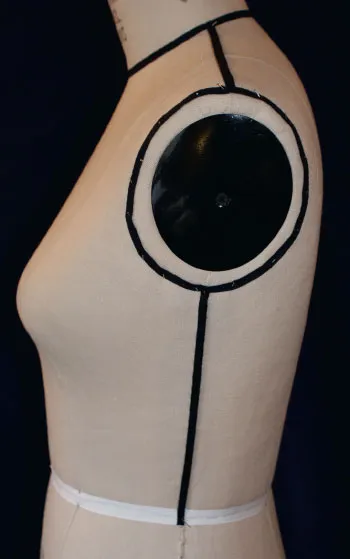
(Women only) Center of shoulder seam to bust point
(Women only) Bust point to waist
(Women only) Bust point to bust point
Base of neck
Center front (CF) of neck to waist
(Men only) Center of shoulder seam to waist front
Around chest
Around waist
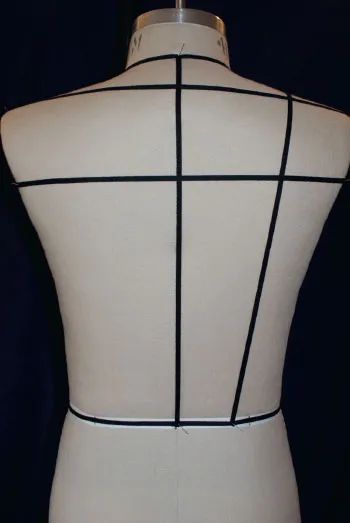
Shoulders across back
Halfway down armscye across back (sometimes called “back width”)
Center back (CB) of neck to waist
Center of shoulder seam to waist back
(Women only) Around underbust
Around hips (widest part)
Shoulder seam (side of neckline to top of armscye)
Armscye
Underarm to waist (side seam)
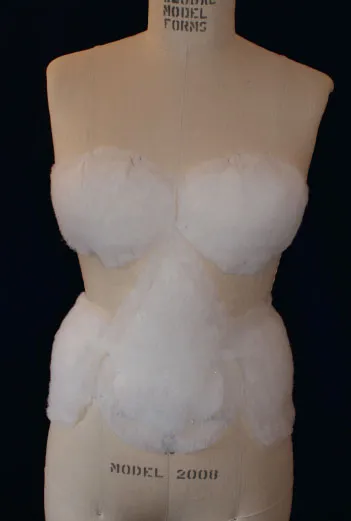
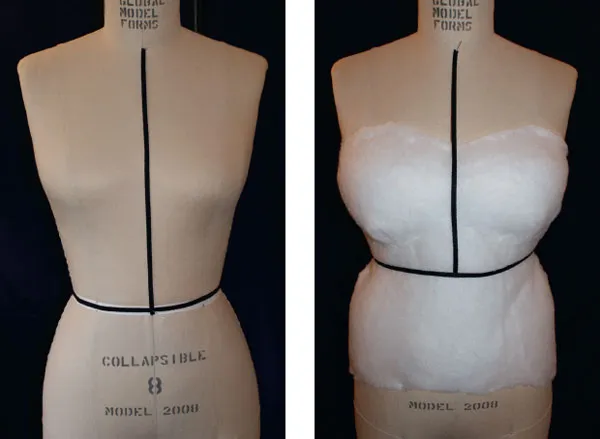
If you are draping a costume for a man, you should choose a dress form as close to the same size or slightly larger than the wearer. A slightly larger dress form will provide a little “breathing room.” It is easier to take in a garment than to let it out. If you are draping for a wearer (male or female) who has a larger belly than any of your dress forms, you can “build up” the dress form with batting* or, if one of the correct size is available, you can put a fat suit on your dress form.
If you are draping a costume for a woman who will be wearing a corset, you need to choose a dress form a few inches smaller than the wearer. Unlike the human form, which is malleable, the dress form cannot be corseted into a different shape. By adapting a smaller dress form with batting, you will be able to see the shape created by tightening the corset laces.
*Adapting the Dress Form
To build up the dress form, use the same kind of polyester batting you use when making a quilt. Wrap and carefully straight-pin the batting around the dress form until you have built it up to the correct size. Make sure that all of your pins are lying flat and safely embedded beneath the canvas covering on your dress form. If you are draping several costumes for the same woman in the same silhouette, you may want to lightly stitch the batting in place.
If you need to use the same dress form for several different women at the same time, you can construct a fitted “vest” with a zipper in the back and build the padding onto it. Then you can zip the padding on and off easily.
Cover the batting with a tight, stretchy knit tank top or a tube of spandex. The closer it fits, the better, but not so tight that it changes the shape of the batting. Measure your dress form again to make sure it is still the size you want.
Pay attention to the vertical as well as the horizontal measurements. If your dress form is too long waisted, you can build up the hips so the waist sits higher.
Proper Care of Your Dress Form
A few words about proper care and maintenance of your dress form:
Be good to your dress form and it will be good to you.
Your dress form is not a pin cushion. Do not leave pins in it when not in use. Use only dressmaking pins when draping; T-pins, safety pins, and push pins put undue wear and tear on the canvas cover. Try not to put more than one pin into the dress form at any one point; this will also weaken the fibers of the canvas cover.
Use marking tools such as a #2 graphite pencil or a designer pencil. Felttip markers and some ballpoint pens will bleed through.
Draping Basics
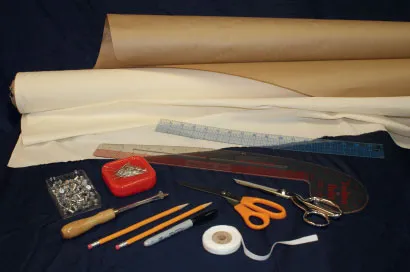
Tools and Equipment
Draping fabric
Dressmaker shears
Straight pins
#2 or designer pencil
Tailor tape or seam binding
Clear, two-inch-wide “C-thru” ruler (marked in inches, not pica)
Armhole curve or large French drafting curve
Push pins
Paper scissors (not sewing scissors)
Brown craft paper
Pounce wheel
Cutting table (waist high with a cork or vinyl-covered Homasote top)
Fabric
The fabric you choose to drape with should be woven, not knit, and of similar weight and drape as the actual fabric that you will be using to build the costume. Most theatrical drapers use 100 percent cotton muslin (which is why a fitting mock-up is often referred to as a “muslin”). You can find muslin and other cottons in a variety of weights to suit your needs. Cotton/poly poplin, as long as it is at least fifty percent cotton and a solid color, can work very well for draping costumes that do not need to hang in soft folds. Because poplin comes in a variety of colors, it can be very useful when communicating with designers—using poplin in colors similar to the design can help demonstrate proportion in garments made of more than one fabric.
Ideally, your draping fabric should be machine-washed in hot water, dried, and ironed before you use it. After cutting the amount of muslin needed for each project, pull the fabric from corner to corner on the diagonal (bias) and steam press it so it is accurately on grain. The four corners should be at right angles.
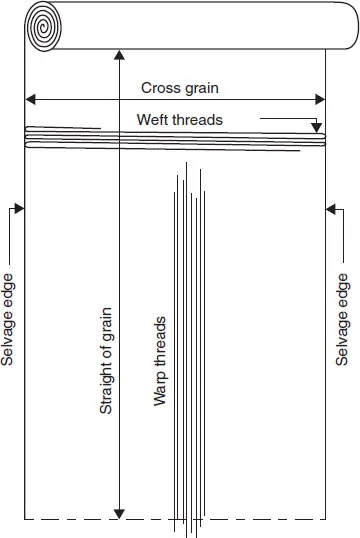
Straight of Grain
One of the most important concepts for a draper to understand is straight of grain (SOG). When fabric is woven, long warp threads are stretched along the length of a loom. This is referred to as the SOG.
Weft threads are woven across the width of the loom, alternating over and under the warp threads, which creates a woven fabric. This is referred to as the cross grain. The outer edges of the warp threads, where the weft threads double back to continue weaving in the opposite direction, are called the selvage edge. The SOG is always parallel to the selvage edges. For most draping projects, the SOG needs to hang plumb (straight down) to the ground in a vertical or perpendicular manner.
Because the selvage edge is woven more tightly than the rest of the fabric, it can easily pull it off grain. You should always cut or rip off the selvage edge of your muslin before using it (but after washing it, so it doesn’t unravel!). If you make a small vertical cut at the top of the muslin...