Use this ultimate scroll saw beginner's guide to hone your scrolling skills to perfection. You'll find everything you need to know here, boiled down to the best and simplest methods. Practice a specific technique in each of 25 skill-building chapters, and then use that skill to make an attractive project. As you progress, each chapter builds upon the previous skills you've already learned. By the time you've completed the book, you'll be ready to tackle any scroll saw project with experience and confidence. Begin with the basics of cutting straight, curved, and jagged lines, and then progress to more advanced techniques like stack cutting, relief, inlay, compound, segmentation, and more. Project patterns include die-cut stationery, a fish silhouette, a butterfly with interior cuts, a hummingbird ornament, and a collapsible wooden basket. This new third edition provides an objective guide to all of the scroll saw models available in today's market, updated to include information on new scroll saw manufacturers.
eBook - ePub
Scroll Saw Workbook, 3rd Edition
Learn to Master Your Scroll Saw in 25 Skill-Building Chapters
- 250 pages
- English
- ePUB (mobile friendly)
- Available on iOS & Android
eBook - ePub
Scroll Saw Workbook, 3rd Edition
Learn to Master Your Scroll Saw in 25 Skill-Building Chapters
About this book
Trusted by 375,005 students
Access to over 1.5 million titles for a fair monthly price.
Study more efficiently using our study tools.
Information
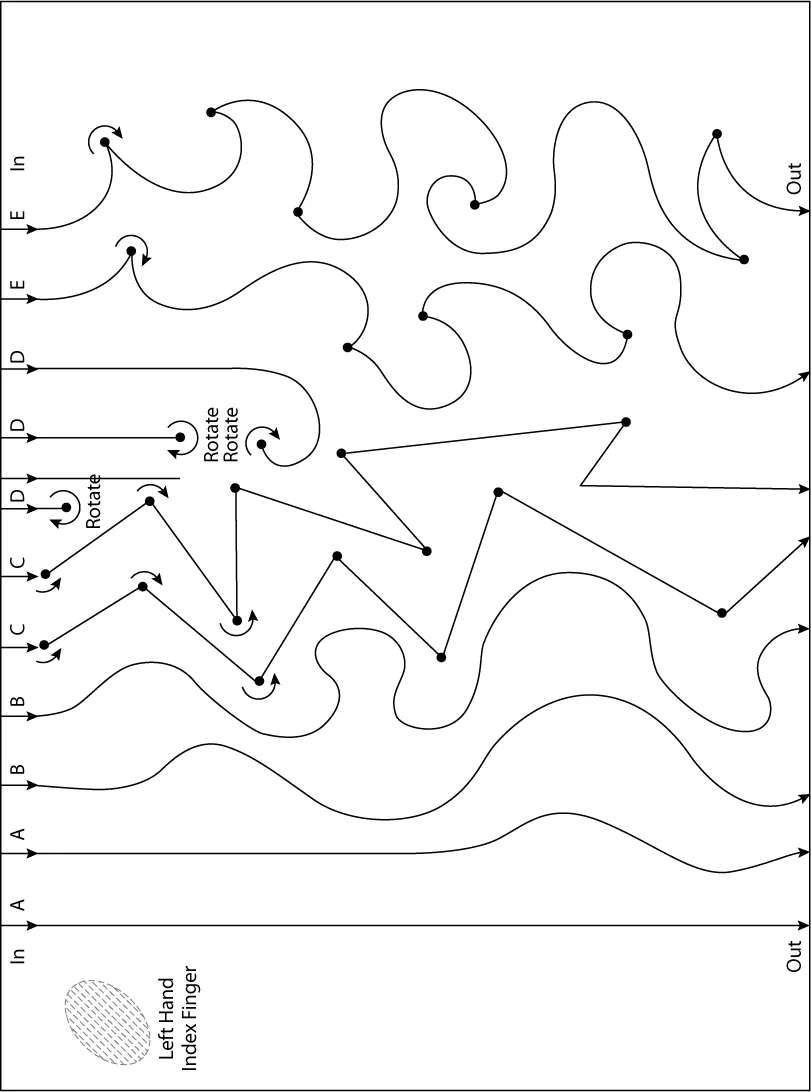
Exercise 1
Objective: Practice following straight lines, wavy lines, making sharp corners and turning in place.
Materials needed:
(1) ¾" x 5 ½"–7 ¼" long piece of wood
#5 skip-tooth blade
Step 1: Make a copy of Exercise 1 and attach it to a knot-free piece of pine or similar wood.
Step 2: Review the four “Getting Started” steps here.
Step 3: Stand or sit directly in front of the saw. Relax and take a deep breath.
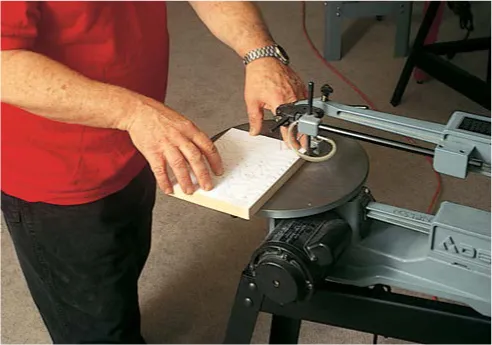
Step 4: Hold your fingers as if you were working on a computer keyboard-use the tips of your fingers. If you are right-handed, use your left hand to lightly hold down the wood. Place your left index finger about 1" directly to the left of the blade. This index finger will help you rotate the wood when you make turns. Use your right hand to steer the wood along the straight line. (If you are left-handed, reverse the instructions.) Remember: Use your finger tips, not your hands and body, to hold and steer the wood, as if you were driving a car along a road.
Step 5: To make a straight cut: Align the blade with the end of the pattern and wood at “A.” Take a deep breath and relax. Lightly push the wood into the blade; let the blade do the cutting. Again, relax. I cannot stress this enough! Be sure your left hand is lightly holding the wood down. Keep in mind, the teeth of the scroll saw blade are in front of the blade facing you. This is where the blade cuts, not on the side or back of the blade. Many people do not realize this their first time using a scroll saw. Complete the straight line cut. If you get off the line, slowly turn the wood to get back on the line. Do not push the blade sideways. Try one more straight line at “A.”
Step 6: To make a curved, wavy line: Follow the same steps as in #5. Practice cutting wavy lines along the two lines marked “B.”
Step 7: To make sharp turns: Start cutting in at “C.” When you reach each large dot on the pattern, stop pushing the wood—relax—and back off slightly. With your left index finger about 1" to the left of the blade, rotate the wood to line up with the direction of the line. Continue cutting. Each time you get to a dot follow the instructions above.
Step 8: To make turns in place: Cut in at “D.” With your left index finger 1" to the left of the blade, rotate the wood at the dot and cut your way back out along the existing saw kerf you just made. Do not back out. Practice at the other “D” lines.
Step 9: Practice making waves, curves and sharp turns at “E.” Again, stop at each dot, relax, back off slightly, turn, and cut.
Step 10: If you still have problems and need more practice, make another copy of Practice Exercise 1 and repeat steps 2 through 9.
Exercise 1
¾" x 5½"–7¼"
#5 Skip-Tooth Blade
¾" x 5½"–7¼"
#5 Skip-Tooth Blade
Exercise 2
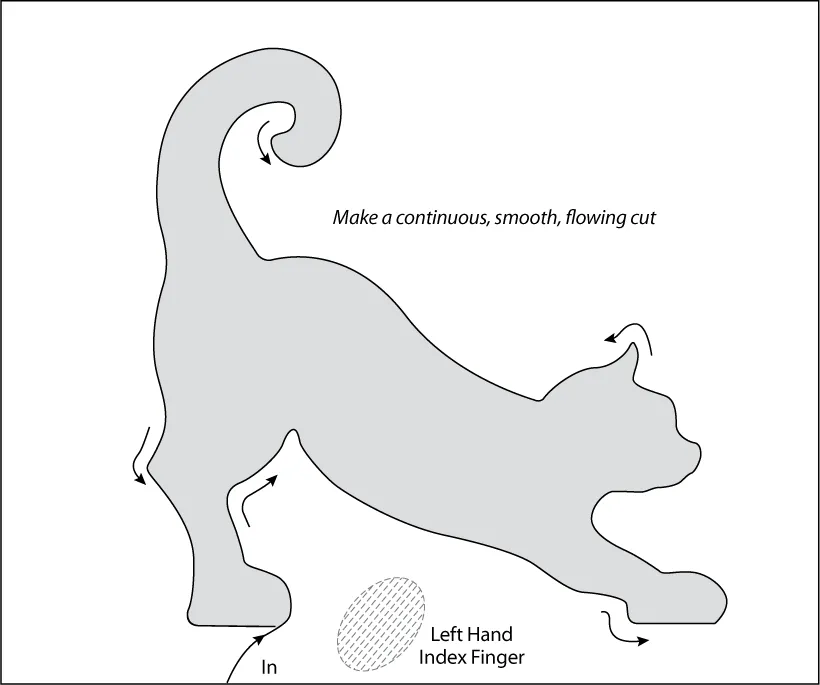
Objective: To cut out a simple object, following lines to produce a smooth, continuous, flowing cut.
Materials needed:
(1) ¾" x 4 ½"–5 ½" long piece of wood
#5 skip-tooth blade

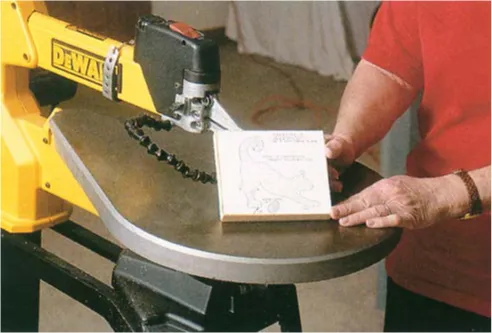
Step 1: Make a copy of Exercise 2 and attach it to a knot-free piece of pine or similar wood.
Step 2: Review the four “Getting Started” steps here.
Step 3: Stand or sit directly in front of the saw. Relax and take a deep breath.
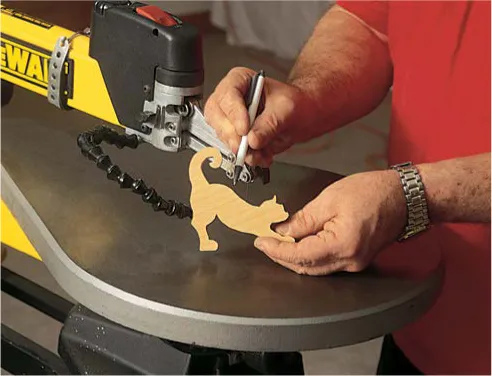
Step 4: Using only your fingertips and a light touch, cut in as indicated. Make a smooth, continuous, flowing cut all the way around without stopping.
Note: If you wander off the cutting line outside of the pattern, stop and back up to where you wandered off. Continue cutting out your pattern (see figure 1). If you wander off the cutting line inside of the pattern, keep cutting slowly and smoothly back to the pattern line (see figure 2). Remember, after you remove the pattern from the wood, no one will know you were off the line.
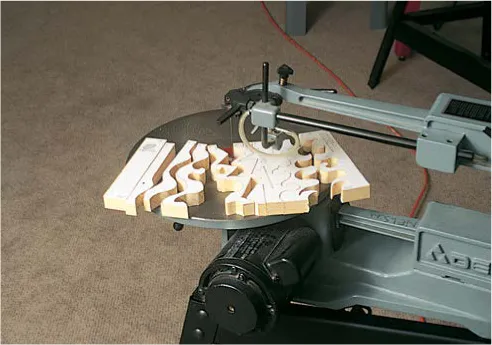
Step 5: When you have the project all cut out, check the edges. You should have a continuous, smooth surface all around. If not, make another copy of the pattern and repeat Steps 1 through 4 with a new piece of wood until it is perfect. PRACTICE MAKES PERFECT!
Exercise 2
¾" x 4½"–5½"
#5 Skip-Tooth Blade
¾" x 4½"–5½"
#5 Skip-Tooth Blade
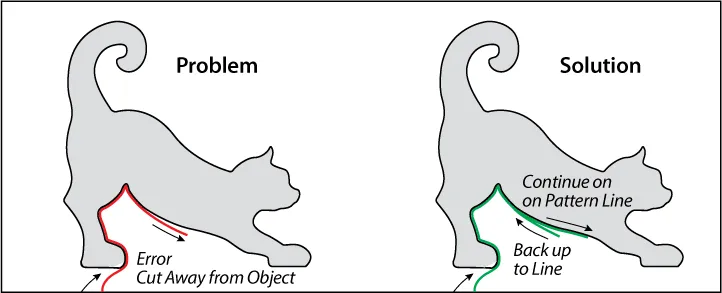
Figure 1
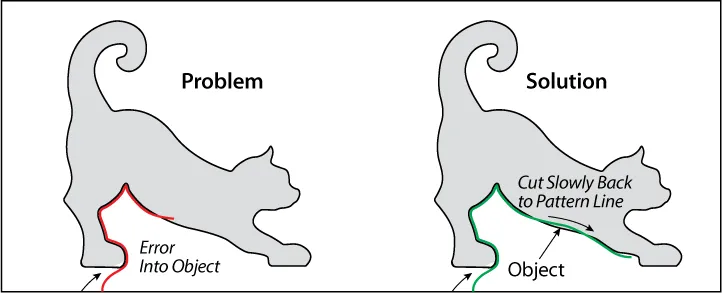
Figure 2
Exercise 3
Objective: To cut out a simple object, fo...
Table of contents
- Cover
- Title
- Copyright
- Contents
- Preface
- Introduction: How to Use This Workbook
- History of Scroll Saws
- Mechanisms
- Scroll Saws
- Blades
- Accessories
- Features to Look for in a Scroll Saw
- Patterns & Material
- Getting Started
- Safety
- Exercise 1: Following lines
- Exercise 2: Making continuous, flowing exterior cuts
- Exercise 3: Making sharp exterior corners (loop method)
- Exercise 4: Making sharp interior corners
- Exercise 5: Cutting very small or very thin objects
- Exercise 6: Stack cutting (staple method)
- Exercise 7: Stack cutting (tape method)
- Exercise 8: Stack cutting (brad method)
- Exercise 9: Stack cutting (ear method)
- Exercise 10: Cutting paper, cardboard or cloth (exterior cuts)
- Exercise 11: Cutting paper, cardboard or cloth (interior cuts)
- Exercise 12: Cutting metal
- Exercise 13: Cutting plastic
- Exercise 14: Relief cutting (relief cut blade/angle tester)
- Exercise 15: Relief cutting (collapsible baskets)
- Exercise 16: Relief cutting (dimensional effects)
- Exercise 17: Inlay (inlay blade/angle tester)
- Exercise 18: Inlay
- Exercise 19: Compound cutting
- Exercise 20: Layering (woven basket)
- Exercise 21: Using scrap wood
- Exercise 22: Making puzzles
- Exercise 23: Relief cutting (alphabet)
- Exercise 24: Segmentation
- Exercise 25: Lap-over basket
- Appendix
Frequently asked questions
Yes, you can cancel anytime from the Subscription tab in your account settings on the Perlego website. Your subscription will stay active until the end of your current billing period. Learn how to cancel your subscription
No, books cannot be downloaded as external files, such as PDFs, for use outside of Perlego. However, you can download books within the Perlego app for offline reading on mobile or tablet. Learn how to download books offline
Perlego offers two plans: Essential and Complete
- Essential is ideal for learners and professionals who enjoy exploring a wide range of subjects. Access the Essential Library with 800,000+ trusted titles and best-sellers across business, personal growth, and the humanities. Includes unlimited reading time and Standard Read Aloud voice.
- Complete: Perfect for advanced learners and researchers needing full, unrestricted access. Unlock 1.5M+ books across hundreds of subjects, including academic and specialized titles. The Complete Plan also includes advanced features like Premium Read Aloud and Research Assistant.
We are an online textbook subscription service, where you can get access to an entire online library for less than the price of a single book per month. With over 1.5 million books across 990+ topics, we’ve got you covered! Learn about our mission
Look out for the read-aloud symbol on your next book to see if you can listen to it. The read-aloud tool reads text aloud for you, highlighting the text as it is being read. You can pause it, speed it up and slow it down. Learn more about Read Aloud
Yes! You can use the Perlego app on both iOS and Android devices to read anytime, anywhere — even offline. Perfect for commutes or when you’re on the go.
Please note we cannot support devices running on iOS 13 and Android 7 or earlier. Learn more about using the app
Please note we cannot support devices running on iOS 13 and Android 7 or earlier. Learn more about using the app
Yes, you can access Scroll Saw Workbook, 3rd Edition by John A. Nelson in PDF and/or ePUB format, as well as other popular books in Technology & Engineering & Technical & Manufacturing Trades. We have over 1.5 million books available in our catalogue for you to explore.