Quick Start Guide to Azure Data Factory, Azure Data Lake Server, and Azure Data Warehouse
eBook - ePub

Quick Start Guide to Azure Data Factory, Azure Data Lake Server, and Azure Data Warehouse

Mark Beckner

Buch teilen
  1. 116 Seiten
  2. English
  3. ePUB (handyfreundlich)
  4. Über iOS und Android verfĂŒgbar
eBook - ePub

Quick Start Guide to Azure Data Factory, Azure Data Lake Server, and Azure Data Warehouse

Mark Beckner

Angaben zum Buch
Buchvorschau
Inhaltsverzeichnis
Quellenangaben

Über dieses Buch

With constantly expanding options such as Azure Data Lake Server (ADLS) and Azure SQL Data Warehouse (ADW), how can developers learn the process and components required to successfully move this data? Quick Start Guide to Azure Data Factory, Azure Data Lake Server, and Azure Data Warehouse teaches you the basics of moving data between Azure SQL solutions using Azure Data Factory. Discover how to build and deploy each of the components needed to integrate data in the cloud with local SQL databases.

Mark Beckner's step by step instructions on how to build each component, how to test processes and debug, and how to track and audit the movement of data, will help you to build your own solutions instantly and efficiently. This book includes information on configuration, development, and administration of a fully functional solution and outlines all of the components required for moving data from a local SQL instance through to a fully functional data warehouse with facts and dimensions.

HĂ€ufig gestellte Fragen

Wie kann ich mein Abo kĂŒndigen?
Gehe einfach zum Kontobereich in den Einstellungen und klicke auf „Abo kĂŒndigen“ – ganz einfach. Nachdem du gekĂŒndigt hast, bleibt deine Mitgliedschaft fĂŒr den verbleibenden Abozeitraum, den du bereits bezahlt hast, aktiv. Mehr Informationen hier.
(Wie) Kann ich BĂŒcher herunterladen?
Derzeit stehen all unsere auf MobilgerĂ€te reagierenden ePub-BĂŒcher zum Download ĂŒber die App zur VerfĂŒgung. Die meisten unserer PDFs stehen ebenfalls zum Download bereit; wir arbeiten daran, auch die ĂŒbrigen PDFs zum Download anzubieten, bei denen dies aktuell noch nicht möglich ist. Weitere Informationen hier.
Welcher Unterschied besteht bei den Preisen zwischen den AboplÀnen?
Mit beiden AboplÀnen erhÀltst du vollen Zugang zur Bibliothek und allen Funktionen von Perlego. Die einzigen Unterschiede bestehen im Preis und dem Abozeitraum: Mit dem Jahresabo sparst du auf 12 Monate gerechnet im Vergleich zum Monatsabo rund 30 %.
Was ist Perlego?
Wir sind ein Online-Abodienst fĂŒr LehrbĂŒcher, bei dem du fĂŒr weniger als den Preis eines einzelnen Buches pro Monat Zugang zu einer ganzen Online-Bibliothek erhĂ€ltst. Mit ĂŒber 1 Million BĂŒchern zu ĂŒber 1.000 verschiedenen Themen haben wir bestimmt alles, was du brauchst! Weitere Informationen hier.
UnterstĂŒtzt Perlego Text-zu-Sprache?
Achte auf das Symbol zum Vorlesen in deinem nÀchsten Buch, um zu sehen, ob du es dir auch anhören kannst. Bei diesem Tool wird dir Text laut vorgelesen, wobei der Text beim Vorlesen auch grafisch hervorgehoben wird. Du kannst das Vorlesen jederzeit anhalten, beschleunigen und verlangsamen. Weitere Informationen hier.
Ist Quick Start Guide to Azure Data Factory, Azure Data Lake Server, and Azure Data Warehouse als Online-PDF/ePub verfĂŒgbar?
Ja, du hast Zugang zu Quick Start Guide to Azure Data Factory, Azure Data Lake Server, and Azure Data Warehouse von Mark Beckner im PDF- und/oder ePub-Format sowie zu anderen beliebten BĂŒchern aus Informatica & Elaborazione di dati su cloud. Aus unserem Katalog stehen dir ĂŒber 1 Million BĂŒcher zur VerfĂŒgung.

Information

Jahr
2018
ISBN
9781547401291

Chapter 1
Copying Data to Azure SQL Using Azure Data Factory

In this chapter we’ll build out several components to illustrate how data can be copied between data sources using Azure Data Factory (ADF). The easiest way to illustrate this is by using a simple on-premise local SQL instance with data that will be copied to a cloud-based Azure SQL instance. We’ll create an ADF pipeline that uses an integration runtime component to acquire the connection with the local SQL database. A simple map will be created within the pipeline to show how the columns in the local table map to the Azure table. The full flow of this model is shown in Figure 1.1.
Figure 1.1: Components and flow of data being built in this chapter

Creating a Local SQL Instance

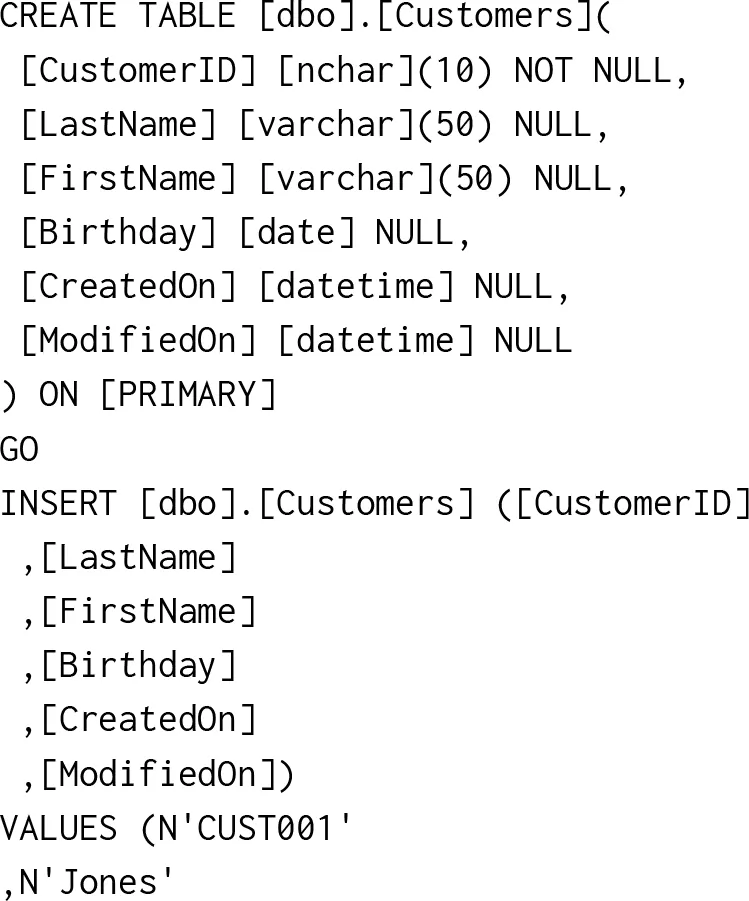
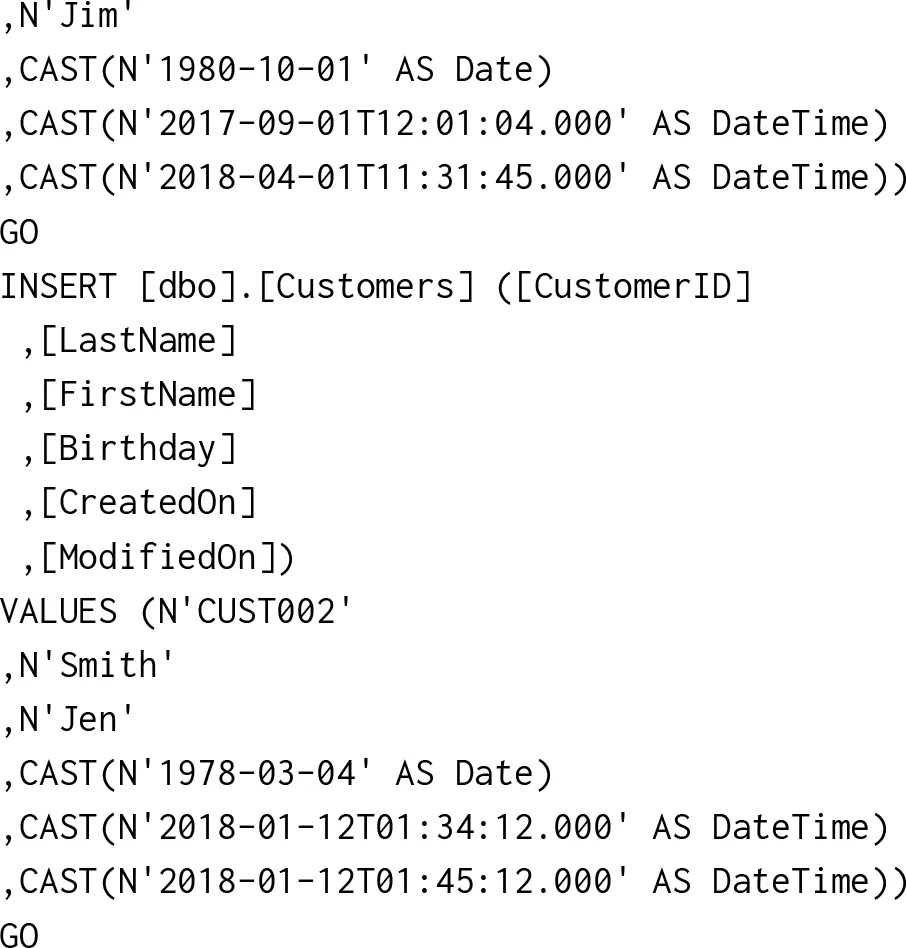
To build this simple architecture, a local SQL instance will need to be in place. We’ll create a single table called Customers. By putting a few records into the table, we can then use it as the base to load data into the new Azure SQL instance you create in the next section of this chapter. The table script and the script to load records into this table are shown in Listing 1.1. A screenshot of the local SQL Server instance is shown in Figure 1.2.
Figure 1.2: Creating a table on a local SQL Server instance
Listing 1.1: Listing 1.1. The Local SQL Customers Table with Data

Creating an Azure SQL Database

Now we’ll create an Azure SQL database. It will contain a single table that will be called Contacts. To begin with, this Contacts table will contain its own record, separate from data in any other location, but will eventually be populated with the copied data from the local SQL database. To create the Azure database, you’ll need to log into portal.azure.com. Once you’ve successfully logged in, on the left you’ll see a list of actions that can be taken in the left-hand navigation toolbar. To create the database, click on the SQL databases menu item and then click the Add button, as shown in Figure 1.3.
Figure 1.3: Adding a new Azure SQL database
You can now enter in the information that pertains to your new database. You can get more information on these properties by clicking the icon next to each label. Some additional details on several of these properties are noted as follows:
  1. Database name—the database name will be referenced in a variety of locations, so name it just like you would a local database (in this case, we’ll refer to it as InotekDemo).
  2. Subscription—you’ll have several potential options here, based on what you have purchased. Figure 1.3 shows Visual Studio Enterprise, as that is the MSDN subscription that is available. Your options will look different depending on licensing.
  3. Select source—go with a new blank database for this exercise, but you could base it on an existing template or backup if there was one available that matched your needs.
  4. Server—this is the name of the database server you will connect to and where your new database will live. You can use the default or you can create your own (see Figure 1.4). A database server will allow you to separate your databases and business functions from one another. This server will be called “Demoserverinotek” with serveradmin as the login name.
  5. Pricing Tier—pricing in Azure is a little overwhelming, and you’ll want to think about costs across all components before you decide. For now, we’ll select the basic model, which allows for up to 2 gigs of data.
Figure 1.4: Configuring the new Azure SQL Server where the database will reside
When you’re ready, click the Create a new server button and the deployment process in Azure will begin. You’ll see a notification on your toolbar (see Figure 1.5) that shows the status of this deployment. After a minute or two your database deployment will be completed and you’ll be able to click on the new database and see information about it.
Figure 1.5: Notification of the deployment in process
There are several ways to connect to this new server. You can use the Azure tools or you can connect from a local SQL tool like SQL Server Enterprise Manager. Using Enterprise Manager requires that you enter information about the SQL Server you are trying to connect to. To connect to your Azure server, click on the Connection strings property of your database in Azure. You’ll want to grab the server name from here and enter it into your server connection window (shown in Figure 1.6).
Figure 1.6: Connecting to the new Azure SQL Server from a local Enterprise Manager connection window
Next, you’ll type in the login and password and click Connect. If you haven’t connected to an Azure SQL instance before, you will be asked to log into Azure. If this occurs, click the Sign in button and enter the credentials that you used to connect to the Azure portal (see Figure 1.7). Once authenticated, you’ll be able to select whether to add the specific IP you’re on or add the full subnet. You’ll be required to do this each time you connect to your SQL instance from a new IP.
Figure 1.7: The first time you connect from Enterprise Manager on a new computer, you will be required to enter this information
With the credentials entered a...

Inhaltsverzeichnis