Clip Studio Paint by Example
eBook - ePub

Clip Studio Paint by Example

Ludovico Serra

Partager le livre
  1. 512 pages
  2. English
  3. ePUB (adapté aux mobiles)
  4. Disponible sur iOS et Android
eBook - ePub

Clip Studio Paint by Example

Ludovico Serra

DĂ©tails du livre
Aperçu du livre
Table des matiĂšres
Citations

À propos de ce livre

Get up to speed with the essential tools and workflows for creating a professional portfolio using Clip Studio PaintKey Features‱ Explore the different art tools available for creating your own illustrations, comics, and animations‱ Learn how to make best use of Clip Studio Paint by implementing it in real-world scenarios‱ Use Clip Studio Paint to leverage your artistic skills and create a portfolioBook DescriptionClip Studio Paint is powerful art software that can help you create artistic work with its in-built material organizer, 3D integration, and group work features. It also provides other features that can speed up the workflow of illustrators, concept artists, and comic artists. With Clip Studio Paint by Example, you'll learn how to use CSP effectively for a wide variety of artistic purposes. The book starts by helping you create the right workspace for concept art, illustration, and comics. You'll create a brush, set up a canvas, and develop an auto-auction. Along with covering how to work with CS Modeler that comes bundled with CSP, this book shows you how to import and rig characters easily. You'll then create reusable changeable scenes and a 3D human character in Blender before exploring concept art, illustrations, comics, and how to create your own portfolio. The book features a glossary with brief explanations of all the main CSP functions. The focus of the book is not on drawing or painting but on helping you enhance your artistic skills using Clip Studio Paint to create an impressive portfolio. By the end of this book, you'll be able to use the impressive capabilities of CSP to create beautiful digital art in a productive way.What you will learn‱ Explore Clip Studio Paint and its use cases‱ Become familiar with the Clip Studio ecosystem for solving your artistic problems‱ Implement the CS Modeler and import and rig characters easily‱ Create reusable and editable scenes and props using CS Modeler‱ Build a 3D human character using the Blender software‱ Set up your workspace using CSP tools‱ Create portfolios for your comics, illustrations, and concept artWho this book is forThis Clip Studio Paint book goes beyond the technical stuff that helps beginner-level as well as intermediate artists who are new to working in a digital environment and need a more streamlined and seamless workflow relating to illustrations, concept art, and comics in Clip Studio Paint. No prior knowledge of Clip Studio Paint is required to get started with this book.

Foire aux questions

Comment puis-je résilier mon abonnement ?
Il vous suffit de vous rendre dans la section compte dans paramĂštres et de cliquer sur « RĂ©silier l’abonnement ». C’est aussi simple que cela ! Une fois que vous aurez rĂ©siliĂ© votre abonnement, il restera actif pour le reste de la pĂ©riode pour laquelle vous avez payĂ©. DĂ©couvrez-en plus ici.
Puis-je / comment puis-je télécharger des livres ?
Pour le moment, tous nos livres en format ePub adaptĂ©s aux mobiles peuvent ĂȘtre tĂ©lĂ©chargĂ©s via l’application. La plupart de nos PDF sont Ă©galement disponibles en tĂ©lĂ©chargement et les autres seront tĂ©lĂ©chargeables trĂšs prochainement. DĂ©couvrez-en plus ici.
Quelle est la différence entre les formules tarifaires ?
Les deux abonnements vous donnent un accĂšs complet Ă  la bibliothĂšque et Ă  toutes les fonctionnalitĂ©s de Perlego. Les seules diffĂ©rences sont les tarifs ainsi que la pĂ©riode d’abonnement : avec l’abonnement annuel, vous Ă©conomiserez environ 30 % par rapport Ă  12 mois d’abonnement mensuel.
Qu’est-ce que Perlego ?
Nous sommes un service d’abonnement Ă  des ouvrages universitaires en ligne, oĂč vous pouvez accĂ©der Ă  toute une bibliothĂšque pour un prix infĂ©rieur Ă  celui d’un seul livre par mois. Avec plus d’un million de livres sur plus de 1 000 sujets, nous avons ce qu’il vous faut ! DĂ©couvrez-en plus ici.
Prenez-vous en charge la synthÚse vocale ?
Recherchez le symbole Écouter sur votre prochain livre pour voir si vous pouvez l’écouter. L’outil Écouter lit le texte Ă  haute voix pour vous, en surlignant le passage qui est en cours de lecture. Vous pouvez le mettre sur pause, l’accĂ©lĂ©rer ou le ralentir. DĂ©couvrez-en plus ici.
Est-ce que Clip Studio Paint by Example est un PDF/ePUB en ligne ?
Oui, vous pouvez accĂ©der Ă  Clip Studio Paint by Example par Ludovico Serra en format PDF et/ou ePUB ainsi qu’à d’autres livres populaires dans Informatique et Infographie. Nous disposons de plus d’un million d’ouvrages Ă  dĂ©couvrir dans notre catalogue.

Informations

Année
2021
ISBN
9781800206038
Édition
1
Sous-sujet
Infographie

Chapter 1: Up and Running with CSP

Hi, I'm Ludovico Serra (otherwise known as Lennybunny), Clip Studio Evangelist and two-time winner of the MVP award. Please note that this will not be a classic manual in which I explain all the functions of Clip Studio Paint (CSP) or how to do all of the technical stuff, such as creating a canvas or creating a simple brush (we will create brushes, but it will be a little bit different than the classic "add a texture to this brush"). If you need information about the technical stuff, there are other books you should read, such as Learn Clip Studio Paint Third Edition by Inko Ai Takita (At the time of writing, this book wasn't published. It will be published in August 2021), and Clip Studio Tips by Liz Staley.
This book will be more of a workflow example, in which I will show you how to use CSP in a faster and more advanced way, even if you are a beginner with the software. Also, this book will be completely and utterly based on my own experience with digital software and my own artistic view, so feel free to adapt everything I tell you to your experience and needs. In addition, this first chapter is for an absolute beginner or someone who is coming from other software, just so that I know for sure that we are on the same page regarding basic knowledge. So, if you're not an absolute beginner, go to Chapter 2, Adding Brushes to CSP, where you will find the fun stuff!
I will cover the basic functions of CSP later in the General CSP functions section, but for now, I will concentrate on some fundamentals.
This chapter will cover the following topics:
  • Comparative anatomy – an introduction to CSP
  • Setting up your workspace and mapping your shortcuts
  • General CSP functions

Comparative anatomy – an introduction to CSP

In my experience, with Clip Studio Ask, you can encounter a lot of early frustration if you are coming from other software and try to apply your previous habits to CSP. One of the first frustrations is opening the software and expecting everything to be ready from the get-go. CSP is not like this, for good reason, but let's compare CSP with two other programs: Photoshop (2020) and Krita (4.2.9). I will compare it with a vanilla opening, so it means I will not modify anything after a clean installation.

The Photoshop interface

Photoshop doesn't really require that much of an introduction; it started as photo-manipulation software and, thanks to its versatility, you can now use it for drawing. There are a ton of tutorials on how to use it. Let's see the vanilla interface:
Figure 1.1 – Adobe Photoshop interface
Looking at the vanilla interface, we can see something rather intriguing, which is that the windows are more oriented for photo editing. On the right side, we have a series of panels dedicated to colors, then under those, there is a panel dedicated to the canvas and adjustment, and under that, we have layers, channels, and paths. Let's say we have the intelligence of a goldfish and so we can't immediately find the various brushes or brush options in a dedicated window. If we go to the toolbar, these are the tools we will find:
Figure 1.2 – Photoshop toolbar
This lets us know that this is undoubtedly a piece of software for photo editing, as we have six tools for selection and five tools not directly related to drawing (such as the clone stamp tool), and only six tools directly related to drawing.
If we right-click on the various tools, we can select other tools; let's call them Sub Tools.
Now let's focus on something more important—how the brushes are organized.

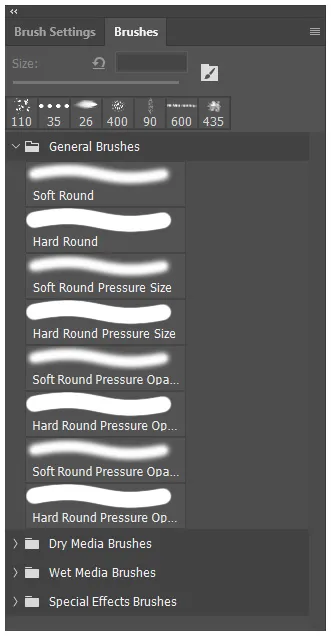
Brushes in Photoshop

Now let's assume that we have a greater degree of intelligence, we recognize the brush icon at the top (
), and we unlock the brushes. We will then see this:
Figure 1.3 – Brush window in Photoshop
We have brushes subdivided into folders, but here's something interesting—we have a list of the latest used brushes with the last size used.
Now let's talk about how the brushes work in relation to the environment:
  • We can't add a shortcut to a single brush.
  • We can't add a shortcut to a single brush folder.
  • We can only add a shortcut that lets us go to the various tools in the toolbar. So, this means we can only add a shortcut to the Brush tool or Mixer brush tool.
  • We can add a shortcut to scroll between the next and the previous brush.
  • This brush list can't contain erasers or other tools.
If we needed to organize our brushes, we would need to put everything in Brush tool, and after that, we would need to organize the brushes using folders. Every time we need a brush, we need to scroll to find the folder we need to get our desired brush.
Now let's see how Krita presents its interface.

The Krita interface

We have something that at first seems pretty crowded, but in reality, it's pretty straightforward:
Figure 1.4 – Krita interface
On the right, we have color selection, tool options, and an overview/navigator section, and below that, we have layers and channels. Lastly, we have Brush Presets and Brush presets History. If we go and look at the toolbar, we wi...

Table des matiĂšres