eBook - ePub
The Practical Guide to Drawing Manga
Peter Gray
This is a test
- English
- ePUB (adapté aux mobiles)
- Disponible sur iOS et Android
eBook - ePub
The Practical Guide to Drawing Manga
Peter Gray
Détails du livre
Aperçu du livre
Table des matières
Citations
À propos de ce livre
The distinctive manga style is popular the world over for its glamorous, dynamic characters and stylish artwork. In this book, author and illustrator Peter Gray guides you through the process of drawing manga, from basic facial features to full-figure heroes and robots in action. Whether you are an experienced draughtsman or a complete beginner, tailored step-by-step exercises and handy hints will help you achieve stunning results.This is another title in Arcturus' successful range of Artist's Workbooks, which also includes titles on: Portraits, Figures, Manga, Techniques, Landscape, Animals and Still Life.
Foire aux questions
Comment puis-je résilier mon abonnement ?
Il vous suffit de vous rendre dans la section compte dans paramètres et de cliquer sur « Résilier l’abonnement ». C’est aussi simple que cela ! Une fois que vous aurez résilié votre abonnement, il restera actif pour le reste de la période pour laquelle vous avez payé. Découvrez-en plus ici.
Puis-je / comment puis-je télécharger des livres ?
Pour le moment, tous nos livres en format ePub adaptés aux mobiles peuvent être téléchargés via l’application. La plupart de nos PDF sont également disponibles en téléchargement et les autres seront téléchargeables très prochainement. Découvrez-en plus ici.
Quelle est la différence entre les formules tarifaires ?
Les deux abonnements vous donnent un accès complet à la bibliothèque et à toutes les fonctionnalités de Perlego. Les seules différences sont les tarifs ainsi que la période d’abonnement : avec l’abonnement annuel, vous économiserez environ 30 % par rapport à 12 mois d’abonnement mensuel.
Qu’est-ce que Perlego ?
Nous sommes un service d’abonnement à des ouvrages universitaires en ligne, où vous pouvez accéder à toute une bibliothèque pour un prix inférieur à celui d’un seul livre par mois. Avec plus d’un million de livres sur plus de 1 000 sujets, nous avons ce qu’il vous faut ! Découvrez-en plus ici.
Prenez-vous en charge la synthèse vocale ?
Recherchez le symbole Écouter sur votre prochain livre pour voir si vous pouvez l’écouter. L’outil Écouter lit le texte à haute voix pour vous, en surlignant le passage qui est en cours de lecture. Vous pouvez le mettre sur pause, l’accélérer ou le ralentir. Découvrez-en plus ici.
Est-ce que The Practical Guide to Drawing Manga est un PDF/ePUB en ligne ?
Oui, vous pouvez accéder à The Practical Guide to Drawing Manga par Peter Gray en format PDF et/ou ePUB ainsi qu’à d’autres livres populaires dans Art et Art Techniques. Nous disposons de plus d’un million d’ouvrages à découvrir dans notre catalogue.
Informations
Sujet
ArtSous-sujet
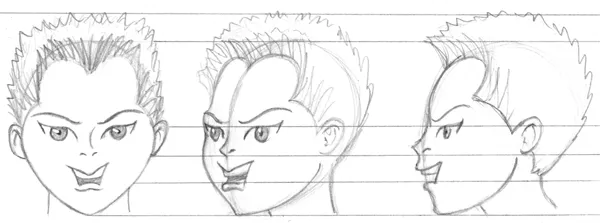
Art TechniquesHEADS FROM DIFFERENT ANGLES
As people move around, we see their heads from all different angles. If you can draw your manga characters from different angles you will be able to show them in various activities, emotions and interactions. It can seem quite complicated, but once again some rough guidelines will make the process much easier.
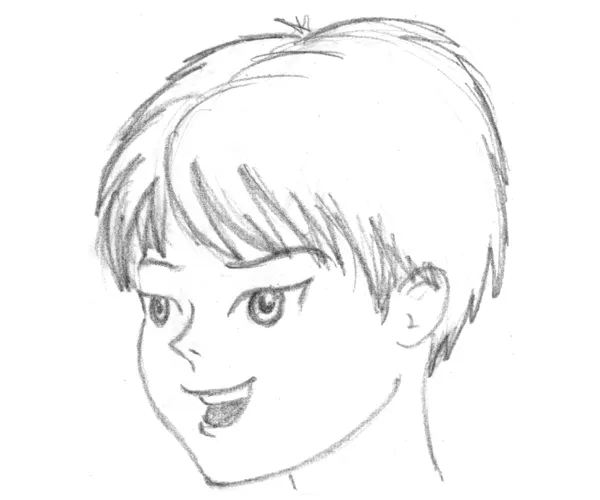
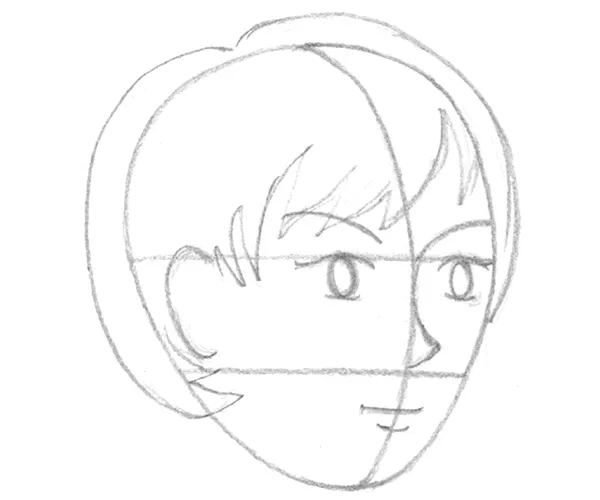
¾ VIEW
Step 1
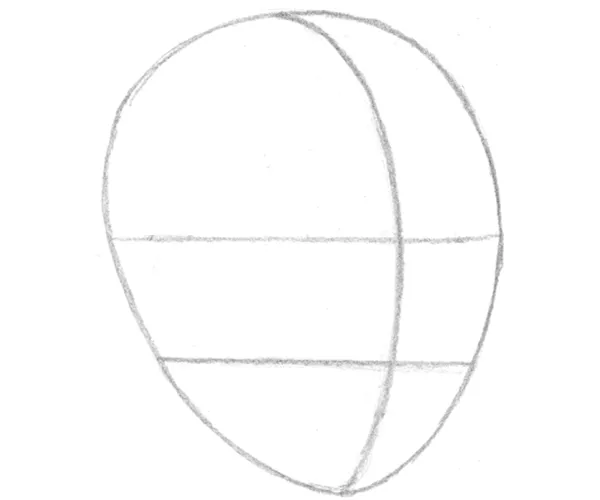
To draw a three-quarter view (where the head is turned to one side), start with the egg shape, but make it broader towards the top and back. Place your horizontal guides as before. The essential difference here is that the vertical guideline must sit to one side of centre and curve.
Step 2
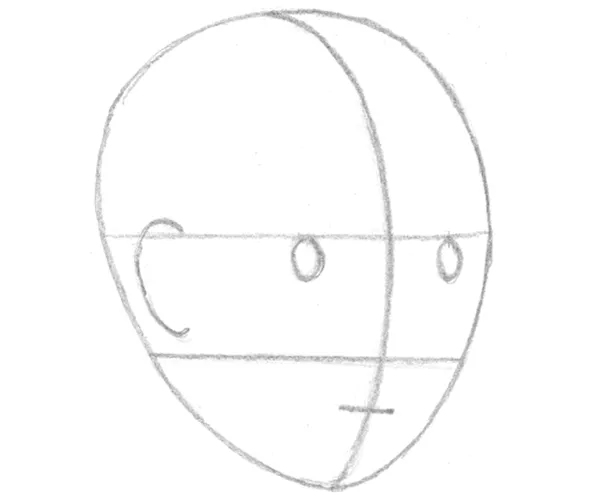
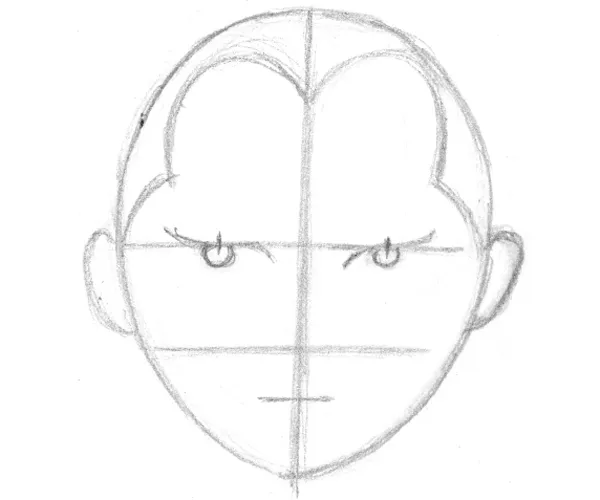
Positioning the eyes, ears and mouth should now be quite easy.
Step 3
Now the rest of the features can be drawn in position.
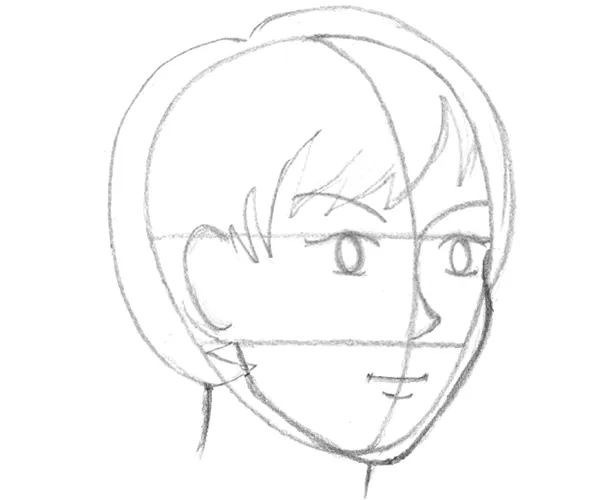
Step 4
For manga, it’s important to define the outline of the cheek and jaw. The line comes in at the eye socket, out to form a cheekbone, then down to the characteristic triangular chin. Note how the neck slopes forward.
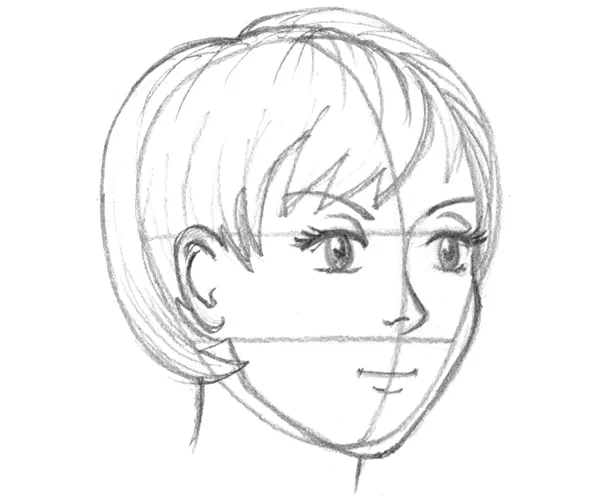
Step 5
Then it’s just a case of refining the features and adding the detail, before erasing unwanted guidelines.
This male character was drawn from the same guidelines. The main differences to note are his fuller jaw line and broader neck.
PROFILE
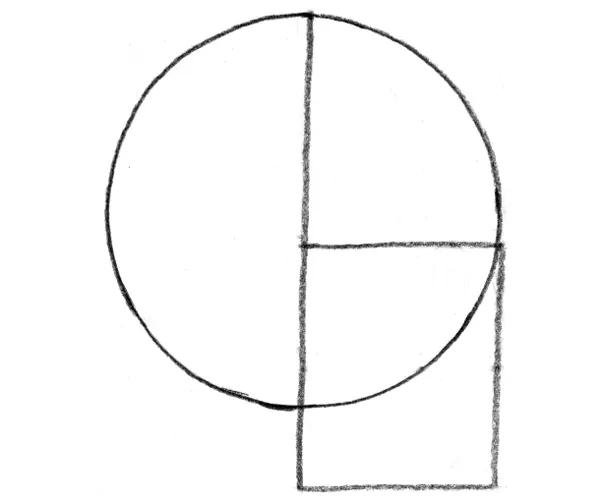
Step 1
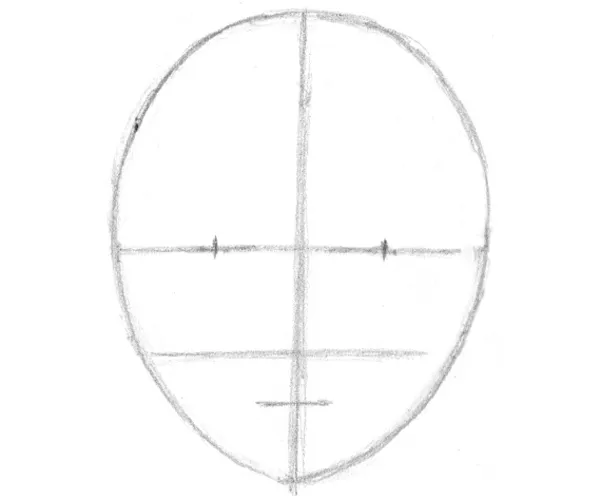
Viewed from the side, the head is much wider than when seen from the front. To get used to the dimensions, try to think of the profile as a circle for the curve of the skull and a rectangle for the lower face and jaw. The central horizontal is halfway down the entire head.
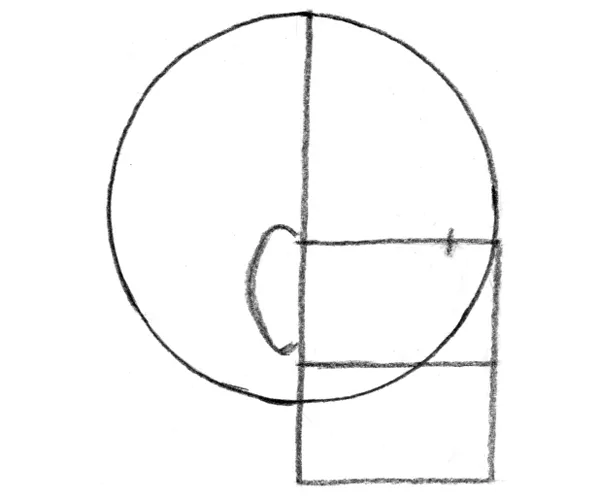
Step 2
The ear sits behind the centre vertical and the eye should be placed right near the front of the face.
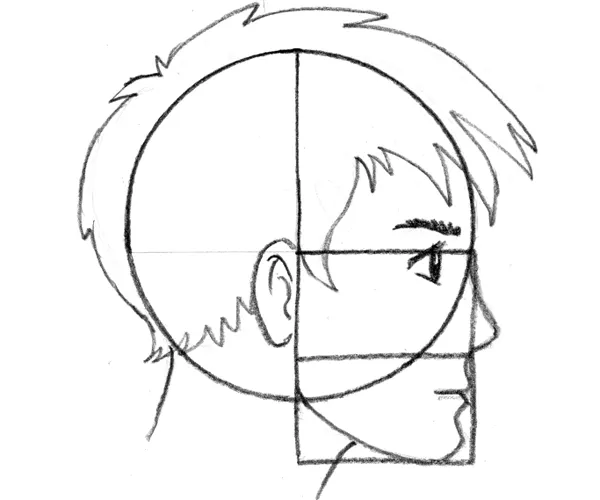
Step 3
The nose sticks out from the front and the mouth and jaw will fit neatly into the lower box. From this angle, the eye forms a triangle shape and the iris is reduced to a flattened disc.
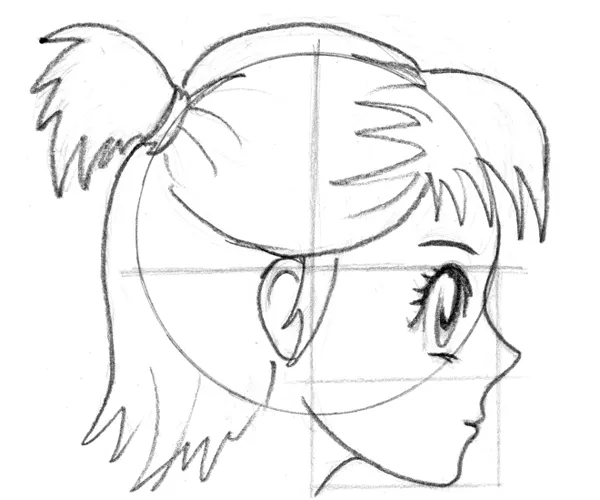
This female character follows the same framework, but the line of her chin slopes back.
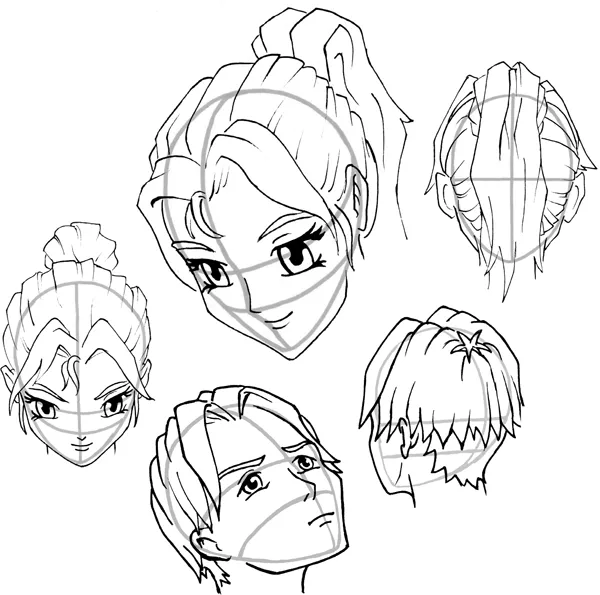
Once you get used to the proportions of profiles, you’ll probably find it easier to start from a broadened egg shape. Using the egg shape, you should be able to draw the head from any angle, as long as you put the guidelines in the right places. Study these diagrams and note how the guidelines follow the curve of the head, up, down and from side to side.
CHARACTER AND EXPRESSION – MALE
There’s much to be learned from copying characters from books, but the real fun begins when you can create new characters and bring them to life with expressions and interesting angles of view. Here are just a few examples of characters drawn from my imagination, showing a range of personalities and emotions. To begin designing characters of your own you could use these examples as starting points.

CHARACTER DESIGN 1
Taking elements from the examples shown, here’s a simple method for creating a new character.
Step 1
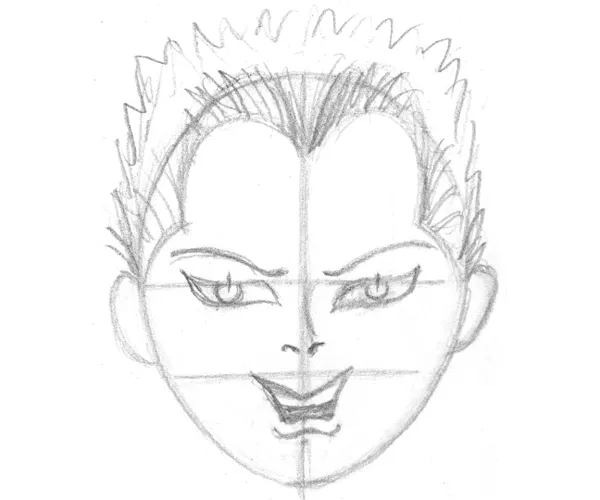
A front view is perhaps the easiest start for a new character. I decided on a young face, so started with quite a squat egg-shape.
Step 2
Next I added more details to my guidelines.
Step 3
Copying features on to the guidelines, a character very quickly started to emerge.
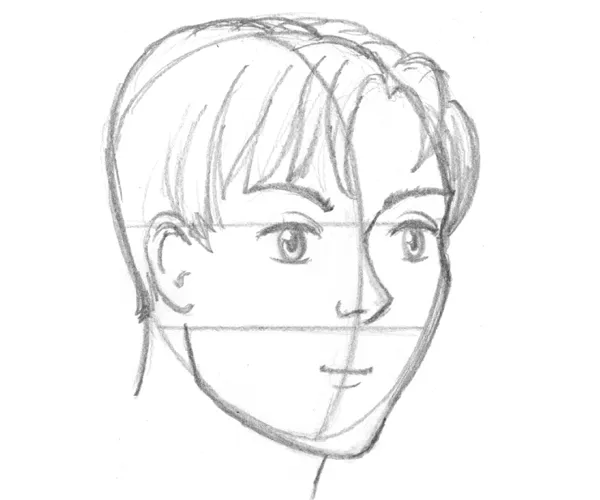
Step 4
Refining the features and face shape, I completed the front view. But this is only a first stage in the design. Drawing the nasty little fellow from other angles will help me to see how he works three-dimensionally. Ruling some horizontal lines from the main features is a great way to keep a face’s proportions consistent.